Is your little one just a downright monkey sometimes? Well, there’s no way around it, kids will monkey around no matter what you say. You might as well add wings and make them into devious little minions! Get inspired by the new Oz embroidery design collection and transform a plain tee into a whimsical and snarky little addition to your tot’s wardrobe with this flying monkey twist. Maybe it will inspire your little monkey to do your bidding (or at least somewhat listen) a bit more often!
Supplies
Making your new minion tee is easy, and just requires a few simple updates to an existing tee. You’ll need:
- A kids' tee or top
- Sheer mesh cutaway stabilizer, such as Sulky Soft 'n' Sheer or Floriani No Show Mesh (I also ended up using tearaway stabilizer for the wings, because the designs are very light, but a sheer mesh cutaway would work great here too)
- Soft fleece
- Scissors and pins
- Winged Monkey embroidery design
- Doodle Wings embroidery design
- Cirque Alphabet embroidery designs
- Tape or clips (optional to help while sewing the tee)
Designs Used
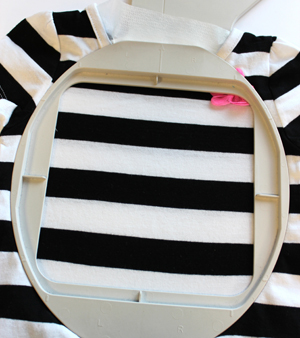
So, start by hooping up your tee with some sheer mesh cutaway stabilizer. This stuff can be great to use with clothes, because it’s much softer against the skin. It’s best used with light designs.
Given that we’re using both a regular design and a bunch of letters from an alphabet, you may want to take a little refresher course from this tutorial on using and placing alphabet letters.
You may find, depending on your machine, that you need a bit of help keeping the back of your tee out from under your hoop. I pulled the back of the tee all the way up and out of the way, and then used tape around the edges to keep it in place at the edges. You may need to stretch your tee a lot to do it, but it works! Other machines may use clips to keep the tee in place after you’ve stretched it away from the back. Whatever works for you.
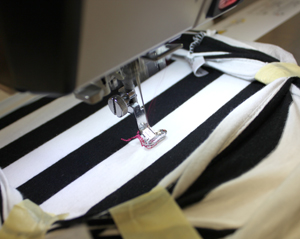
Start by stitching your little flying money on the tee.
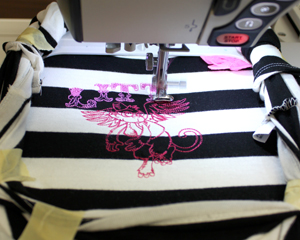
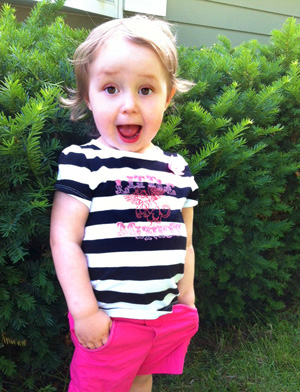
When your monkey is done, continue stitching your letters on by one, spelling out “Little Minion.” It’s OK if it’s a little wonky on the layout -- it will just look cute and kooky on such a mischievous little tee.
If you need extra help on placement with your letters, you can always print out a paper template of each. You can learn how to print templates here, and see more about placing alphabet designs here.
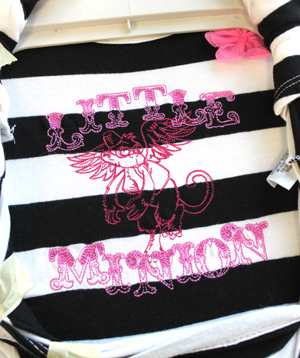
Here’s the front of the tee, all done! You can remove all the tape and shenanigans you used to keep it hooped, and carefully trim away the excess stabilizer from the back.
OK, so now our flying little monkey needs some wings! But nice soft plushy wings so they can still play comfortably.
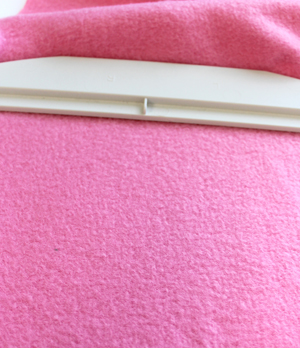
Hoop up some soft fleece in whatever color you want your little monkey’s wings to be. I hooped this set up with tearaway stabilizer, but a sheer mesh cutaway works great too.
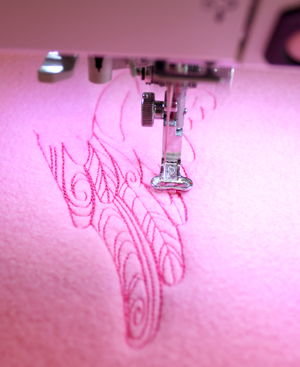
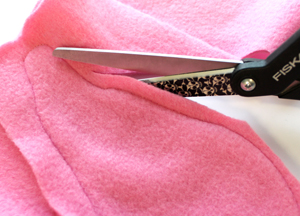
Stitch out your first wing design in a similar color to your fleece. When it’s all done, tear or cut away the excess stabilizer from around your wing.
Take another piece of fleece just a little larger than your wing design, and place it right sides together on top of your embroidery. Pin it in place near the edges of the stitched design.
Following the shape of your wing design, sew a 1/4 inch seam all the way around it, leaving at least an inch gap near the top edge of your wing (where it would connect to the body).
Trim the excess fleece away from the edges, then turn it right side out through the hole you left at the side.
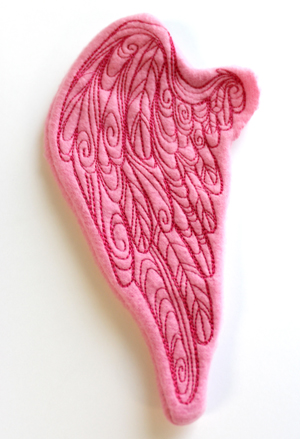
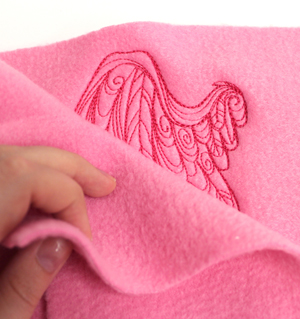
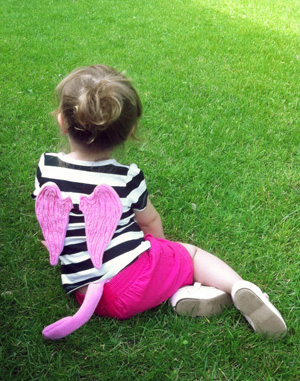
One plushy wing complete! You can see the gap I left on the right side of the wing. You don’t need to bother closing this up, we’ll stitch it closed when we attach it to the tee.
Repeat the process with the mirrored wing design to make two little plushy wing shapes.
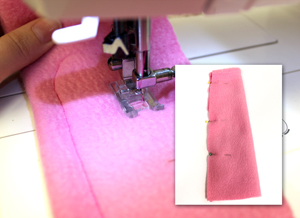
You can’t have a complete little monkey without a tail! Take a long piece of the same fleece and fold it in half. Sew a simple tail shape, rounding off the bottom edge, and leaving the top open.
When you’re done, trim the excess like you did with the wing and turn it right side out.

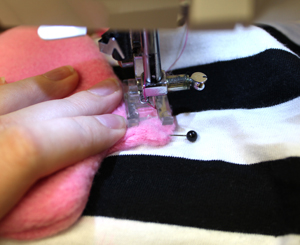
Place it under the shirt seam at the middle of the back of the shirt. Use a matching thread color and sew it in place following the seam that’s already there.
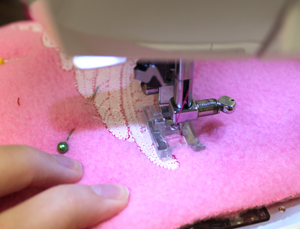
Now for your wings! First, figure out their placement, then mark the placement of the edge of the wing in place and flip it down, so the stitched side is now facing in towards your tee.
Sew a seam along that raw open edge to secure it in place on your tee. It will sorta look like we’re sewing it the wrong way up on the wrong side, but we’ll flip it over and sew it again soon.
Do this with both wings.
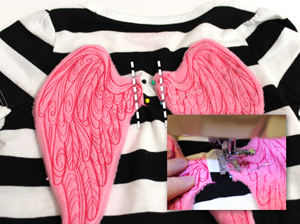
Once that raw edge has been sewn in place, fold the wing back the right way, and pin that folded edge in place again. This way we’ll have a double seam to make sure your wing stays secure.
Sew a seam down the side of both wings to secure them the right way up.
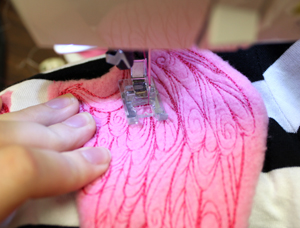
These wings are intentionally soft and floppy, but that also means you might want just a little bit of extra security with keeping them on and not flopping all over the place.
Sew a small tackdown seam in matching thread, about an inch or so away from the edge of the wing. Try to sew it in the same place as one of your stitched lines already to keep it hidden. Do this on both wings.
Now your wings will still flap around, but not quire so much that they’ll be annoying.
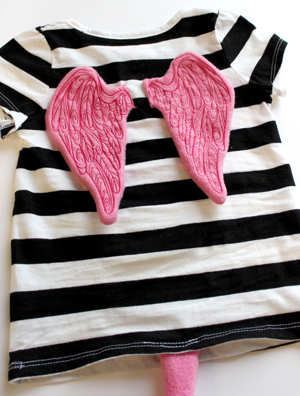
Monkey wings and tail complete! Your little flying monkey is ready to soar with soft, plushy little accents.
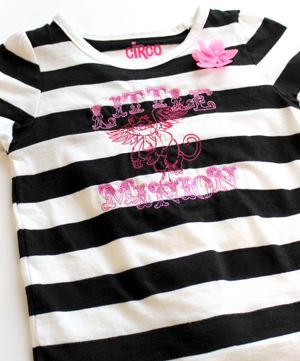
Your little minion is clearly and adorably labeled on the front, with a cute and quirky way to update a plain old tee!
So instead of trying to keep your little monkey in check, give them wings to fly! And a tail, while we’re at it.
There’s no better way to celebrate the fun and mischievous nature of kids than with a quick and cute update to their wardrobe. Some simple updates to more tees and you have an adorable army of minions to do your bidding!
Or ignore you totally, but at least look adorable doing it.


