Designs Used
Embroidery is a wonderfully versatile art. You can stick it on quilts and hoodies, and bags and buttons, and all sorts of wonderful goodies. But sometimes, in our haste to stick it on stuff, we forget that embroidery is really just a piece of art. We just happen to be able to sew it on everything. Maybe sometimes you just like the image for itself, and don’t need to stick it on everything in order to show it off.
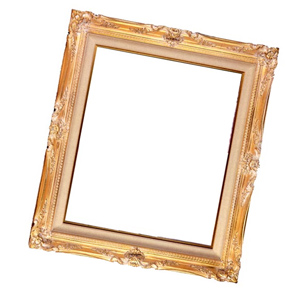
If you’re proud of your embroidery piece, whether you do it by hand or by machine, you can just show it off just as art by placing it in a frame. The simplest way to do it is just embroider it on a piece of fabric, and stick the fabric in a frame... but you should know by now that we never do anything the usual way here. I wanted a simple design, presented in a simple fashion, and I found a more interesting way of showcasing it... by floating it!
OK... so what the heck do I mean by floating embroidery? I’ll tell you...
I said before that embroidery is wonderfully versatile, and we can put that versatility to good use here, by being creative about what we sew it on. Instead of sticking it on a solid fabric, we’re going to sew it on some sheer fabric, like organza, and “float” it in its frame, so it hangs suspended in the middle of the piece. You can do this with any type of frame, but to make it even easier on yourself, you can grab a “float” frame, found at most craft and framing stores, where you have two pieces of glass instead of a solid backing.
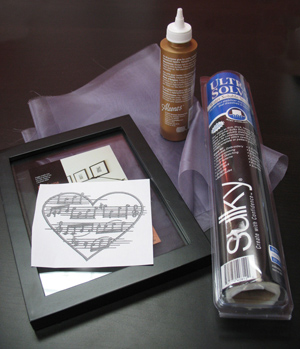
Besides your frame, you’ll also need some sheer fabric, some water soluble stabilizer, and depending on your frame and how you want to secure your fabric, some glue or small flat thumbtacks.

This method of framing will work for any design on the site, but if you really want to take advantage of the “floatiness” this kind of framing offers, I would choose a design that has lots of good empty areas, or negative space. This will create neat shadows and a sense of depth when it hands on the wall. I chose the “Moonlight Sonata” design because of all its open areas, and I thought it would look nice framed on the wall or as a simple but pretty gift for a music lover.
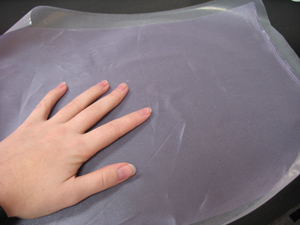
To begin, cut a piece of organza or sheer fabric that’s larger than your frame and large enough to hoop. I picked a nice light purple, with enough color to see that it’s there, but airy enough to be able to see through it.
You might notice mine is kind of wrinkly at the moment. If you’re using organza and want to fix that, just make sure you iron it on a very low setting or with a piece of fabric on top, because if your fabric is polyester high heat will melt it. Half-melted floaty frames don’t look very good.
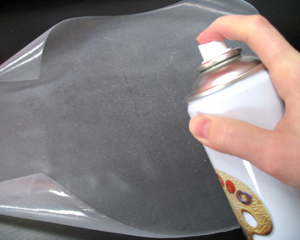
Next, cut a piece of your water soluble stabilizer about the same size as your fabric, and spray it lightly with spray adhesive. Don’t worry, the spray adhesive won’t dissolve the stabilizer, since that would kind of defeat the point.
Smooth your fabric on top of your stabilizer. This photo might look a bit confusing, since we’re putting a see-through fabric on top of a transparent layer, but I assure you the fabric is on top and the stabilizer is on the bottom.

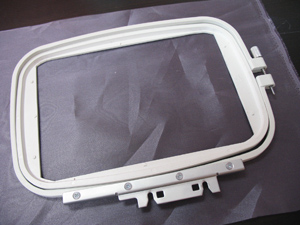
Hoop it all together so it’s nice and taut, and load up your design.
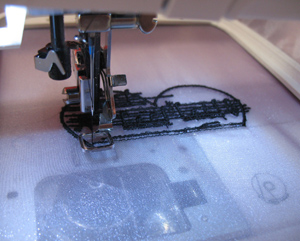
Stitch your design into your fabric. Keep in mind the orientation of the design, so that you’ll have enough fabric to stick it in your hoop the way you want it.
For really delicate designs, where you might be able to see the back of your threads through the organza, you might also want to change the color of your bobbin to match as closely as possible to the overall design. I was lucky, as my design was only one color.
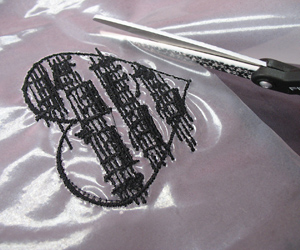
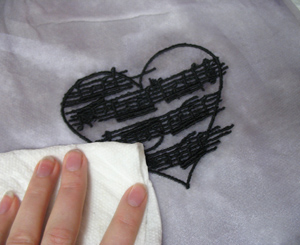
Once your design is done sewing, flip it over and cut away most of the excess stabilizer, taking care not to cut through your light fabric. Clip away any excess threads, both on the front and the back, because you’ll be able to see them through the fabric this time.
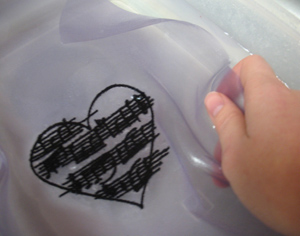
To remove the stabilizer, soak your design in warm water until it has all dissolved. Make sure all residue is gone before you remove it, as bits of leftover stabilizer will be very obvious when they dry on the transparent organza.
Pat your design dry, soaking up any excess moisture. Once it’s dry, it’s time to frame it!
Take your frame and remove the backing.
If you have a float frame, with two pieces of glass, you’ll need the back piece of glass, but you can decide if you want the front of your embroidery behind glass, or open to the world.
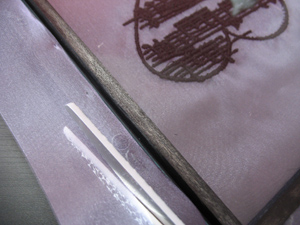
Center your design in your frame, wrong side up. Move it around till you’re happy with its general placement. Check it from the front to make sure nothing is crooked. Sometimes it’s hard to tell from the back.
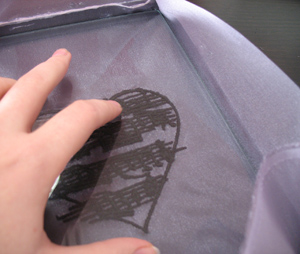
To flatten your design using a float frame, hold it roughly in the center, and place your glass on top of it. To remove all the wrinkles from your fabric, press down gently on the glass above your design and tug at the excess around the edges. The pressure should keep your design in place while you straighten out the extra fabric. If you don't have a float frame, you probably won’t be able to attach the glass to the back, since we're not using the solid backing.
How you secure it is up to you, and what kind of frame you have. With the float frame, there’s a small wooden inset you place on top of your glass that will hold down your fabric, and then you can simply run a line of glue around the edges behind the frame to keep your fabric from shifting. It will become even more secure after we add the final rivets at the end... we’ll get to that in a moment.
If you don’t have a float frame, you’ll need to secure the fabric directly to the back of the frame, and glue probably won’t hold it tight enough. You’ll want to get some small flat thumbtacks, and tack your fabric tight across the back. Tack one side securely, and then tug the fabric taught and secure the other side. Go all the way around your fabric until it’s all fixed in place.
Once you’ve tacked your fabric down, or secured it with the wooden inset, take a scissors and trim off the excess fabric along the edge of the frame.
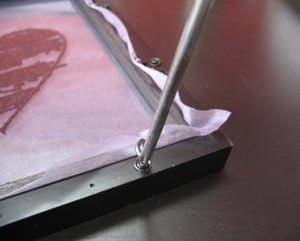
If you have a float frame, you can finish securing your fabric by tightening the back supports with a screwdriver. This should push down on your fabric and keep it tight, so make sure you have it pulled taut as you secure it to smooth out any remaining wrinkles.
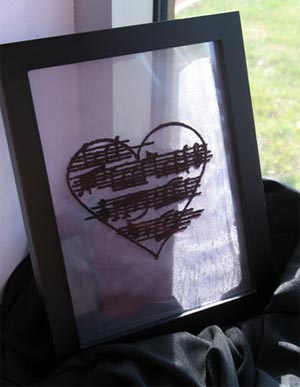
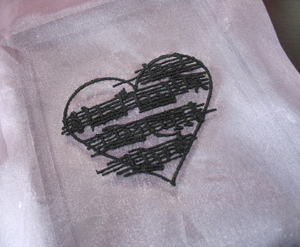
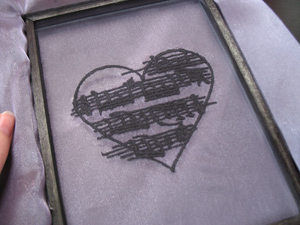
And the finished result!
Hang it on a wall, or near a window to let the light shine through and cast neat shadows from your embroidery. The design sits pure and unadorned, letting the art shine through as it floats inside its frame. It’s a much more unique and contemporary way of displaying your crafts, and it only takes a minute to make. You can choose different colors of organza to complement the space you’ll put it in, but because the fabric is transparent it will let the wall colors shine through and will match everything anyway!
Floating embroidery is a super fast, easy way to display your favorite designs, or make a quick gift for someone you know. There’s no sewing involved... just embroider it, frame it, and go!


