Boots!
Boy, I love boots. I wear them pretty much year 'round, even in the summertime if I can do it without sweating my feet off. Fall and winter, though, are most certainly the best time for boots, and it’s the time that most normal people dig them out of their closets to brush up their winter wardrobe.
This pair of boots is the sad little pair that always lives in the back of the closet. There’s nothing wrong with them, which is why I can’t bring myself to give them away. They’re just kinda... meh. There are no buckles, no ties, no fun fur, no anything.
Do you see where I’m going with this?
Supplies
We’ve used fun fabric to make boots before; this time we’re just going to use it to update them for this season’s hottest looks. No sewing required! All you need to make your boots is:
- Yer boots
- Hot glue gun
- Faux fur
- Small belts, or leather and buckles
- Scissors
- Utility knife
- Measuring tape
- Water soluble stabilizer for lace awesomeness
- A lace choker design (I picked the steampunk one)
Designs Used
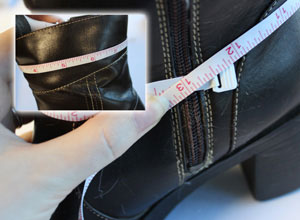
The main component of this boot update is that luxurious furry cuff, and we want to make sure it fits right.
Measure around the top of your boot, where the cuff will fold over. Then measure the bottom where you’d like the cuff to end. These will likely be two different widths, as boots get wider past your ankle. You know, to accommodate the whole “foot” thing.
I’m going to go and take a guess that most boots are going to have some sort of zip up the side. We don’t want the cuff to go all the way around your boot, blocking your zipper, so we’re going to take that into account when we’re making the cuff. The measurements will work as follows:
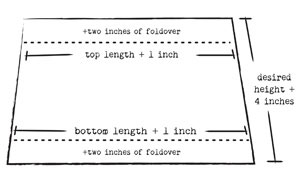
As shown on the diagram, you’re going to want to mark the top length of your boot, and add one inch (so we can fold in the sides at the zipper). Then mark down the desired height of your cuff, and at the bottom mark out the bottom length of the boot (the longer measurement) and add an inch. You should have a sort of trapezoid thing, a rectangle that’s a little shorter at the top than at the bottom.
Finally, add two inches of height to both the top and the bottom, so we can fold the top over the boot, and the bottom under itself for a finished cuff. Got all that? Good, because we don’t want to waste any of this nice fluffy fur.
While we’re at it, let’s talk fur a second. I got this gloriously soft stuff on sale, and learned that wool coats and faux fur don’t like each other. Or maybe, they really really like each other. Either way, when I put the bolt down it looked like I had just strangled a wookie. This is a little glimpse into your future together.
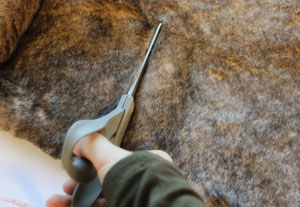
Measure and mark carefully before you snip your fabric. Now, if you’re in a devil-may-care kinda attitude and feel like your studio could be brightened with little tumblweeds of faux fluff, cut away! Sometime after I started cutting, a helpful colleague of mine came by and mentioned if you cut through the back, keeping as close to the fabric (and not the fur) as possible, it creates a lot less mess. They told me this while I glared at them through a floating haze of fluff.
The truth is, no matter what you do, your studio will be covered in fluzzy bits. Just deal.
Psst ... before you get started, why not hoop up some water soluble stabilizer, and start stitching two of your steampunk lace pieces? Let them stitch along merrily while you tackle the fur. If you need pointers on how to stitch lace, check out this tutorial.
Once you’ve cut out your two trapezoids, it’s time to grab that glue gun! Yup, this all can be done with that crafting wonder, hot glue. It sticks to fur quite well.
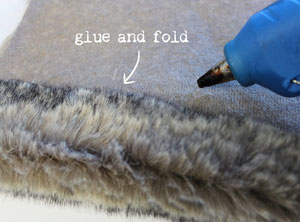
Start by folding up those two inches you left at the bottom of your cuff, and gluing the fold in place. Be generous with your glue, and mind your fingers.

Next, we want a clean, fuzzy edge to butt up against that zipper, so fold the sides of your fur in about 1/2 inch, and glue.
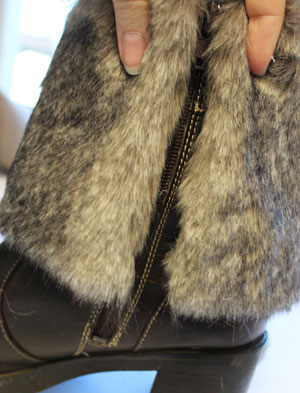
Test your fabric by wrapping it around your boot. You should have a small little gap around your zipper, so you can still use your boots. No use in having boots you can’t even get on your feet, unless you’re really into avant-garde bookends.
Once it looks like your fur is going to be a good fit, fold the top end over and into your boot, and carefully line up one edge of your fur next to the zipper.
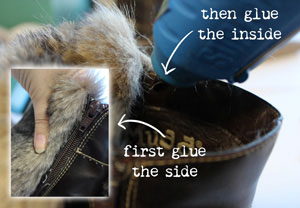
Add a line of glue right down next to the zipper, and glue that side in place. Also glue the top flap of that side inside your boot. Take care, as you’re gluing right next to your zipper right now, that you don’t glue the zipper shut. Then we’re right back to bookends.
Once that one side is glued in place, you can slowly start to work your way around, adding glue all along the inside of your boot, and carefully folding the fur edge inside it.
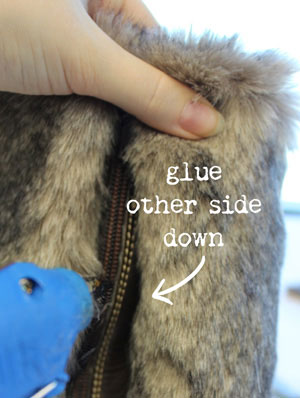
Once you’ve worked all the way around, glue the last edge of the flap first on the inside (mind the zip!) and then finally down along the other side of the zipper.
Though it looks nice and simple in the photos, this will take some fiddling, and with the combination of hot glue and excess fuzz, my fingers were wondering what they did to deserve to be tarred and feathered in the name of fashion.
Trust me, the results are so worth it. Besides, I’ve used hot glue so much by this point in my crafting career, I don’t have fingerprints left anyway.
If you’re lucky, or perhaps really slow at gluing, your lace will be done! Snip away the excess stabilizer and allow them to soak according to your package directions.
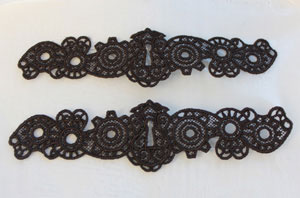
Now on to buckles! You can make these using old belts or straps you have from around the house or found at thrift stores. I happened to have two straps from a case that was destroyed, so I snipped them off and saved them. Never waste a good buckle.
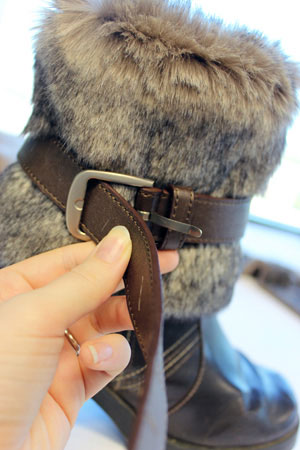
Slip your belt or buckle around your fur. Very likely, your belt will be far too long, so just measure how long you’d like it to be, and gently push the belt clasp into the leather where you’d like it to close, in order to mark the spot.
You don’t need this to be super tight or anything. In fact, I think it’s better if it says a bit loose, so it doesn’t crush your fur. It should also be loose enough that you can still zip and un-zip your boot around the belt.

Once you’ve marked your new buckle size, remove the belt and poke a hole where you marked using an X-acto knife or leather punch. Test your new buckle length by closing the clasp, and then trim the excess length off your belt. I cut it to a neat little triangle just long enough to stay in the belt loop.
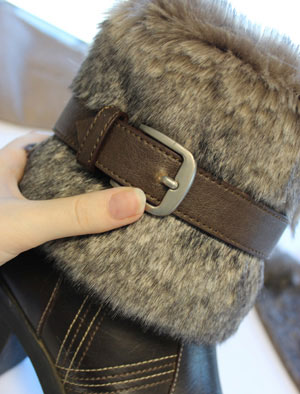
Slip your buckle back on.
Damn, that’s classy right there.
Play with the placement a bit. Do you want your strap in the middle of your boot? At the top? The bottom?
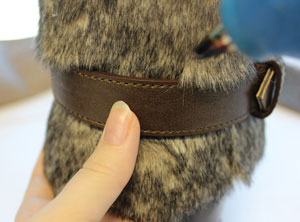
Once you’re happy with your placement, dab some hot glue behind your belt and push it into your fur. Do this in 3-4 spots around your belt to keep it in place. Mostly the fur will keep it up, but this ensures it doesn’t slip around while you’re walking.
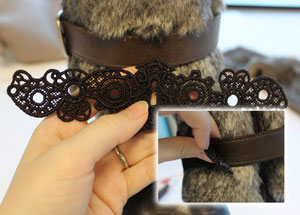
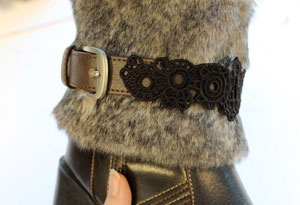
You didn’t think we’d forgotten about our lace, did you? Of course not. Hopefully by now your lace is free from the stabilizer and nice and dry. We’re going to add this subtle steampunk accent as part of the buckle, because I love when I can sneak in little steampunky details like that. Add a couple dots of glue to the back of your lace, and glue it on the front of your boot.
Unless you’re a peg leg pirate, you’ll want to repeat this process again until you have two beautiful, newly fuzzy fashionista boots!
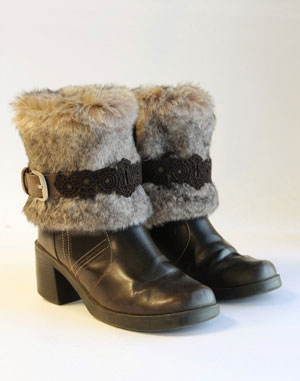
What once were shoved to the back of my closet are now my hottest boots, with all the trimmings of this season’s fashions. The faux fur is such a luxurious way to celebrate the season, and the funky buckle and lace accent assure that this boot won’t look like any other.
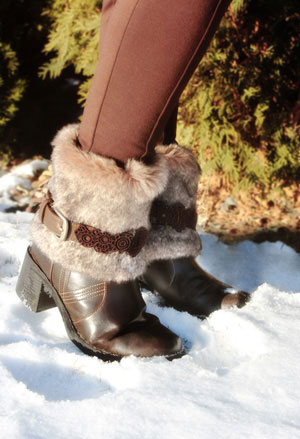
Rock your upcycled booties out in the winter weather, perfect with a pair of skinny jeans or your favorite leggings. With a little magic, some embroidery, and the power of hot glue, you’ve got yourself a pair of brand new booties.
Sure, you may have started the day looking like a chinchilla exploded in your hair and your fingerprints gone, but by the end of it you’re a smooth, sleek fashionista. And that’s what DIY is all about, baby.


