During the holidays, you often might find yourself thinking on the things that would make the perfect gift for friends or family. If you’re tired of getting folks something they just won’t wear, OR just tried of your friends constantly stealing your scarf, I’ve got the perfect idea for you -- a custom embroidered cozy cowl scarf!
All you have to do is scroll through the abundant selection of Urban Threads designs, grab something that reminds you of your recipient, and add it to that one-of-a-kind cozy gift. No one complains about a gift that is useful -- at least not to your face.
In this tutorial I’ll show you how easy it is to make a 10” by 32” reversible cowl scarf; a gift that can be easily customized to fit the sensibilities and style of your loved ones.
Supplies
To craft your embroidered cowl scarf, you will need:
- Your favorite embroidery design (we used the 5.87 x 6.73" Raven Crest for this example)
- At least 1 yard of fabric for the outside of the cowl, and 1 yard of fabric for the inside of the cowl (you may choose to use the same fabric for both inside and outside)
- Medium weight cutaway stabilizer
- Temporary spray adhesive
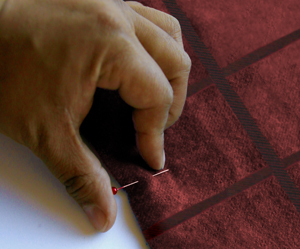
- Hand sewing needle and pins
- Ruler
- Air erase fabric marker OR white tailor's chalk (do not use tailor's chalk with silk or nylon fabric, as it may stain)
- Buttons or clasp(s)
- Optional: 40 inches of faux fur trim
**NOTE: Most wool fabric comes folded and rolled, from a fabric bolt. The directions given here will be based on this.
Designs Used
If your chosen fabric is printed or patterned; you’ll want to make sure that prints or patterns lay evenly. You don’t want one side of you scarf to be straight and the other be diagonal. Unless of course, that’s your desired outcome -- then, roll with it.
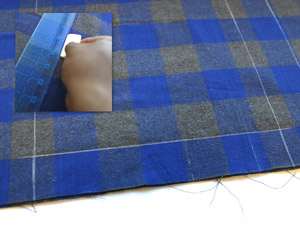
We’ll start by prepping the outside layer of your scarf. We’re going to add some markings to help guide us.
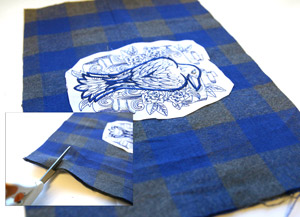
Since the design I’ve chosen requires a hoop that is larger than my finished product; I am going to cut more fabric than needed.
Use your ruler to measure out a rectangle 17 inches wide by 16 inches tall on your outer fabric. Cut out this rectangle.
Since my fabric is already folded; I’ll only need to cut one rectangle. If your fabric isn’t folded, you’ll want to mark out and cut two.
Now because our inner fabric doesn’t need any excess for embroidery, you can mark out and cut a 17 by 11 inch rectangle from your inner fabric. Remember, if your fabric isn’t folded, you’ll need to cut two.
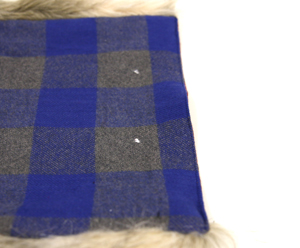
Now you should have two 17 x 16 inch rectangles of outer fabric (blue) and, two 17 x 11 inch rectangles of inner fabric (red).
Set the inner fabric aside for now. We’ll get back to it later.
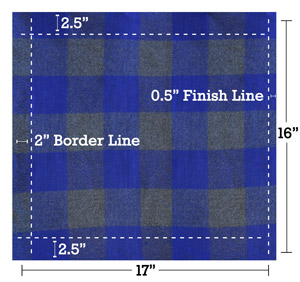
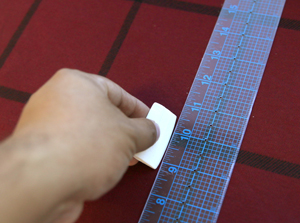
Once your fabric is cut, on one outer piece, use your ruler and measure 2.5 inches from the top and bottom of the outer fabric to create the cut line for your finished product. Mark these lines with your air-erase pen or tailor's chalk.
Draw a line 2 inches from the left to mark your border line (the area that will be used to close the reversible scarf), and another line 0.5 inches from the right side (where your seam will be sewn).
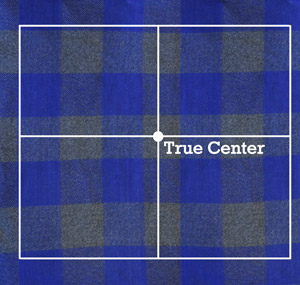
Next, we’ll want to find the “true center” of your rectangle to know where to put the embroidery. To do this, find and mark the middle point of each side of the rectangle, then draw a straight line to connect the marks.
The intersection created by those lines is where I want my machine to be centered for the embroidery design.
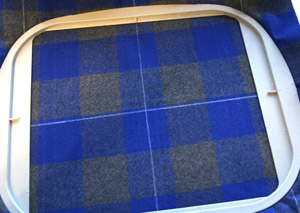
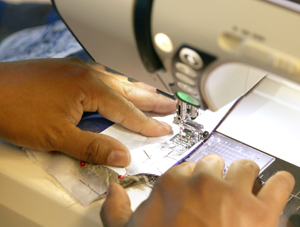
Grab your temporary spray adhesive and medium weight cutaway stabilizer. Cut enough stabilizer to cover the fabric entirely, then adhere it to the back of your fabric with the spray adhesive.
Hoop both layers together taut and line up the crosshairs of the embroidery hoop with your marked true center lines on the fabric.
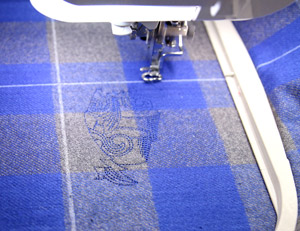
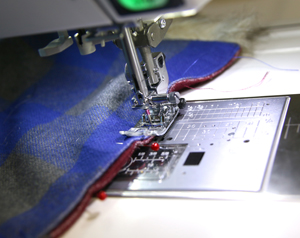
Embroider your design!
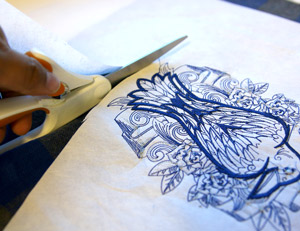
When you are done embroidering, carefully remove the excess stabilizer from the back of the fabric by cutting around at least 0.25 inch border around your design.
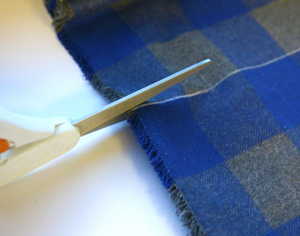
Now that the embroidery is done, we can eliminate the extra fabric used for hooping the design. Lay your two rectangles face to face, and cut the extra 2.5 inches off of the top and bottom of your fabric where you had marked it.
This will leave you with outer fabric 17 inches wide by 11 inches tall, the same as your inner fabric.

Now we’re going to sew our two rectangles end to end to create a long rectangle of fabric.
To do this, lay your front and back panels of outer (blue) fabric face to face, and pin down the side marked with the 1/2 inch line. Sew a 1/2 inch seam down just that side of your fabric. Make sure to back tack at the beginning and end of this seam to secure the stitch.
Turn your fabric over and press the seam flat.
Next, take your “inside” fabric, and repeat this process. Pin the two rectangles along one short side and stitch a 1/2 inch seam.

You should now have two long rectangles of fabric -- your inside and outside layers.
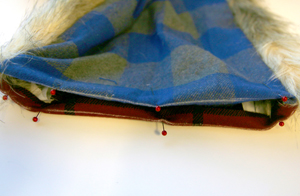
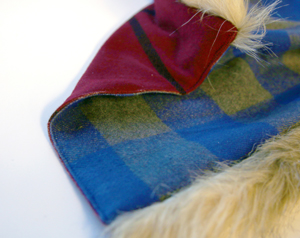
Lay your “outside” fabric on top of your “inside” fabric, right sides together.
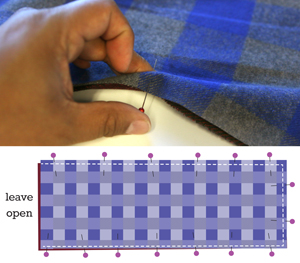
Pin the top, right side, and bottom of your fabrics together.
NOTE: If you have extra stretchy or thin fabric, adding a thin strip of stabilizer along the far right pinned edge will help your fabric from shifting..
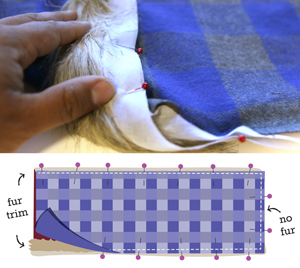
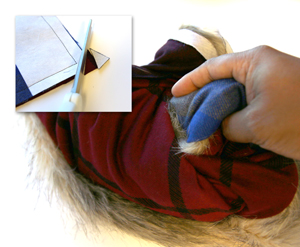
If you want to add fur trim, now’s the time! You can pin it with the fur facing inwards (so it's sandwiched between your layers) but just on the top and bottom (long sides) of your scarf.
The short sides doesn’t need any fur trim.
With your fabric pinned and at the ready (fur or no fur) sew a 1/2 inch seam around the top, right side and bottom edge of the fabric (along where you have pinned). You can see here the strip of stabilizer I added to that right side to help with the stretchy fabric. It’s not necessary, but can help!
Be sure to back tack at the beginning and end of your stitch.
If you want a crisp corner finish, snip the corners of the fabric. Then turn your scarf right side out, and press the edges with a flat iron to make it lay smoothly.
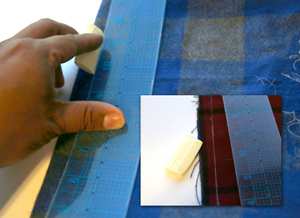
On the unfinished side of your scarf, draw a straight line 0.5 inches from the edge of your fabric. This marks the border of your button holes to make sure they look evenly placed.
Do this on both sides of your fabric, back and front.
Fold the raw edge inward; using the chalk line as a guide. Once your raw edges are tucked in, you can pin the two layers flat together.
Now you can sew straight seam 1/8 inch from the edge. Again, remember to back tack at the beginning and end of your seam.
Here’s what your finished scarf edge will look like. All neat and tidy!
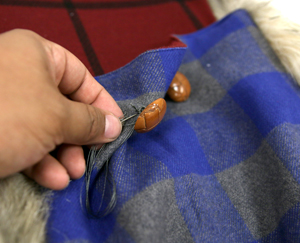
Now we’ll work on adding the buttons and button holes.
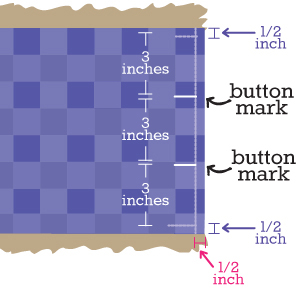
On the right side of your scarf, draw a straight line 0.5 inches from the edge of your fabric. This marks the border edge of your button holes. It will help make sure they look evenly placed.
Starting from the top of the scarf; mark a straight line (as wide as your intended button) exactly 0.5 inches away from the top edge. Measure 3 inches down and make a similar mark. Measure another 3 inches down for a third mark and a final 3 inches down from there to make your fourth mark (this final mark should measure 0.5” away from the bottom of your scarf).
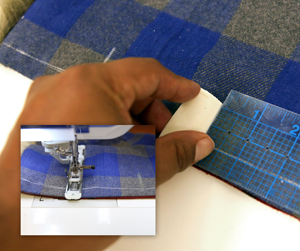
This is what the markings look like on your scarf. Now, use your buttonhole maker on your sewing machine to stitch a buttonhole at each marked point.
Once you’ve finished sewing the buttonholes, snip your loose threads and cut the buttonholes open.
On the left side of your scarf repeat the same markings you made for the button holes, only marking a “dot” or “x” for where you’ll want to sew your buttons.
It might help after marking to lay your buttonhole side of the scarf over this side, to see if the holes and the markings line up.
Once you’re sure of your placement, sew your selected buttons to the scarf, and snip your threads. Finally, flat iron your scarf -- the steam will remove chalk and air erase marks.
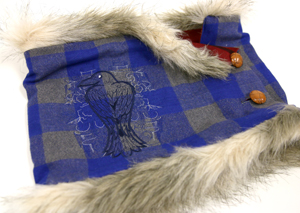
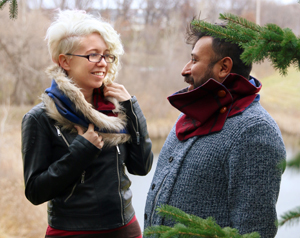
Your embroidered cowl is complete!
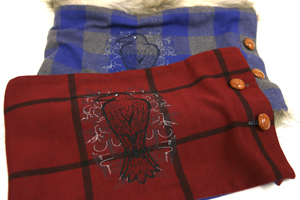
And remember, the cowl can be made with or without fur trim, and in different fabrics, colors and styles to suit anyone!
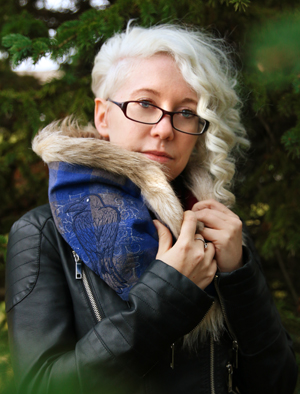
A warm cozy cowl makes a great gift for the holiday season. There’s nothing better than a personalized, warm way to show you care!
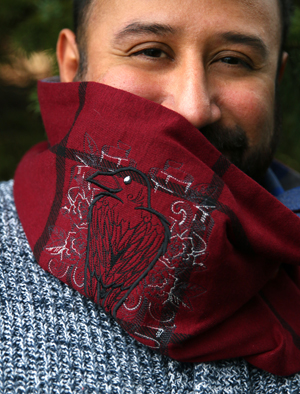
The style is versatile enough that it works for anyone, and the embroidery really lets you add that personal touch to make it extra special for the receiver.
You handmade embroidered gift is sure to make you or your loved ones feel extra cozy through the winter season. It’s the perfect DIY gift for the holidays, no matter whom you’re stitching for!


