Designs Used

Urban Santa and Rudolph the red-nosed craft bunny want to know... Have you been good this year?
I mean like, really really good... Good to the point where all you asked for Christmas this year was world peace and you never uttered creative curse words after stabbing yourself with a needle and you always went to bed on time.
That good? Really? Well, you’ve been better than me. I think you deserve a present for your goodness, so for Christmas this year, Urban Threads is giving you not one... but two Christmas presents. We made you cookies! Two tasty gingerbread men are yours to have and hold and hang on your tree and turn into awesome crafty things.
How do you make them? I’ll show you! And if after making your delish-looking cookies you have a hankering for real ones... well stick around, because I’m also going to show you how to make some gingerbread cookie mix and package it up all cute like for Christmas. It’s up to you whether you give ‘em away or gobble them up yourself.
Hand embroiderers can make these tasty fabric cookies too. Follow the instructions below, but skip the machine embroidery bit and hand-stitch your cookies to tasty perfection.
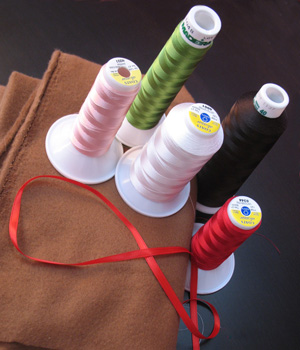
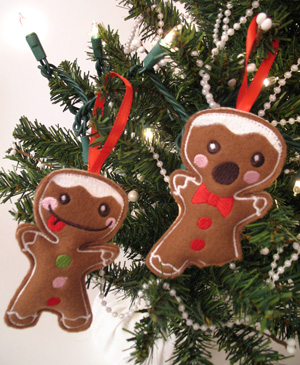
Making your little cookie guys is quite simple. All you’ll need are the tasty gingerbread men designs some ribbon, cookie-colored felt or other non-fraying fabric, and a little bit of stuffing…

It also makes great Santa beardness.
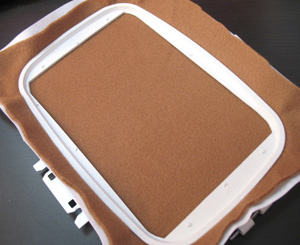
Take some of your gingerbread felt and hoop it up with stabilizer.
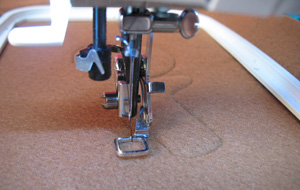
And stitch out your little gingerbread cookie.
This little stuffie is a bit different from our resident Voodoo dude, in that instead of cutting around the dieline, we’re actually going to cut him out on the dieline, so he looks more like a real cookie. I’m not sure, but last time I checked cookies didn’t have dielines.
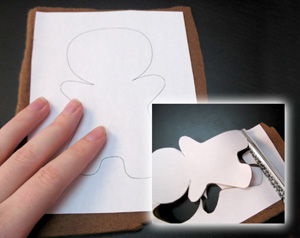
To make the other side of your cookie, sew out the back dieline or print out and stick it on some felt with a bit of spray adhesive.
Cut it out ON the dieline, like you did with the front of your cookie.
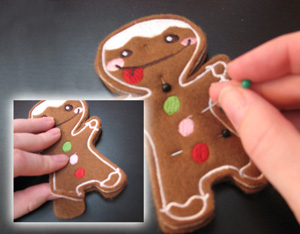
Layer your two pieces of cookie on top of each other and pin them together.

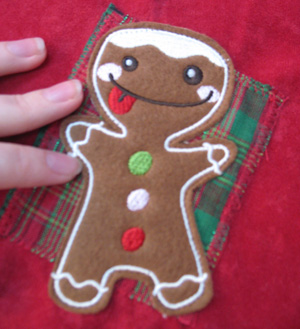
Now we’re going to stitch him together. To hide your stitches and keep him looking as cookie-like as possible, change your bobbin to match your felt and then use clear nylon thread for the top stitch.
We’re going to leave the top of his head open for stuffing, so start at the side of this head, and follow along the white icing line with your invisible thread. The best way to hide your stitches is to stitch just to the outside of the satin stitch, instead of right on top of it. Go all the way around until you reach the other side of his head.

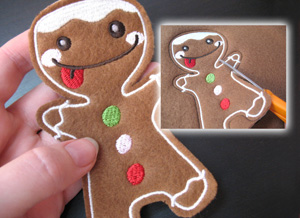
Now it’s time to stuff his little brain! To get stuffing down his tiny little form, I’d use a pencil and push down small wads of stuffing. Stuff him until he’s just a little bit plump. You can put a little ground cinnamon in him and he’ll smell nummy too.
On a side note, I’ve never seen anything look so happy about getting stuffing rammed down its little neck. I felt almost guilty about it.
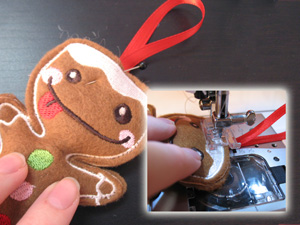
Cut a small loop of ribbon for hanging, and pin his head together with the ribbon tucked inside. Sew a seam to finish off his little head, and stitch the ribbon in place. Repeat these steps to make both of your little gingerbread buddies.
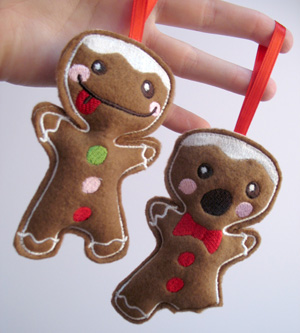
Now you have two adorable little cookie ornaments to decorate your tree!
Your little cookie guys making you long for an edible cookie of your own? Well don’t eat them!
We’re not done with our project yet! I’ll tell you how to make your own cookie mix, and how to package it up to make a super sweet gift for Christmas, with gingerbread cookies and matching ornaments! What could be sweeter?

I got my gingerbread recipe off allrecipes.com. Here’s a link if you want to see their directions for making the mix. To fix this size mix, you’ll need a 1-quart wide mouth canning jar.
To make your mix, you will need:
* 2 cups all-purpose flour
* 1 teaspoon baking powder
* 1 teaspoon baking soda
* 1 1/2 cups all-purpose flour
* 2 teaspoons ground ginger
* 1 teaspoon ground cloves
* 1 teaspoon ground cinnamon
* 1 teaspoon ground allspice
* 1 cup packed brown sugar
Mix 2 cups of the flour with the baking soda and baking powder. Mix the remaining 1 1/2 cups flour with the ginger, cloves, cinnamon, and allspice.
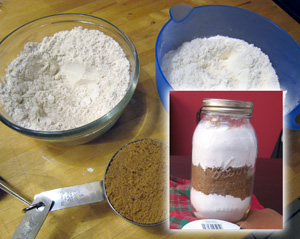
In your 1 quart canning jar, layer the ingredients starting with the flour and baking powder mixture, then the brown sugar, and finally the flour and spice mixture. Pack firmly between layers.
If you’re giving your mix away, you’ll want to attach a card with the following directions:
Gingerbread Cookies
1. Empty contents of jar into a large mixing bowl. Stir to blend together. Mix in 1/2 cup softened butter or margarine, 3/4 cup molasses, and 1 slightly beaten egg. Dough will be very stiff, so you may need to use your hands. Cover, and refrigerate for 1 hour.
2. Preheat oven to 350 degrees F (175 degrees C).
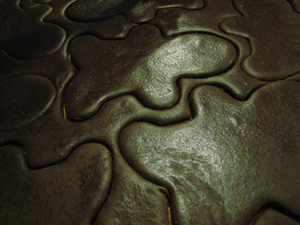
3. Roll dough to 1/4 inch thick on a lightly floured surface. Cut into shapes with a cookie cutter. Place cookies on a lightly greased cookie sheet about 2 inches apart.
4. Bake for 10 to 12 minutes in preheated oven. Decorate as desired.
I decided for the sake of the integrity of this project, I had to make the cookies to test their tastiness.
I do this for you, people.

After much deliberation and decorating, I decided the cookies were a success...
(By the way, I found adding one tablespoon of vinegar made the cookies soft and chewy...)
So, now that we’ve perfected our recipe, let’s package it up...
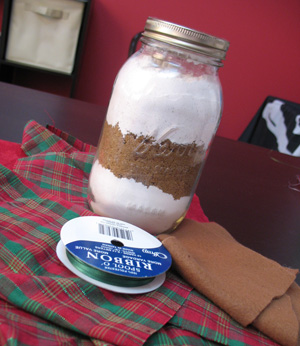
Once you have your cookie mix in a jar (and it will probably be packed together a lot better than mine) we’ll want to make a cute cookie cover for it.
For this we’ll need some fabric, at least 7 by 12 inches high when folded, some accent fabric if you want to jazz it up, and a bit of ribbon. You’ll also want to stitch up another cookie front that we’re going to applique to the cover. Follow the previous directions and stitch out your favorite cookie buddy, but stop before you add the backing to him. We just need the front.
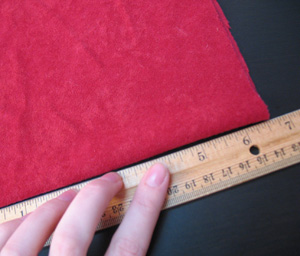
Take your main fabric, and fold it in half. Measure out a rectangle that’s about 6 1/2” inches wide by about 12 inches tall, and cut it out with the cloth still folded in half.
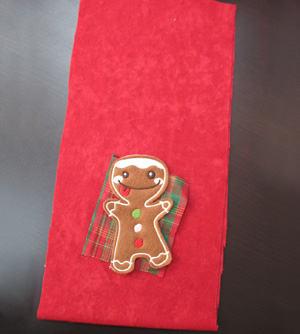
We’re going to decorate our cookie cover so it looks all festive, and use our little gingerbread buddy in a new way ... as applique!
I took a small square of my accent fabric, and laid it out it with my little cookie guy, to create a jazzy design for my gift bag. When placing your design, keep it at least 3 inches from the bottom, so it centers nicely when the jar is inside. When I liked the placement, I opened up the fabric and secured on the square with a fun zig-zag stitch.
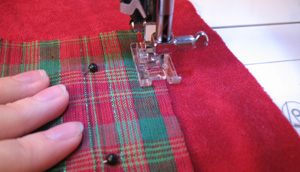

Then I appliquéd the little cookie on top of it.
Your bobbin thread doesn’t matter here, but remember to use clear nylon thread and sew around his satin stitch frosting to hide the stitches.
Now we have a cute matching cookie design for the cover! You don’t always have to turn these guys into ornaments. They make adorable applique too!
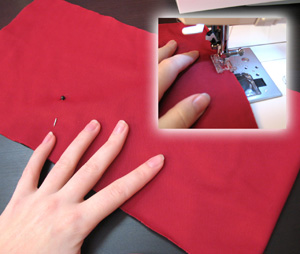
To complete the bag, fold your fabric in half again, this time right sides together, with the design facing in, and pin it together.
Sew a 1/4” inch seam down both long sides.
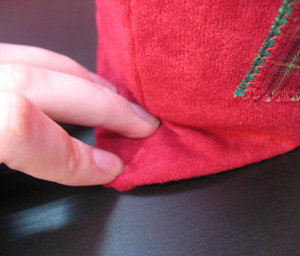
Turn your bag right side out and slip your jar inside to test the fit. You’ll find that at the bottom of your bag, you have a lot of excess fabric at the corners. Pinch your fabric in to see how much we’ll have to take off. My excess was about an inch.
Turn your bag inside out again, and pinch in the corners flat. Sew a seam across. Do this on both sides. Make sure that when you sew your corners they’re both equal, and that your bag is flattened evenly. This is what my bag looked like from the bottom.
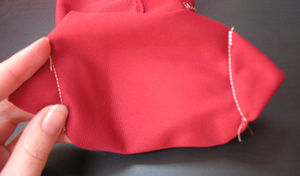
Trim off the excess and turn your bag right side out again and test to see that your corners fit.
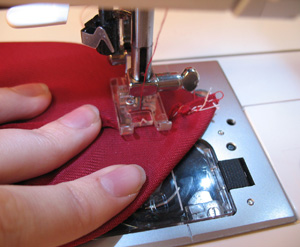
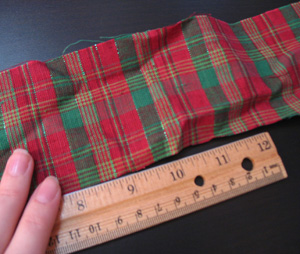
For a finishing touch, we’re going to add a festive border around the top of our cookie bag. Measure out a strip of fabric 13 inches long by about 2 inches high.
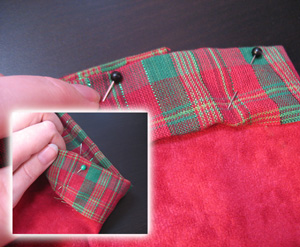
Now we’ll attach it to the top. I found the easiest way to do this was to first fold the fabric over the edge of the bag, and then fold the raw edges on the outside under, pinning in place as I went.
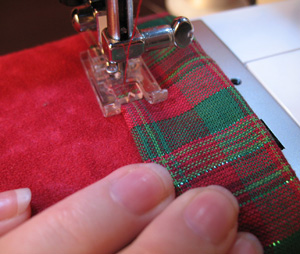
You’ll probably have to take the removable arm off your sewing machine to fit the bag underneath it. Sew a seam all the way around your bag, securing the decorative border in place.
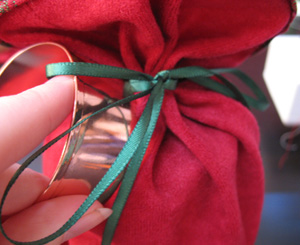
Slip your cookie mix jar back inside your bag, and gather up the excess at the top with a cute ribbon. I laced a cute cookie cutter in with the ribbon as part of the gift pack, so it had everything an inspiring cookie maker could need.
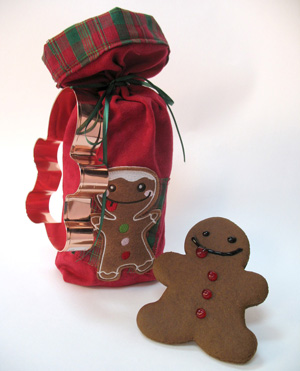
Your cookie holder with cookie goodness! The cute little packaging adds a bit of festive flair to your gifting presentation, and the pretty layered cookie mix is a nice surprise inside! Be sure to add the extra directions so your receiver will know how to make their tasty cookies.
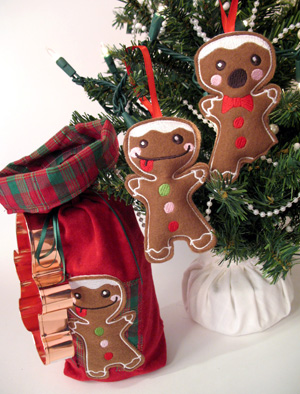
Include an adorable matching set of gingerbread cookie ornaments, and you’ve got the perfect homemade gift! Hand-stitched ornaments and homemade cookies ... what a cozy Christmas!


