Valentine's Day is fast approaching, and you might be short on ideas. Roses? Chocolates? So done before. Instead of heading to the store, take a peek at that stash of fabric scraps you have stuffed away in the corner. There’s some serious potential there, just wait and see! A few fabric scraps, some delicate embroidery and filling, and you have a huggable and rustically cute little Valentine’s Day gift!
Supplies
All you need to make your cute patchwork pillow is:
- Red and pink fabric scraps
- Two pieces of fabric large enough to make the back and front of your heart pillow.
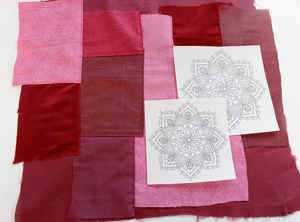
- Pretty and delicate embroidery designs (I used this Mendhika Medallion)
- Cutaway stabilizer
- Pins and scissors
- Pencil or fabric marker
- Polyfill stuffing (lots!)
- A hot iron nearby is useful too
Designs Used
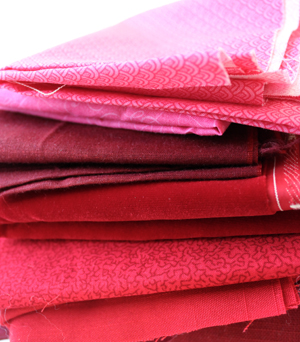
This project is a great excuse to use all those bits of awesome fabric you couldn’t bring yourself to throw away. Though pinks and reds are classic for the holiday, your heart and scraps can be any color. Dig in and find your favorites, and don’t be afraid to mix it up! I had fun prints mixed with metallics mixed with soft velvets.
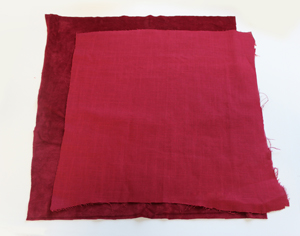
In addition to your scraps you’ll also need two pieces of fabric large enough to make the pillow itself, back and front. The front piece is what we’ll build our patchwork pattern up on. The back can be anything. I picked a soft velvety fabric so it was extra fun to hug.
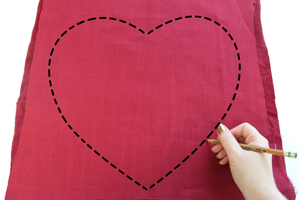
Start by marking out a heart shape on your fabric. Right now, this is just a general guide for your patchwork area, but if you want, you can mark and cut out a heart shape from your back fabric and use it as a template.
Once you have your “heart” shape mapped out, it’s time to start getting crazy with scraps! There are a lot of different ways of getting a crazy-patchwork look, but I’m going to use the easiest way I know.
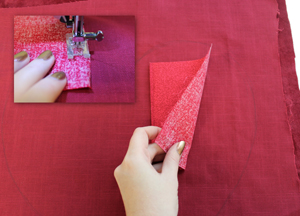
Place a piece of fabric down on your heart canvas. Flip it right side down, and sew along one edge.
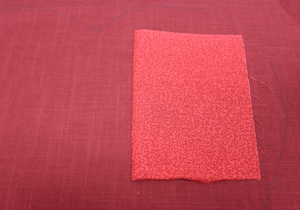
Flip it back over, and press that seam flat with an iron. One piece down!
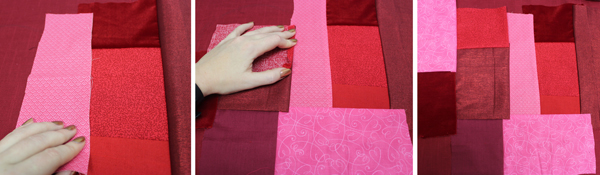
That’s all there is to this technique. To add the next piece, flip another piece right side down next to the edge of another, sew a seam, and flip it back over. You just work outward from the first square, constantly covering the raw open edges of patches with the next piece of fabric. In any instance when you need a patch to have two finished edges, just press and fold one side of your seam before sewing the other edge in place. Don’t worry, we’ll tack it all down later to make sure it stays in place.
Once you’re sure the whole area of your “heart” is now covered in patchwork fabric (you won’t be able to see your heart marking anymore, but that’s OK) you may want to stitch over all the seam edges again to make everything nice and secure.
If you want, now is a time you can also get crazy with decorative stitches and the like, or just choose to stitch around the edges.
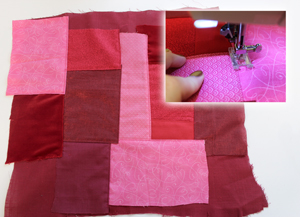
Here are my pieces of patchwork fabric, all ready and waiting for some awesome embroidery.
There are all kinds of designs you could add to your pillow at this point, but I personally like light-stitching designs for anything I’m going to be snuggling with.
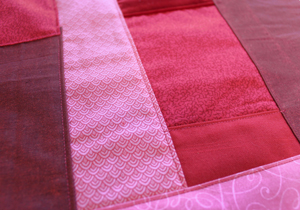
I picked the large and medium sizes of one of our mendhika designs, because when stitched in white, I thought they might look a bit like lace.
I used printed templates (learn how to print your own templates here) to map out some placement ideas. I kinda wanted mine more as an accent than front and center, so I put them off to the side.

Hoop up your fabric with some cutaway stabilizer and stitch up your designs! Stitching these two mendhika medallions in one color really lets their beautiful and delicate detail take front and center stage. They were also light enough that I could overlap the designs no problem.

Now, let’s return to that back fabric. If you didn’t already mark and cut out a heart shape, do that now. I just eyeballed mine with a pen, if you like you can also fold it in half once it’s cut out and trim the two sides until they’re even to ensure a perfect heart shape.
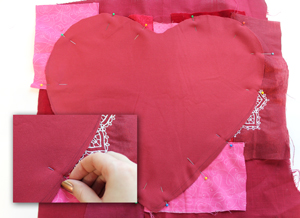
Now we can use this piece to map out where it’s going to overlap our patchwork and embroidery designs. Place your back piece right side down onto your patchwork. Make sure when you place your pillow shape that it’s not overlapping any non-patchworked areas. You can also use this as a kind of visual guide to see where your embroidery is going to end up on your pillow.
Once you’re happy, pin your heart in place.
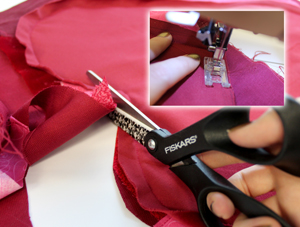
Sew a wide seam (about 1/2 inch) around your heart, leaving a few inch gap near the bottom for turning and stuffing.
Once the two pieces are sewn together, cut off all the excess fabric and patchwork. Yes, for me, that even meant cutting through some embroidery. Before you turn it right side out, be sure to clip some notches into the top of the heart seam to prevent bunching.

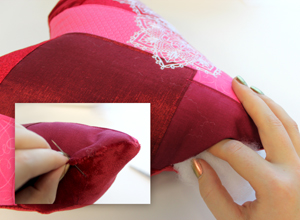
Turn your heart right side out.
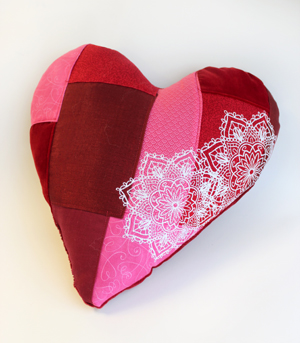
Awesome! All your pretty scraps are perfectly complemented by the bright white embroidery.
Now all that’s left is to stuff and stitch your pillow closed.
Be mindful, even a pillow this small can take a lot of stuffing to really fill it out! Put in small handfuls and take your time to get it filled out evenly.
Once your pillow is stuffed enough, hand-stitch the opening closed with matching thread.
Done and done! A thrifty and quick little Valentine’s gift perfect for snuggling with that special someone or adding a little romance to your home decor.
Not into Valentine's Day? No problem! Skip the heart shape and go crazy with the colors. Colorful patches with bright white embroidery is a look that can work for any season. All you need are fabric scraps, and goodness knows you probably have enough of those...


