Whether it’s cold-weather-induced aches, or overenthusiastic-workout pains, having a heat pack around to soothe your complaining joints is always a good idea. However, when your bod is hurting, the last thing you want to do is drive all the way to a store to get one. Instead, you can make yourself one, using stuff you already have in your house! It’s fast, reusable, and earth friendly.
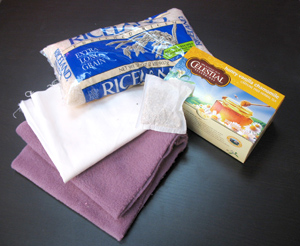
To make your own reusable heat pack, you’ll need some plain white rice, some cozy fabric for the cover, some natural (non-polyester) fabric for the heat pack, some of your favorite or yummy scented tea, a few buttons, and a cozy Urban Threads design.
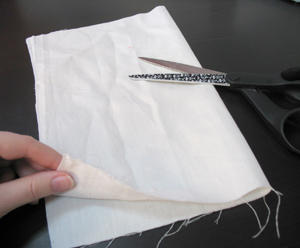
First, we’re going to make ourselves the heat pack. You’ll want to make this part out of a cloth that’s made of natural fibers, like cotton, because fabrics made with polyester have a tendency to melt in the microwave, or so I’ve heard. I wouldn’t test the theory anyway.
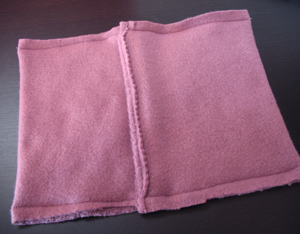
The size and shape of this heat pack is entirely up to you. You can make a long one for wrapping around your neck, a big flat rectangle to soothe your lower back, or just a small compact pillow to soothe ear aches and keep you cozy. Once you decide what shape you want, and what you want it for, it will dictate the rest of our measurements. Fold your fabric in half so it makes the shape you’re looking for. Mine is a small neat rectangle.
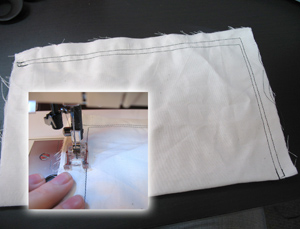
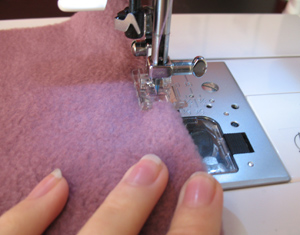
Sew a double seam along two of the open sides. The double seam will ensure that none of our rice can sneak out. Once you’ve stitched it, turn it right side out.
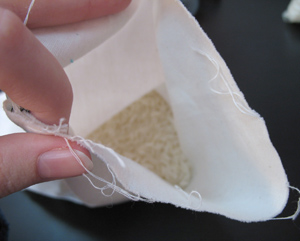
Now fill your bag with rice, and open one of your tea bags and pour it into the mix, stirring it up a bit. The tea will give your bag a nice soothing scent when it’s warmed up. You can also use scented oils to the same effect.
Fill your bag with enough rice so it’s full, but not bursting. I used up about 3/4 of my rice bag. You’ll need to be able to push most of the rice down to the bottom, away from the open edge, to sew it shut, so don’t fill it to the brim.

Now pin your raw edges in on the open side shut, ready for sewing. If you want, you can also use a layer of pins in front of the seam as a semi-barrier for the rice, to keep it sneaking out while you’re sewing.
Sew a double seam to close your bag, like you did before.
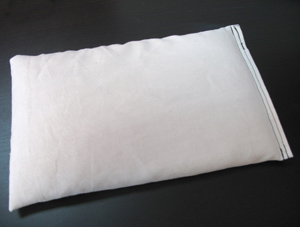
Your finished heating pack!
It’s not very pretty, I know, but it won’t matter, because we’re going to give it a nice cuddly removable cover that we can take off and wash if we need to. It also makes it easy to replace the rice heating pack if it ever starts to get stale or leak.
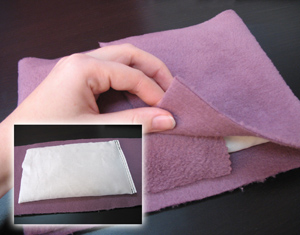
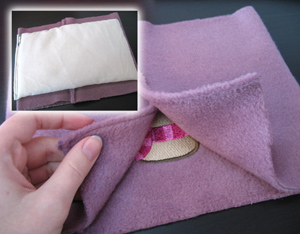
For your cover, use your heating pack to help with your measurements. You can pick any kind of fabric for this part, since it never has to go in the microwave. I picked a nice cozy fuzzy fabric. You’ll want a strip of fabric that’s at least one inch taller than your heat pack, and more than double the length.
That’s because we’re going to do a “fold over” cover. You’ll want enough fabric to fold over at the back with at least two inches of overlap, as shown. Make sure that if you’re making a tiny bag, you’ll want to embroider your design before you cut out the fabric, otherwise it will be too small to hoop.
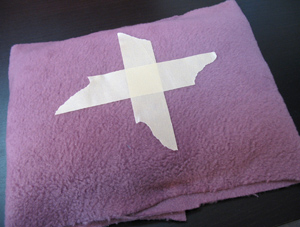
To mark the perfect spot for your embroidery, keep your fabric folded, but flip it upside down, to the front of the pack. Use a piece of tape to mark where you want your design to go. If you don’t mark it, it’s really easy to lose your placement once you open your long strip of fabric back up.
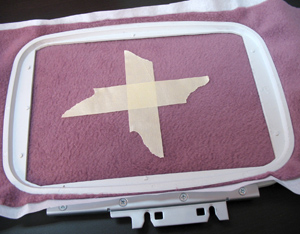
Using your markings, hoop up your design with a piece of stabilizer so it’s all ready to sew.
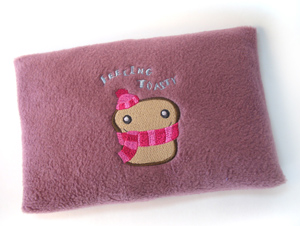
I chose my favorite new winter design, Feelin’ Toasty. It was so perfect for this project I just couldn’t resist.

Our adorable little toasty toast, all stitched out and ready to be made into a cute cover. Trim away the excess stabilizer on the back.
Before we sew the cover together, we’ll want to tidy up the edges.
Take the short sides of your rectangle, fold the raw edge 1/4 inch under, and sew a seam down the side, so the sides don’t fray. You want the finished side to be on the same side as the embroidery. Do this on both ends of your rectangle, keeping the longest sides unfinished for now.
Now fold your cover back up, like you did before, but this time you’ll want to do it inside out, so the embroidery is on the inside, and the raw sides of the seam edges are facing out.
Once your cover is folded, place your heating pack on top to make sure it will fit, and you haven’t folded it too short. You also want to make sure you have at least an inch of overlap at the back. If you’ve measured a bit tight, it’s better to have it a bit shorter than your rice pack than skimp on the overlap. It will just bunch up your pack and make it a bit squishier.
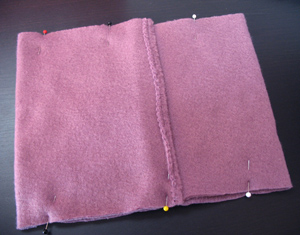
Pin the open edges together, top and bottom. If you need to, trim your rectangle down so it’s only an inch taller than your rice bag. This is what your cover should look like before you sew it.
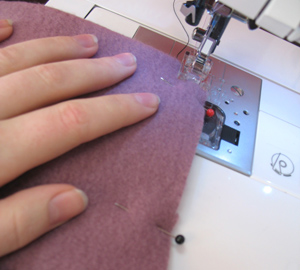
Now sew a ½-inch seam down both open sides. Make sure the overlapping pieces are laying flat inside, so you don’t sew over them incorrectly.
Your finished cover, still inside out. Turn it right side out when you’re finished, and push out the corners.
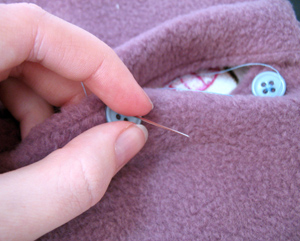
As a finishing touch, I sewed on three little buttons on the under flap, so it could button my cover securely closed.
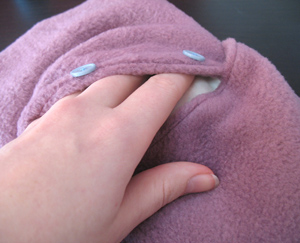
To finish your bag and make it toasty warm, pop your rice pack in the microwave for 1-3 minutes (time depends on the size of your heating pack), and then stuff it back into its cover and button it shut.
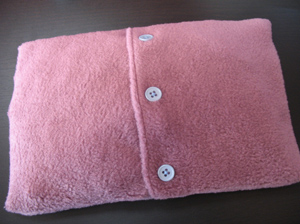
This is the back of my heating pack, all buttoned up and warm.
Your finished toasty bag, all warm and fuzzy and soft, ready to soothe away any aches or pains, or just warm you up on a cold day. They’re perfect for sore muscles and aching joints, and make a really great earache remedy if you sleep on them.
Keep in mind after long repeated use, you might have to replace the rice, but all you have to do is refill your heating pack and stitch it back up, and it’s as good as new. The removable cover can be washed as well, to keep your toasty pack fresh and warm. Be sure to store your toasty pack in a cool, dry place when you're not using it.
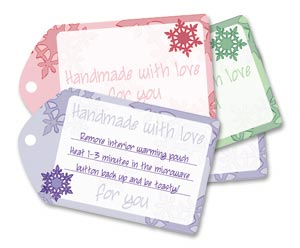
These little toasty packs are so simple and fast, they make perfect holiday gifts! If you’re thinking you might want to give a few of these away as adorable little handmade gifts, I have an extra little touch you can add... free gift labels!
Just download the PDF here and print them out on cardstock (you can find the download link for this template at the top of the page). There are four labels in all, one with heating instructions so your loved one knows exactly how to use their brand new toasty pack, and three other labels you can add to any handmade goods you make for the holidays.
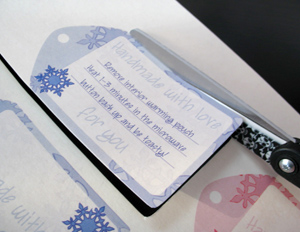
Print your label, carefully cut it out from the cardstock, then thread it through with some matching ribbon.
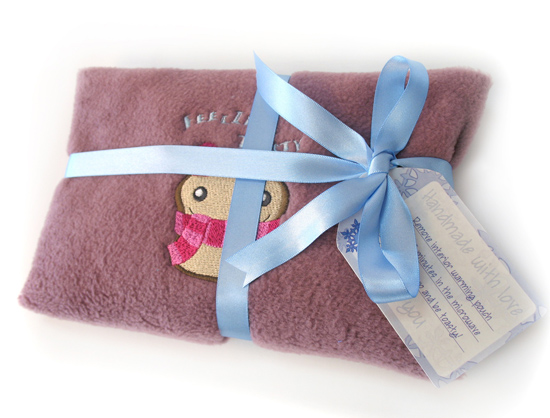
Now you have a beautiful little toasty gift ready to give for the holiday season!
You can use the rest of the labels for all the other handmade goodies you make for the holidays, and print as many as you need. Give everyone on your list some warm holiday wishes, to keep them cozy through the long winter months. You can customize each one’s shape for different uses, and give each one a different design to suit their personality. And of course, keep one for yourself, for all your hard work.


