Feeling like getting into the seasonal spirit, but don’t quite have the wardrobe around? Too much of it just goes for the classic anyway. I mean, I love the holidays and winter sweaters, but I also like a little twist of me, you know? Well with this repeatable sweater design, no matter your hoop size, you can make an adorable patterned sweater complete with tiny skull details, because what’s winter without them? After all, you can get a regular holiday sweater anywhere. This DIY one is much cooler, and you get to put it on your favorite sweater!
Supplies
So, the construction of this is pretty straightforward, but may take some sewing time, depending on your hoop size. To make it, though, all you’ll need is:
- Winter sweater repeat embroidery design (This design is split into multiple pieces for smaller hoops -- see description for each size for details. We'll show how to arrange the individual sections.)
- A spiffy sweater or sweatshirt
- Sheer mesh cutaway stabilizer
- Scissors
- Printed templates for placement (trust me, on this one, you’ll really want them. Here's how to print templates.)
It also helps to have around a ruler and a roll of tape. Actually, that tape really helps.
Designs Used
Firstly, a note about the embroidery designs. There are a couple different things available:
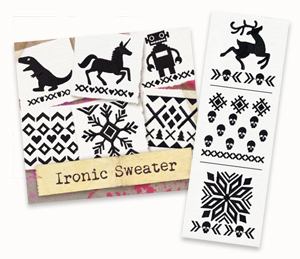
- The Ironic Sweater design pack (left) has nine mix-and-match motifs available, in three different sizes all smaller than 4"x4".
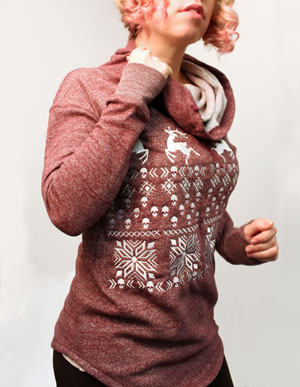
- There's also a Winter Sweater Repeat design (right) that's available in three versions -- the vertical arrangement shown here is available in one piece for larger hoops, or split into multiple parts for smaller hoops.
If you want to mix and match between the two products above, choose designs that are the same width, and pay attention to how many parts each Winter Sweater Repeat version is split into.
Let me explain why the tape is so important. You see, we’re building our sweater pattern piece by piece, and when you do that, it’s very very easy to start to veer off from where you want the design to go. The line of sweater designs may start to dip up or down, and you’ll only discover it when you’re all done.
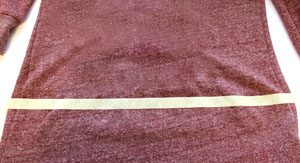
So, I’d recommend taking your sweater, and marking a straight line across the bottom with a piece of tape. This will help keep your design from getting too wonky.
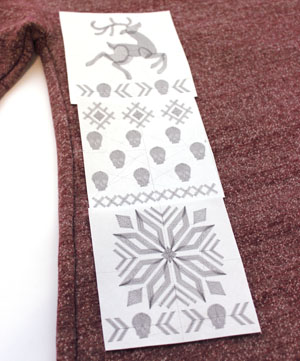
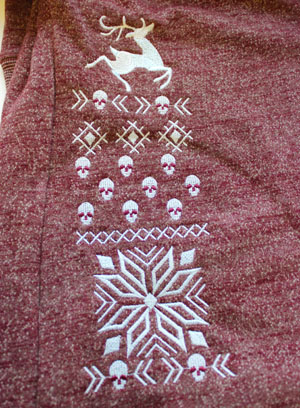
OK, once you have a tape mark to keep you level, you’ll want to lay out your first set of designs. Each sweater set comes in three pieces. Technically, you can arrange these from top to bottom however you like, but we arrange them like so.
You’ll want to use your templates to not only figure out the placement of your designs top to bottom, but also how many across you plan on sewing, depending on the size of your sweater. For a small to medium sweater like this, four across was about perfect.
Once you have your spacing roughly figured out, start at the far left.
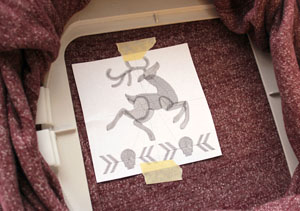
With your three laid out how you want them, you’ll want to start with just your top design. Tape that one in place.
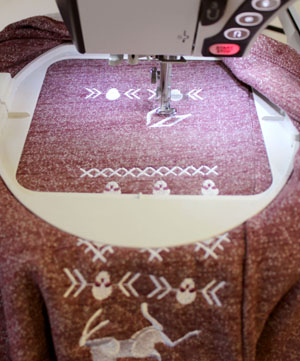
You’ll want to hoop it up with your sheer mesh cutaway stabilizer behind it. Because I was at the edge of my sweater, I found it easier to hoop it with the design at the edge, and I centered my machine on it once it was ready to sew.
You’ll also notice the sweater is all bunched around my hoop. That’s because you’ll want to stretch the back of your sweater out of the way.
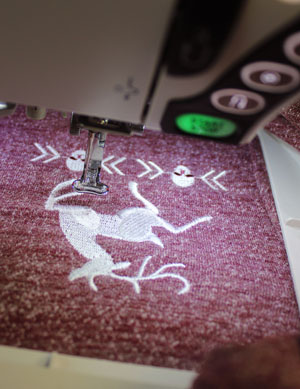
Once your design is hooped up under your machine, and your machine centered over your design, you can get stitching!
I had to flip mine upside down, because I ended up putting my hoop arm through the bottom of the sweater. Lots more room down there than through the neck!
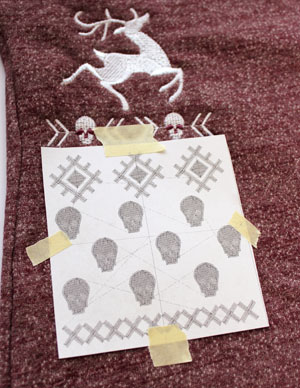
Once your first design is sewn, you’ll want to pull out the template for the next section and tape it in place. Keep it as level with the first design as possible using the crosshairs printed on the template.
Your next design stitches out just like the first. it’s starting to look like a sweater repeat!
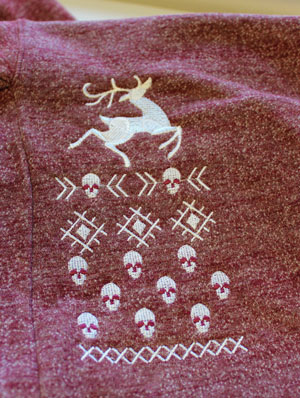
Finally, tape in place your last piece. Make sure everything is not only lining up with each other, but still looking level with that tape line you put down.
Sew the final bottom piece on your first sweater pattern.
And that’s it! That’s the trick really. You use your templates to keep things lined up top to bottom. The trick as you repeat this process is keeping things level along the front of your sweater. Be sure to keep an eye on your tape mark as you sew your next set.
Also, if you happen to have a really large hoop and editing software, you could combine all these into one, and stitch it as one big block at a time.
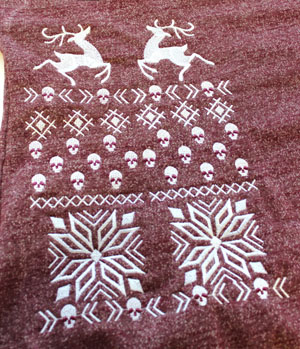
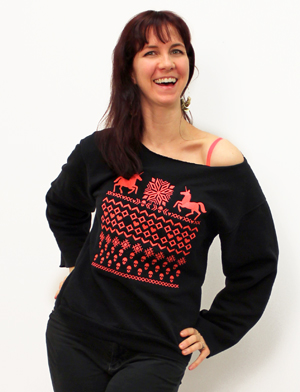
For your next piece, you can also choose to either keep your design all facing the same way, or alternative the top deer design to have them create a less uniform-pattern.
I ended up mirroring all of my second set, but in retrospect, just mirroring the deer is best. The skull section lines up better all going in the same direction.
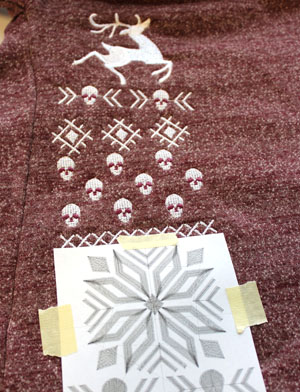
Keep stitching! Make sure you’re really paying attention to that tape marker, as the more you add, the easier it is to let it start “drifting” up or down. What’s nice is this doesn’t have to be totally perfect, the eye won’t pick up small shifts, only big ones.
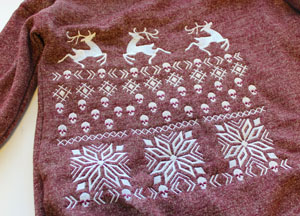
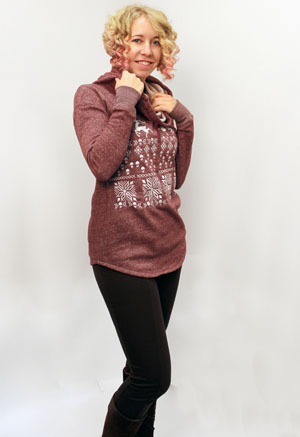
And complete! From even the tiniest hoop comes the mightiest of winter sweaters. It takes a little time and patience with measuring, but boy does it give a big effect! Those repeated patterns across the front blend into a nice big pattern that people will never guess you added yourself!
And I bet you it will take them a second longer to notice the skulls. But what’s the point of making a DIY sweater if you can’t make it a little different from the rest?
With this easy set of designs, you’re no longer limited to just the frumpy sweaters of times past. Find a chic and cozy sweater that fits you just right, and make it wonderfully seasonal with your mad embroidery skills.
Mix it up even further with the Ironic Sweater design pack! A variety of motifs and patterns mean you can mix and match to create the perfect sweater or sweatshirt for your style.
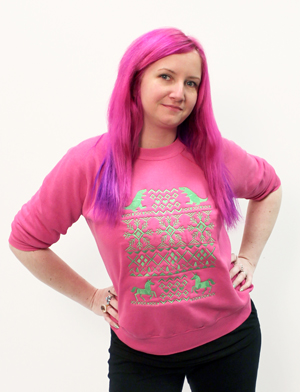
Your favorite creatures, your favorite colors ... anything's possible! Enjoy crafting your own unique winter wear with these versatile designs.