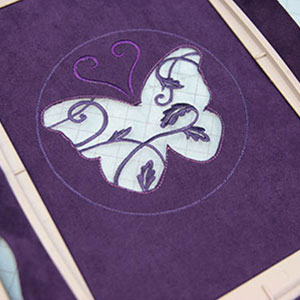
Illumniate your decor with a unique cutwork shadowbox! A translucent "window" in front allows background detail to shine through. Your choice of fabrics and threads makes each creation unique and beautiful!
Supplies
To create your cutwork shadowbox, you'll need:
- Butterfly Silhouette Shadowbox (Organza) embroidery design
- White or light-colored organza fabric
- Dark-colored embroidery thread
- Fabric for cutwork panel - we used faux suede
- Medium weight cutaway stabilizer
- Two hand embroidery hoops slightly larger than the embroidery design
- Hot glue gun and glue
- Scissors
- Heavy water soluble stabilizer, such as Vilene or Sulky Ultra Solvy
- Air erase or water soluble marker
- Craft knife and cutting mat
- Temporary spray adhesive
Designs Used
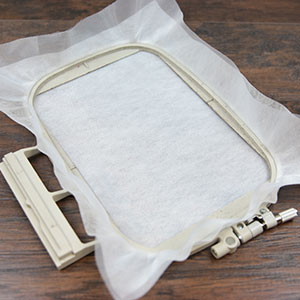
To get started, cut a piece of organza fabric larger than your hoop. Spray a piece of heavy duty water-soluble stabilizer with temporary spray adhesive, and smooth it on the back of the organza. Hoop the fabric and organza taut together.
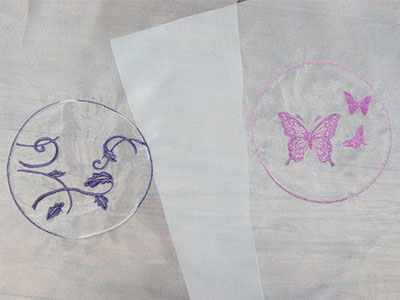
Since the embroidery will be seen from both sides, you'll also want to wind a bobbin to match each color thread that you'll be using for the design. Each cutwork shadowbox design consists of three files. File "a" is the organza insert that will be added to the front cutwork layer, and file "c" is the back layer of the shadowbox. Load file "a" into the machine, and start stitching. Make sure to match the bobbin thread to the top thread.
Once the design is complete, repeat these instructions to hoop up another piece of organza with heavy water soluble stabilizer, and stitch file "c". File "b" will be sewn next - this file contains the cutwork element of the design.

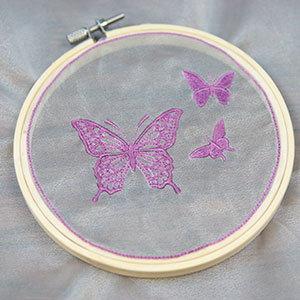
Once both designs have sewn out, remove the organza from the hoop. Cut away the excess stabilizer and trim any loose or long threads on the backside of the embroidery.
Soak away the remaining stabilizer according to the package instructions.
Let the organza air dry, then press with an iron set on a low heat setting, using a pressing cloth between the iron and the embroidery.

Spray a piece of medium weight cutaway stabilizer with temporary adhesive and smooth the fabric on top (we used faux suede). Hoop the fabric and stabilizer together.
Load the "b" file into the machine and start the design. Some inner elements will sew first followed by the circle border. Then, the "cutting lines" will sew. After these lines have sewn, stop the machine and remove the hoop from the machine but do not unhoop the fabric.
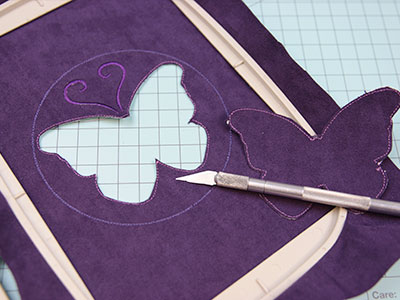
Place the hoop flat on a cutting mat and using a sharp craft knife, cut out the shape by cutting in between the cutting lines. Cut through both layers of the fabric and the stabilizer.
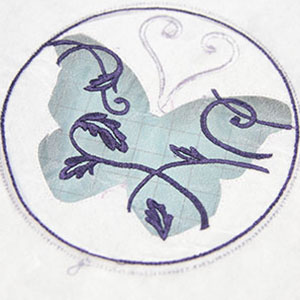
Flip the hoop over with the wrong side facing up. Spray the backside of the stabilizer with adhesive and then align design "a" (wrong side facing up) within the shape of design "b".
Flip the hoop over to the right side and gently press the organza in place. Make sure the embroidery of design "a" is positioned correctly inside the open cutwork space.

Attach the hoop back onto the machine and continue with the design - a zigzag tackdown stitch will sew next followed by a satin border.
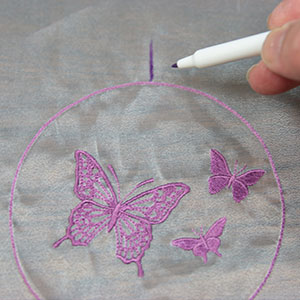
Now both layers of the shadowbox are complete so it's time to add them to the hand embroidery hoops! Using an air-erase pen, mark the top of each of the designs.
Lay design piece "c" face up over the inner hoop of the hand embroidery hoop. Place the outer hoop over the fabric, so that the mark lines up with the center of the hoop screw. Press firmly so that the fabric lays smooth and taut. Tighten the hoop screw.
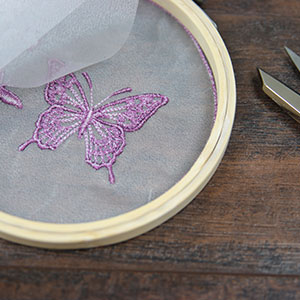
Lay the embroidery hoop, raw edge of the fabric up, and trim the excess fabric. Try to get as close to the hoop's edge as possible.
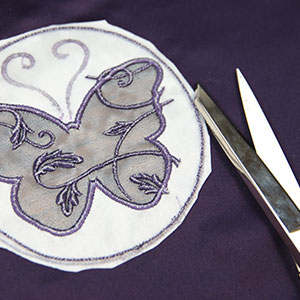
For the front panel (designs "a" and "b" combined), first trim the stabilizer and organza on the backside of the embroidery getting as close to the circle border as possible.

Next lay the back panel (design "c") right side up and run a line of hot glue along the top edge of the hoop.
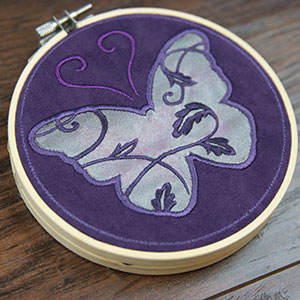
Align the front panel on top with the hand screws lined up at the top of the hoops and press the top panel in place.


