Designs Used

I kept a journal when I was younger, still do, and I'm not alone. Every day thousands of little children write their thoughts and rants and ravings; and every day thousands of angst-ridden teens-to-twenty-somethings huddle in coffee shops and scribble furiously in their notebooks.
I went through lots and lots of journals, but never really found one that I liked, something that suited my personality. Journals holds our most personal thoughts and feelings, so shouldn't they be reflective of our persons, too?
There's no need to keep hunting for the perfect journal, because with your handy dandy stitching machine, you can make a reusable custom cover that's all your own.
You can even apply this same project to cookbooks, schoolbooks, books on your shelf that have gotten a little worn out -- anything in book form, really.
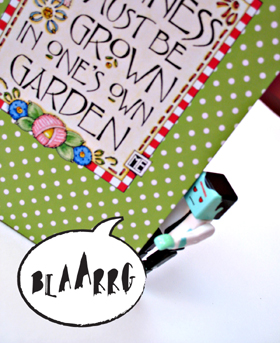
I went off to my local craft store and got this little journal for just a buck. I can see why. I don't have anything against lime green, happiness, gardens, or polka dots, but the combination doesn't really fit with my journaling mood.
I asked my resident cubicle zombie what he thought of the journal, and he just groaned. I'm not sure that's his consensus on the journal cover, or simply a hungering for brains. Either way, he didn't seem a fan of the current cover.
No worries, though. With slick embroidery work we'll have a nifty journal in no time. Pick fabric that's larger than your journal or book by at least two inches all around, different lining fabric that's the same size, your favorite embroidery design, and, if you want a sleek little fastener, some leather cord and a charm.
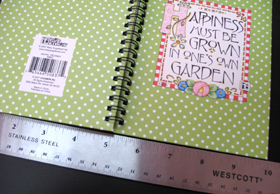
Measure your journal or book. Measure the width and height of the cover, and then measure the binding. If you have a traditionally bound book, just measure how wide it is. If it's a spiral bound book, add at least double the width. Mine looks about 1/2 inch wide, but I'll need an inch or more to accommodate it.
Once you have the length (including the binding), add the length of the desired flaps, plus one inch for seams.
For height, add another inch to accommodate seams. Write those measurements down.
Mark those measurements on your fabric, then determine where you want the design to be. It may help to wrap the fabric around your book, and then determine the placement
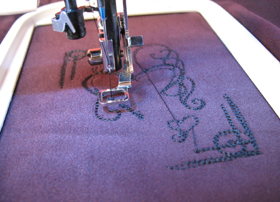
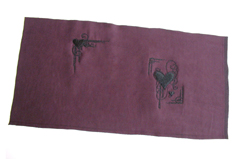
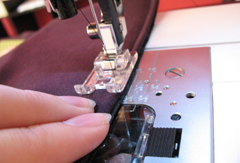
Hoop the fabric with stabilizer, and stitch away. I'm using the Heart of Darkness design.
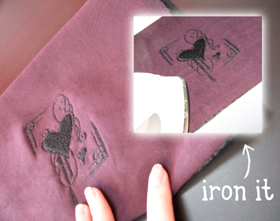
When the design has finished stitching, trim away the excess stabilizer from the back side.
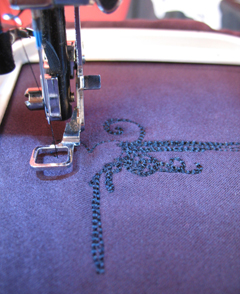
I'm also putting the coordinating corner on the back of the journal cover, and have lined it up so that it's snug on the corner of the book.
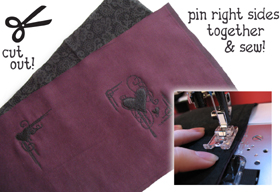
When all the embroidery is finished, cut out the rectangle along the markings.
Cut another rectangle the same size for the lining. It can be the same fabric that you used for the outside, or a different fabric.
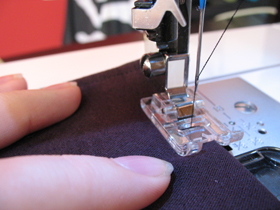
Take the two rectangles, pin them right sides together, and sew a 1/2 inch seam around three edges, leaving one of the short sides open.
Take the rectangle and turn it right side out, making sure all of the corners are pushed out properly. Press the seams so that they're nice and flat.
I think I'll take this opportunity to mention that the next time I go to the fabric store, I'll actually pay attention to how stretchy the fabric is, rather than being enthralled by all the pretty colors. Stretchy fabric is a real pain to work with sometimes...
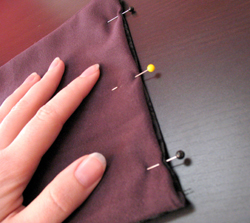
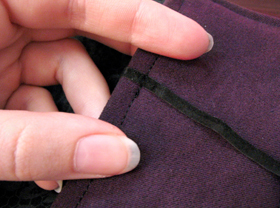
Take the remaining open seam and tuck the raw edges in 1/2 inch, pinning them in place. Sew a 1/4 inch seam to close the gap, then stitch a 1/4 inch seam on the other end of the rectangle, too.
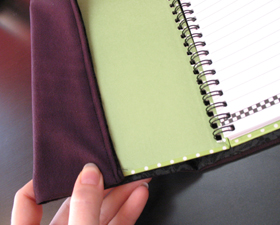
Once you have the rectangle neatly closed, with two seams down either side, wrap it around the journal or book to help measure for the pockets/flaps.
Make sure that your design stays centered, and that both pockets are even with each other. Pin one side and see how it measures with the other pocket. Keep adjusting and pinning until everything is even.
Check how it fits both open and closed. It may feel a little loose when the book is open, but if it's too tight, then the journal or book won't close properly.
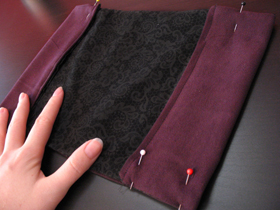
Once you have everything pinned, remove the journal. Check to make sure everything is pinned straight, and that your pockets look even.
Sew a 1/4 inch seam all around the edges, securing the pockets on place.
At this point you can be done if you like but it might be the perfect time to embellish a little more....
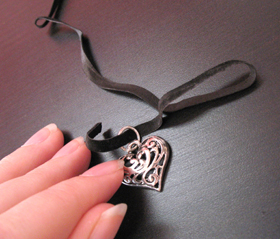
I wanted a little tie and charm to keep my book closed. I found a metal heart charm (complements the Heart of Darkness designs) and tied it to a long length of velvet leather code. The length is up to you, but wrap it around your journal a few times to get an idea, before you snip.
To secure the cord, I wrapped it around the corner of the back flap and taped it underneath, then sewed a quick top stitch through the existing seam to secure the cord in place. Now I can wrap it around my journal as heartily as I like, and not worry about yanking it out of some half-hearted hot glue attempt.
This is just one way to secure your journal. You could play around with a button, loop, snap, flap, or even a little buckle. You can add all sorts of things to make your cover even more uniquely you.
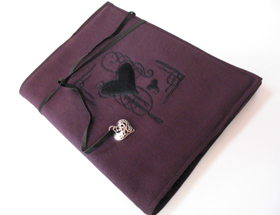
Now I have a beautiful embroidered journal, as personal as the thoughts, warbling, and rants that I'll fill it with. It's a far cry from the plastic polka dotted journal that I started with.

Making a book or journal cover itself is fast and simple, so make dozens to swank up your reading and doodling material. Fabric covers are far more durable and long-lasting than paper ones, so it's a great way to protect books that are wearing a bit thin -- and add your own personality, too.


