It’s that time of year again...
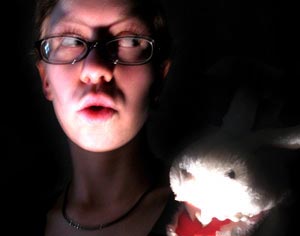
The time where mallow pumpkins abound, jack o’ lanterns grin merrily from porches, spooky stories are told with the aid of flashlights, and fanged bunnies howl at the moon...
...OK, maybe that’s only around here.
Supplies
To make your wicked wreath, you’ll need:
-
A wreath form, found in craft stores
-
Two black feather boas
-
Some creepy black fake roses
-
Fun little ornaments for embellishment
-
Hot glue gun
-
Scissors and/or wire cutter
-
Fishing wire or clear thread
-
Fun creepy sign (not required, but cool)
-
Water soluble stabilizer
-
Some awesomely creepy lace designs
-
A fanged were-bunny (again, not required, but cool)
Designs Used
That’s right ghouls and goblins, it’s Halloween!
Everyone’s favorite creepy holiday is fast approaching, and it’s time to get your decor in gear! Even if you don’t do up your house in spooktacular fashion, your entryway is vital to setting the mood for some hopeful trick or treaters, and there’s no easier way than setting out a few well-placed pumpkins, and having an awesome spooky wreath hanging on your door.
What? You don’t have a wreath? Well, let’s whip up a little black magic and make one!
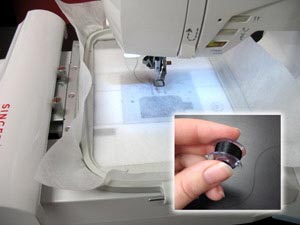
I would recommend starting the embroidery first and you can make the wreath while your machine stitches merrily away.
If you want to see the finer points of stitching lace, check out this tutorial, but it’s simple enough you can probably follow along here. Wind a bobbin of matching color to your lace, and hoop up a piece of water soluble stabilizer. Load your designs (I’d try fitting as many in one hooping as possible) and set your machine a’ witching!
Er, I mean stitching.
If you want to add a sign, I would tie this on first, because it’ll be heavier than most of the things we’re going to tie on here and we want to make sure it’s on nice and tight. Use fishing wire or some other sturdy clear tie here, clear thread probably won’t be strong enough to hold it up. Tie it securely at the top of your wreath.
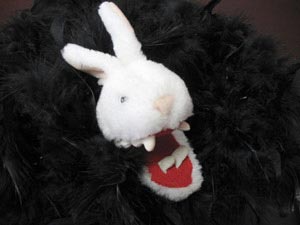
Now it’s time to wrap our wreath in our fabulous black boas. Craft Bunny tested the fabulousness of the boas first. They were rated as acceptable.
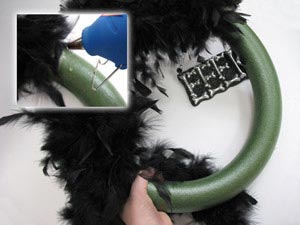
Take one end of your boa and glue it securely onto the wreath, then wind the rest around your wreath form. Unless you have a really long boa or a really small form, you’ll probably only get about halfway. Secure the end of the boa with some hot glue to keep it in place.
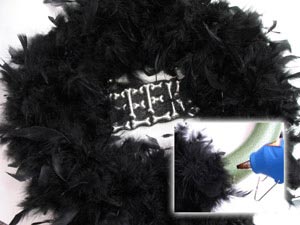
Take your second boa and repeat the process, gluing one end where your other boa left off, winding it around the rest of the way, and securing the end with some more hot glue. You should now have a pretty feathery wreath. Simple, isn’t it?
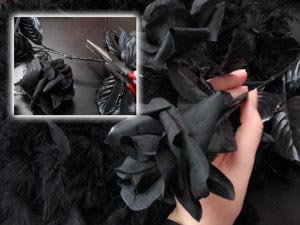
Now it’s time to add some elegant and spooky touches. I found these fake roses at my local craft store. One stem had about three different rose heads on it, so I cut each of them off individually. Leave a few inches of stem on each flower.
Keep in mind, most of these craft flowers have wire running through them to keep their shape, so cutting through them with a wire cutter is best. No need to ruin your good scissors.

Take your flowers and tuck the stem underneath one of the wraps of your boa. This alone probably won’t be enough to keep it in place, so dig underneath all that fluff and find the end of your flower’s stem. Give it a good coating of hot glue attaching it to the wreath form to make sure your flower stays in place.
Scatter a few flowers around your wreath. You can add as many as you like.
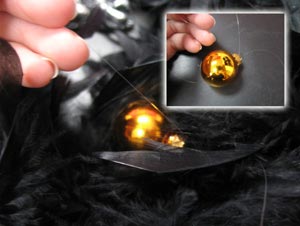
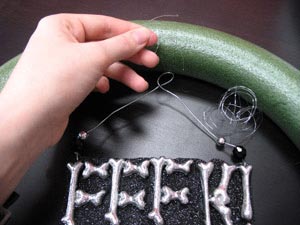
Another fun accent to add is little festive ornaments. For these, you can use fishing wire or more delicate invisible thread. Black thread works pretty well too. Run your thread through the top loop of your ornament, and then wrap it around your wreath. Move as many feathers out of the way as possible so you don’t get a “scrunched” look where you tie on your ornament, but for the most part your ties will be invisible in between all the fluffy feathers.
If you find your little ornaments are moving around too much, you can use a small pin with a black or invisible head and pin the ornaments into the wreath as well.
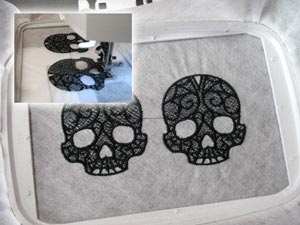
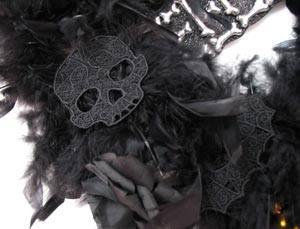
So by now your lace skulls should be all done stitching, assuming a poltergeist hasn’t taken over your machine. Poltergeists invade my machine with alarming regularity.
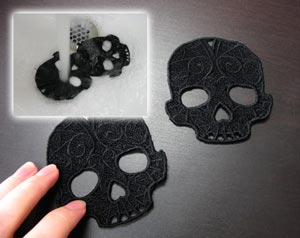
Soak your lace in warm water to remove the stabilizer, and pat them dry.
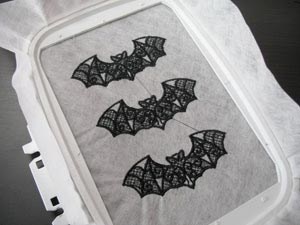
Don’t forget to make yourself some lacy bats!
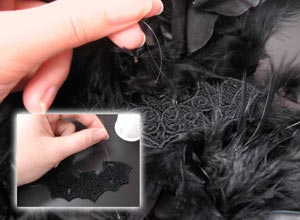
Like the little ornaments before, loop a piece of invisible thread or fishing wire through the top of your lace ornament (you’ll find there’s a little hole there for just such a thing) and tie it to strategic places on your wreath. Stitch and add as many gothic bats and ghoulish skulls as you like!
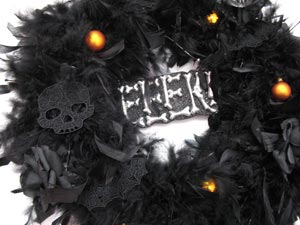
Double, double, toil and trouble, and in no time at all we have a wonderfully wicked wreath to spook up our door! Adorned with spooky black roses, glints of orange, and wonderfully gothic lace, your wreath is spooky and classy all at the same time. You can add any embellishment you like to your wreath, and stitch as many gothic accents as you like!
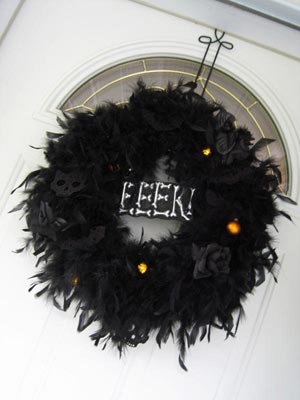
Hang your proud new spooky display up on your door to welcome trick-or-treaters with a little spooky style. You can always add more embellishments over the years, or make a totally new wreath whenever the mood strikes.
Enjoy your new wreath, and have a spooktacular Halloween from all of us at Urban Threads!


