Handmade bracelets have a vintage charm that always reminds me of endless summers and carefree days. The charm bracelet has come back in vogue, but instead of dangling charms, they’re now interwoven into the bracelets and stacked for a bigger, bolder effect. If you want a simple way to give your summer look an update, all you need is some twine and your trusty embroidery machine.
Supplies
So, to make your charm stack bracelets, you’ll need:
- Your stitched lace charm embroidery designs. How many is up to you. You can double some up, mirror others, or just have them on their own. Get creative and customize them with your own colors. Here's how to stitch freestanding lace!
- Twine or leather cord. The twine I found was rather thin, so I ended up braiding it for an even more vintage effect. For a faster DIY, you can just use simple cord.
- If you don’t want to always tie on your bracelets, you can have cinch clasps and closures, as well as some jewelry pliers to close everything up.
Designs Used
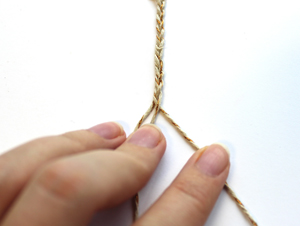
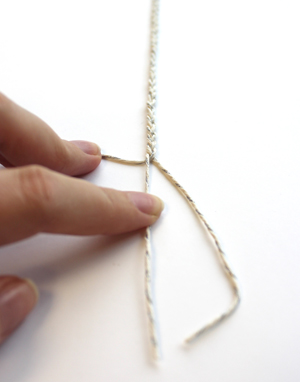
So, let’s start with your cord. I stitched my charms in metallics, and found this pretty thin cord woven with metallic threads. In order to make it thick enough to be used for a bracelet, I braided three strands together.
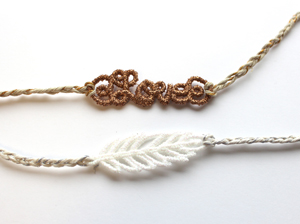
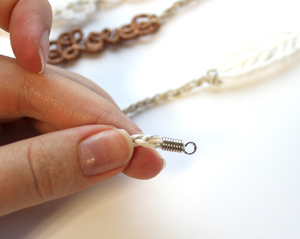
I looped the top edge of the braid around the edge of my first charm, Love. The love charm has some convenient little handles on the side that make it easy to loop in cord.
Repeat this on the other side. Ta da! One bracelet pretty much done. Love is an easy one to do, and looks great all on its own.
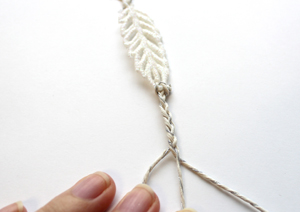
The little feather charm is easy too. The simple loop at the top also means it can easily be a dangling charm, but there’s also a loop at the end of the feather, so I looped both ends like my “Love” charm, braiding the cord again.
So, there are two very simple examples of ways to “stack” your charms by tying a cord to each end. However, the charms are even more customizable than that...
Some charms work better looped through a cord, instead of on the ends of one, so I cut three longer pieces of twine, and braided them into one long cord, long enough to be a bracelet on its own.
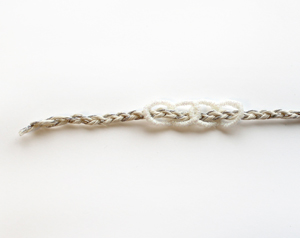
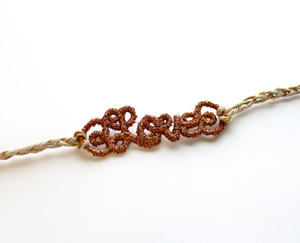
The “chain” charm can be easily interwoven with your cord like so.

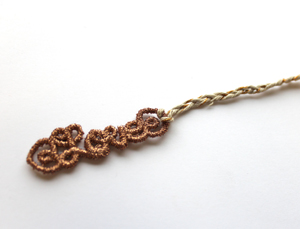
The gear charm is easily interwoven as well. Combine it with another chain charm, and you have a longer, more complete little accent for your next bracelet.
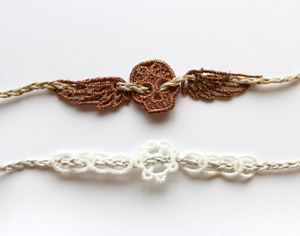
Similarly, the skull charm looks pretty awesome interwoven with two of the wing charms. Combinations like this are endless! Play with your own creative combinations and colors to make your charms just the way you want.
Finally, there are two easy ways to finish off your bracelets. One more finished way is to cut the ends just a little short of the length around your wrist, and then add a crimp at the end of one side, and a crimp and a clasp on the other. That way you can close your bracelet securely every time.
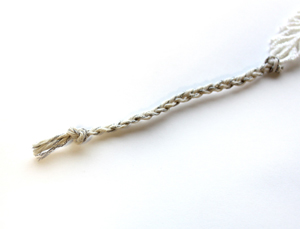
If you want to go old school, just tie a knot near the end of your twine or leather, and tie it around your wrist yourself. Either way works!
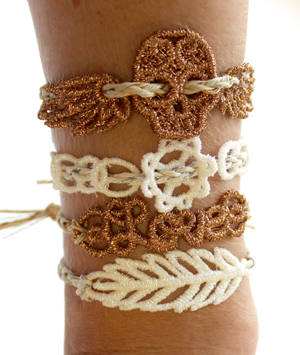
You can chain together as many charms as you wish, and stack them high up your arm. With each charms just taking a few short minutes to stitch out, crafting up an armful of accessories is a breeze!
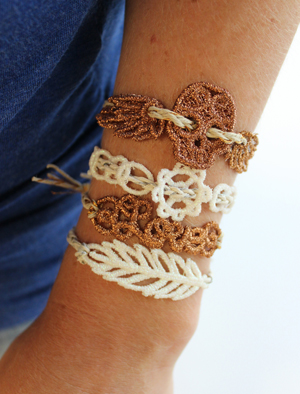
Summer accessories come together with rustic twine and chic metallic accents, but really, they can come together any way you like. Try out current trends of leather and neon colors, or all monochromatic. It’s easy and fun to stack up a bunch, and look cool and casual long into the warm summer nights.


