Sailing through puffy clouds, this magical little dreamboat is light, airy and oh so cute to stitch. It's just three pieces of lace and a wooden dowel, but when those things combine, you have a gorgeous 3D ship that's ready to set sail on its own, or in a fleet of delicate ships. Here's how to make your own!
Supplies
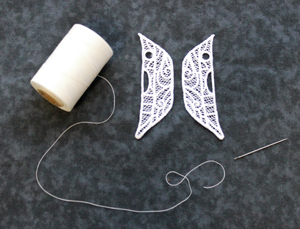
You will, of course, need your Dreamy Sailboat lace pieces. If you need a refresher on how to stitch lace, click here. To assemble your dreamboat, you'll also need:
- Dreamy Sailboat embroidery design, already stitched
- Hot glue gun and glue stitcks
- Needle and thread to match the color of your lace
- Scissors
- 3/16 inch diameter wooden dowel (or a straw, chopstick or anything similar)
- Wood saw (If you are using wooden dowels or chopsticks)
- Optional: acrylic paint to match your dowel to the boat
Designs Used
So, let's start with our two ship halves. Start by lining up the bottom pieces, as pictured. You can either hand stitch or use your machine to zigzag stitch across the bottom of the boat.
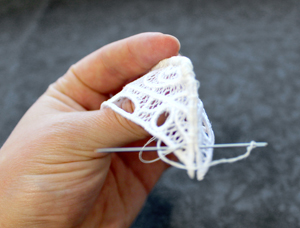
Once the hulls are secured together at the bottom, you'll need to hand stitch up the sides. Make sure you keep the two ends of the ship hull level with each other, so they meet up at the same point on either side.
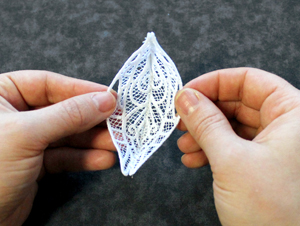
OK! Now you have a tiny little boat hull.
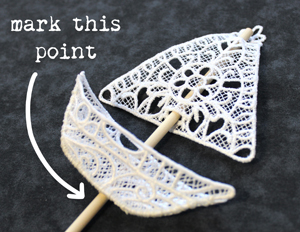
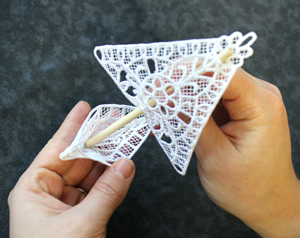
Carefully feed your dowel through the gaps in your sail like so. Don't worry about getting it perfect yet, this is just to measure the dowel height.
Mark the dowel with a pen or pencil approximately where you'd want the bottom to sit in relation to the hull of your boat.

With that point marked, remove the dowel and cut it down to size with your wood saw.
If you're using something simpler for your boat, such as a straw, just cut it with scissors.

Place your dowel back in the sail, so we can double check the dowel length and prep it for gluing.
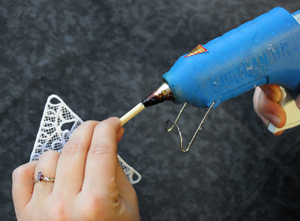
Add a pea-sized dot of hot glue to the end of your dowel, on the end that will go on the boat.
With the glue still hot, place the glued end firmly into the bottom of the boat and hold in place. You may need to add extra dabs of glue around the edges of your dowel to ensure it stays in place.
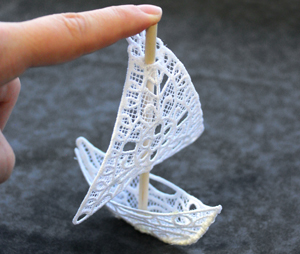
Keep your sail upright until the glue has fully dried.
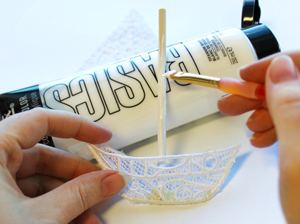
Once the glue is totally dry, you can choose to add one final finishing touch...
Remove the sail from the dowel one last time, grab your paint, and give the dowel a matching coat of color. I thought this my dreamboat would look best in an all-over delicate white.
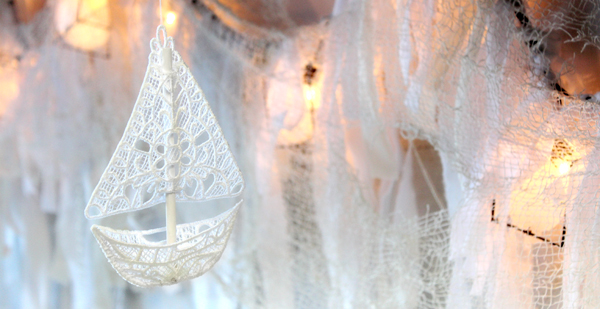
Your dreamboat is ready to launch into the clouds, the sea, or wherever dreams may take it. Picture a whole fleet hanging gracefully from a mobile, or a string of them dancing along a sunlit window. Wherever your dreams take you, this little dreamboat is a great way to get there!


