Now here's a little piece of beauty all seamstresses needs in their lives -- a lovely lace dress form! Easy to assemble and a refreshing addition to any work space, this tiny form is sure to bring a smile to anyone who encounters it.
Supplies
First things first: you'll need to download the Dress Form (Lace) design and stitch out the four lace segments on your embroidery machine. Check out this tutorial for details on stitching freestanding lace.
To assemble your dress form, you'll also need:
- Hand-sewing needle and thread to match the color of your lace
- Scissors
- Wooden dowel (7.5" tall for the smaller dress form, 9" tall for the larger dress form)
- Big sturdy button or block for a base
- Hot glue gun and glue
- Large paperclip or sturdy craft wire
- Masking tape
- Jewelry pliers or small needle-nose pliers
Designs Used
After stitching out your lace, rinsing it, and letting it dry you are ready to begin.
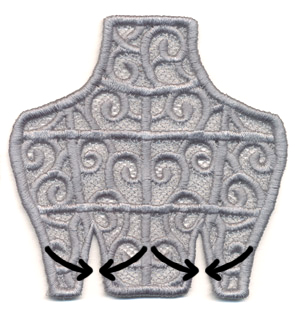
Start by hand-stitching the darts together in each of your top pieces.
I found it useful to pinch together the lace, with the right side of the lace facing in, and hand-stitch starting from the inner point of the darts.
Next, stitch the darts on the lower pieces in the same manner.
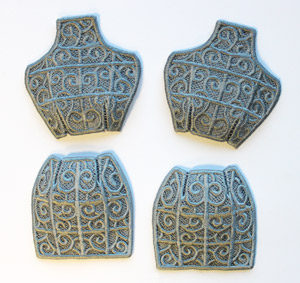
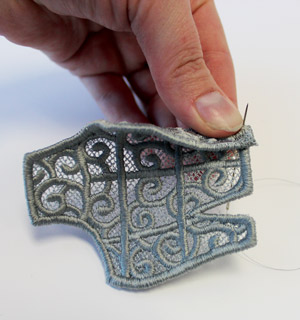
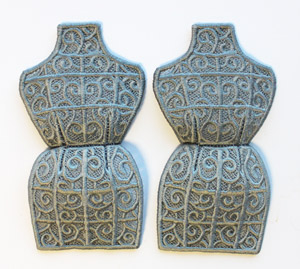
Once you have all four pieces properly darted, they should look like this.
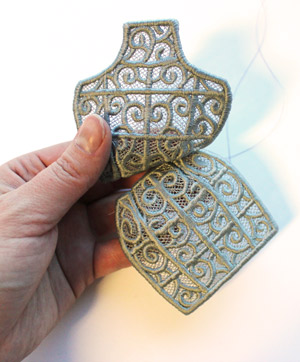
Next you'll need to connect each bust piece to their lower torso pieces. I did this by folding the right sides in together and stitching the edges together.
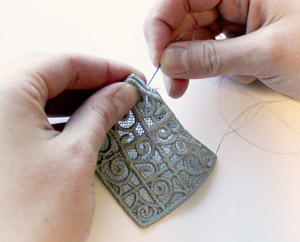
Once your finished, your two halves should look like this.
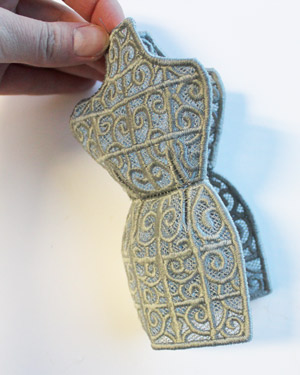
Next, line up the two halves and stitch from the top of the neck down the sides of the form.
Note: Leave the neck and base open so you can slide in your stand later.
When you are finished with one side, flip over your dress form and stitch up the other side.
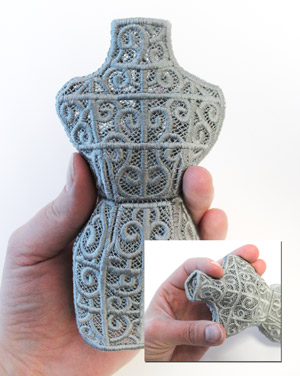
Your finished dress form should look similar to this, with the top of the neck and base still open.
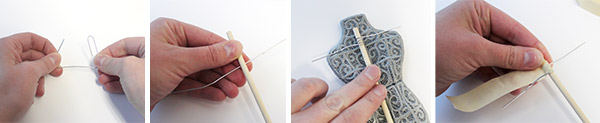
To create your stand, gather your paper clip and wooden dowel. You can use the bodice to determine how long you want the dowel. We suggest using a 7.5" dowel for the 3.27 x 3.23" Dress Form, and a 9" dowel for the 3.86 x 3.86" Dress Form. Once the dowel is cut to the desired length, open your paperclip and twist it around the top end of the dowel. Use your lace piece to match the wire at shoulder length with the top of the dowel, so that it sits below the neck opening. Secure your wire in place with hot glue or masking tape.
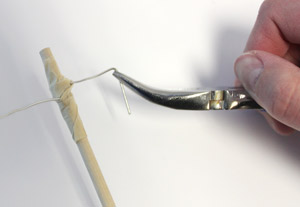
Next, bring in the sharp edges of the paperclip by rounding each end down and in with your pliers.
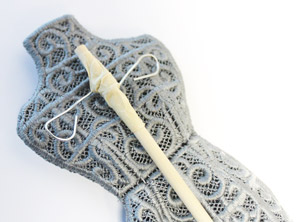
Use your dress form as a guide for the wire -- this needs to be wide enough for the inside shoulders to rest on, but not too wide that you can't fit it inside the dress form.

Next, grab your hot glue gun and base piece. Set a large and even amount of glue in the base of the button.
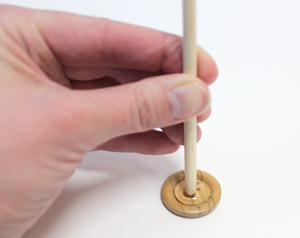
Attach the wooden dowel to your base by holding it upright in the center of the hot glue.
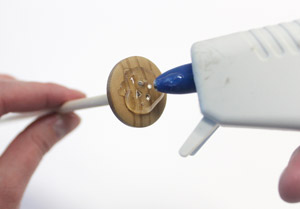
After the top of the base is set and dry, I also added glue to the bottom of the button to flatten it out. Place the glued surface on a piece of aluminum foil or other non-porous surface that you'll be able to peel it off of later, and let dry.
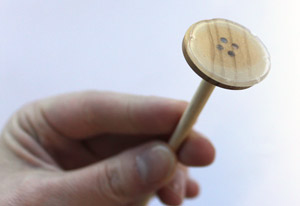
This should create a solid flat surface to ensure your dress form stays upright!
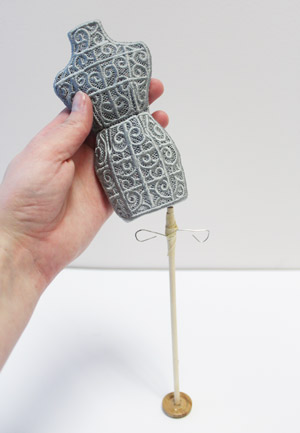
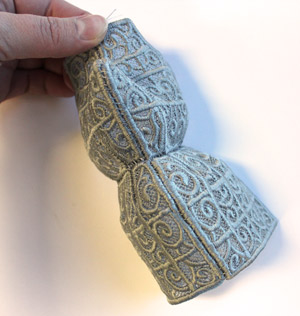
Carefully slide your dress form over your stand. If you are having trouble getting the wire past the waist of your dress form, you may want to curl the wire in a little bit more.
Don't be afraid to use your pliers through the top neck area to make adjustments!
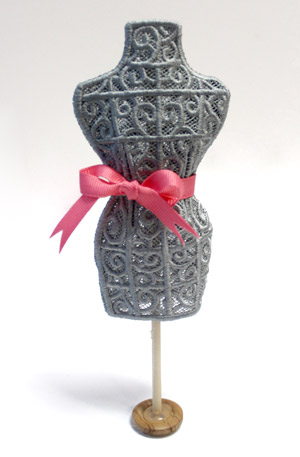
When your dress form and stand are complete, feel free to give yours a little extra love! Decorate with beads, ribbon, buttons, and more.

These lovely little dress forms make perfect home and office decorations for the dressmaker or fashionista in your life!


