Deliver your notes, photos, and invitations in style with these elegant and simple freestanding lace envelopes! This tutorial will show you how to assemble your lace into a functioning piece of beautiful correspondence.
Supplies
First things first: you'll need to download the Lace Envelope design for your embroidery machine. This comes in two sizes -- the larger fits a 4"x6" photo or card, and the smaller fits a standard gift card (or up to 2 1/4" x 3 3/8").
You will also need:
- Hand-sewing needle and thread to match the color of your lace
- Scissors
- A button (up to 1" diameter for the larger envelope, or 5/8" diameter for the smaller envelope)
Designs Used
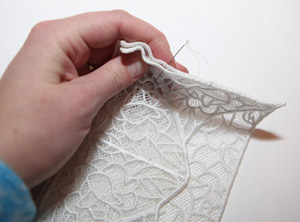
Begin by stitching each of the three pieces of freestanding lace on your water soluble stabilizer, then dry completely (here's more on stitching freestanding lace).
Take your back piece and front bottom envelope piece and stitch them together, right sides facing away from each other.
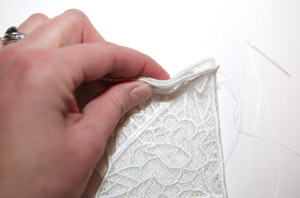
If the pieces don't match up perfectly, it's OK! That's the nature of lace. You may need to pinch the sides in together as you stitch around the envelope.
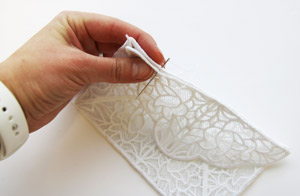
Next, stitch along the top edge of the envelope flap and the top of your back piece, leaving the top flap open along the scalloped edge.
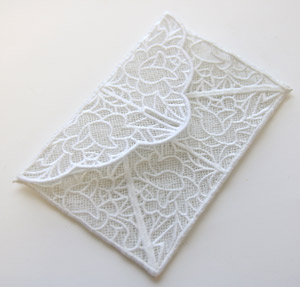
This is what your stitched envelope should look like when you're finished.
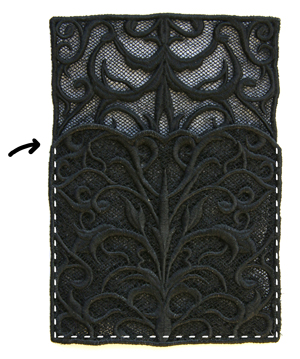
If you're stitching the Damask Lace Envelope, simply stitch around the three edges of your pocket, either by hand or using a sewing machine.
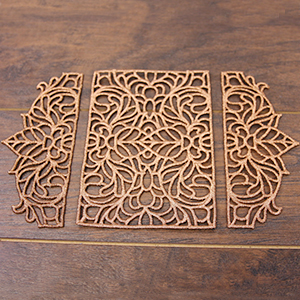
If you're stitching the Autumn Baroque Envelope (Lace), lay the pieces side by side, with the straight edges touching. The center piece should face up, while the "wings" should lay face down.
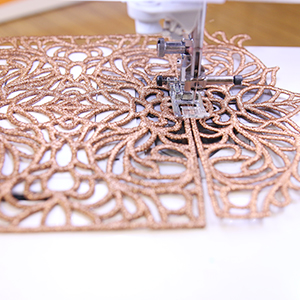
Stitch the pieces together with a zigzag stitch. Then, fold the wings inward and use a ribbon to close the envelope.
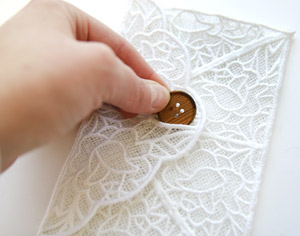
The next step is the most difficult one -- find a button that fits the buttonhole. Slide your button through the opening to make sure it will work before stitching it down.
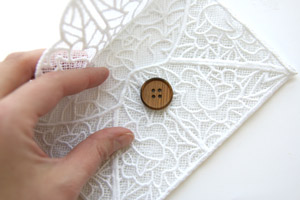
Use the buttonhole as a guide to place your button -- the center of the button should be placed an inch down from the top of your bottom flap on the larger envelope, and 1/2 an inch down on the smaller envelope.
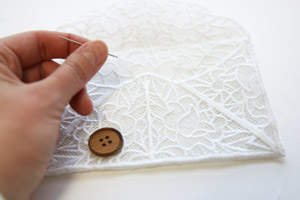
Use the strongest point of your lace to hold your button, on the middle satin line of your bottom flap.
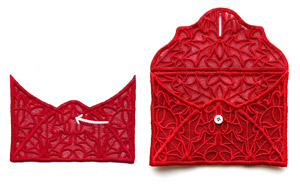
For the Holly Envelope, pick a satin detail to secure your button onto.
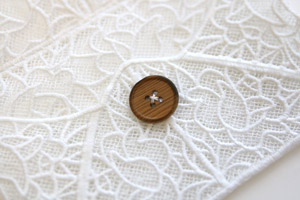
Secure your button firmly on!
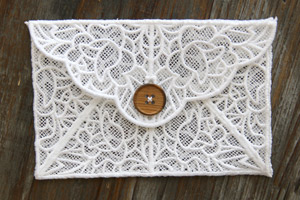
This beautiful lace piece will stun any recipient! Stitch this envelope in a variety of colors with fun buttons, and get creative with your stationery -- there's no wrong way to do it.
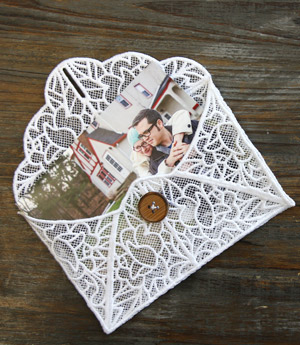
Ta-dah! Your completed envelope, ready to hold handwritten love notes, pictures, cards, and more!
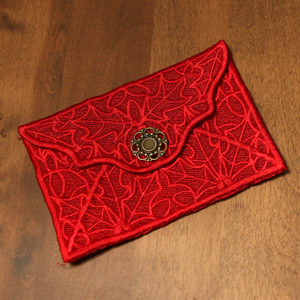
For any occasion, or no occasion at all, these lovely lace envelopes make a beautiful gift in themselves.
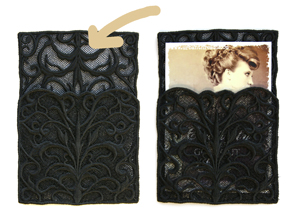
The Damask Envelope is another option for dressing up photos, invitations, greetings, and gift cards. The open pocket design makes it easy to slide your messages in!
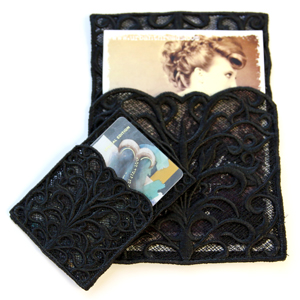
This beautiful lace piece will charm any recipient! Stitch this envelope in a variety of colors with fun buttons, and get creative with your stationery -- there's no wrong way to do it.


