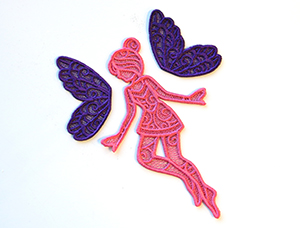
Flutter away with this delicate freestanding lace fairy! Easy to assemble and oh-so-rewarding, this design is great for ornaments, magical gift tags, key chains, and more.
Supplies
To craft your freestanding lace 3D fairy, you will need:
- Fairy in Flight (Lace) embroidery design
- Heavy duty water soluble stabilizer, such as Vilene or Sulky Ultra Solvy
- 40 wt. rayon thread for your embroidery
- Hand sewing needle
- Tapestry needle
- Hot glue gun and glue
- Scissors
- 1/8" wide ribbon
Designs Used
Begin by stitching the three pieces of freestanding lace onto heavy duty water-soluble stabilizer using 40 wt. rayon thread for best results. Once you're done stitching, rinse and dry each piece completely. (Here's more on stitching freestanding lace).
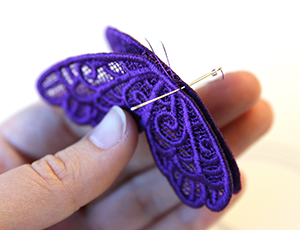
Using a hand sewing needle or a zig-zag stitch on a sewing machine, sew the two wings together along the straight side. Make sure that when the pieces are laying flat side by side, that the right side of both lace pieces is facing the same direction.
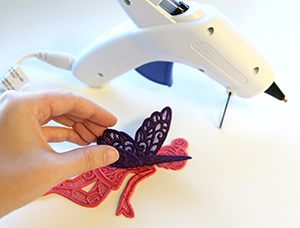
Next bend the wings to the desired angle. Using a hot glue gun, adhere the bend where the wings meet to the fairy's back. Make sure that the right side of the lace wings is against the wrong side of the lace fairy.
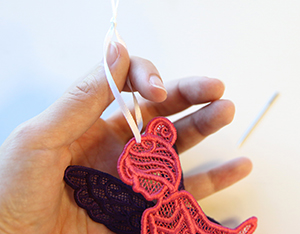
Finally cut a piece of ribbon between 4"-7" long, and use a tapestry needle to thread it through the top of the Fairy's head. Tie the ribbon into a loop to make it into a hanger.
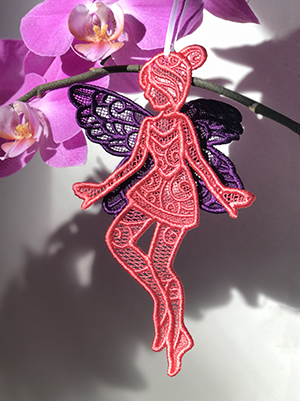
Your freestanding lace fairy is ready to hang on indoor flower gardens, as an ornament on a tree, or even as a gift tag on a present! The possibilities are limitless!


