Christmas is in the air, and the time has come to trim the tree! Those classic round ornaments are something we probably all have stored away with our Christmas decorations, but did you know with a little added lace, they can become magical hot air balloon ornaments and sparkling ornament covers? A delicate lace cover trim your tree in this whimsical delight, with just a bit of that elegant Victorian flavor we love around here.
Supplies
So, what do you need to make your adorable ornament cover?
- A round bauble ornament. The one I’m using here has a 12.5-inch circumference -- that is what best fits the largest size of each design. The medium size works best with an ornament with a 10-inch circumference, and the smallest size works with an ornament with a 7-inch circumference.
or design - Heavy duty water-soluble stabilizer
- 1/8 inch wide ribbon
- Needle and thread for hand-sewing
For the Hot Air Balloon Ornament, you will also need:
- 100% cotton thread (30-50 wt.)
- Jewelry clipper and grip
- Jump rings
- Matching chain
For the Celestial Ornament Cover, you will also need:
- 100% cotton thread (30-50 wt.)
- Metallic thread (40 wt.)
Designs Used
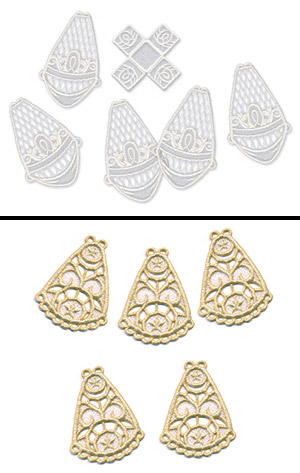
Now, the first thing we need to do is stitch out the lace pieces. Remember to use the threads recommended in each designs' thread list, and to stitch one piece per hoop, in the smallest hoop possible for best results. (See these instructions for details on how to stitch freestanding lace.)
For the Hot Air Balloon Ornament, you will need one basket piece, but the number of balloon cover pieces may vary depending on your ornament size. For example, for the large size of this design, you’ll want to stitch 5 balloon cover pieces for a 12.5 inch ornament. If you have an ornament with a circumference other than 12.5", 10", or 7", you may stitch more or fewer balloon segments to better accommodate slight size differences. (See the descriptions for the large, medium, and small ornaments for the exact widths of each segment.)Remember to use cotton thread with this design!
For the Celestial Ornament Cover, you will need 5 wedge pieces, stitched using cotton thread and metallic thread.
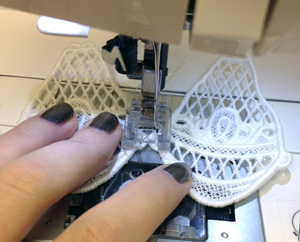
So, once you have your lace pieces all ready to go, we’ll need to stitch the cover pieces together in a big loop. This can be done by hand or very easily on a sewing machine. A few small zigzag stitches connecting each piece at the small side loops is usually enough to keep them together.
Remember, stitch them in a chain, but then you’ll need to stitch the first one to the last one, to create a full loop.
If you're stitching the Celestial Ornament Cover, this is what it will look like before you stitch the last two end pieces together to create your loop.
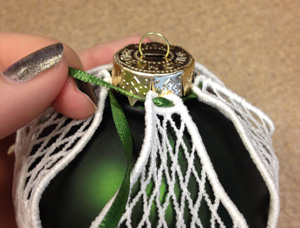
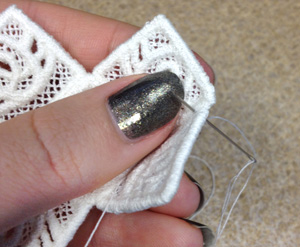
With your pieces stitched together in a loop, slide them over your ornament piece. To get them to all come together at the top, cut a piece of ribbon, and lace it through the top loops of each lace piece, like shown. When you have it laced through all of them, you can cinch it tight to get them to all meet at the top.

With the ribbon pulled tight, tie it in a decorative little bow. This is your balloon cover.

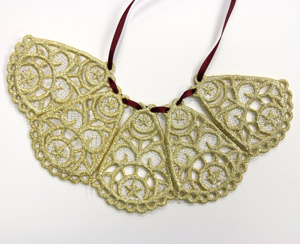
This completes the Celestial Ornament Cover! It's ready to adorn your tree in a variety of glittering colors!
Now, if you are stitching the Hot Air Balloon Ornament, we just need to assemble that little basket! Getting this little piece under the sewing machine is a little fiddly, so I stitched it together by hand. Using matching thread, pull the sides of the basket upwards and stitch them together.
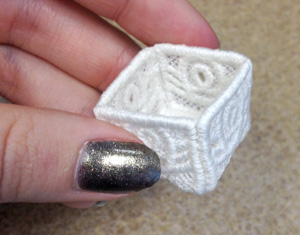
This is what your little basket should look like when you’re done!

We need to connect our basket to our pretty balloon. Technically, there are lots of ways you could do this, but I liked the idea of little chains.
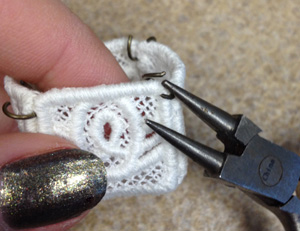
Start by adding a jump ring through the bottom parts of each lace piece. Then attach a small length of chain to each ring. Make sure these chain pieces are all the same length.
Next, attach the same number of jump rings to your basket. Depending on the size of your lace design, you can have 5 or more pieces. Basically, just evenly space your selected number of rings out around the basket, so it hangs level underneath your balloon.
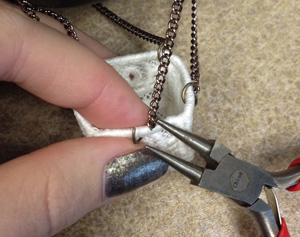
Connect those dangling chains to the jump rings on the basket.
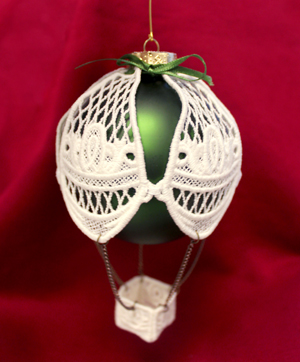
You’re done! Lift your ornament up by its hanger, and your balloon lifts off to life! The lace cover has now transformed it into an adorable Victorian accent. What’s fun is this can be done to any round ornament, and leaves the ornament totally unaltered and unharmed. You can easily slip off the lace cover if you change your mind later.
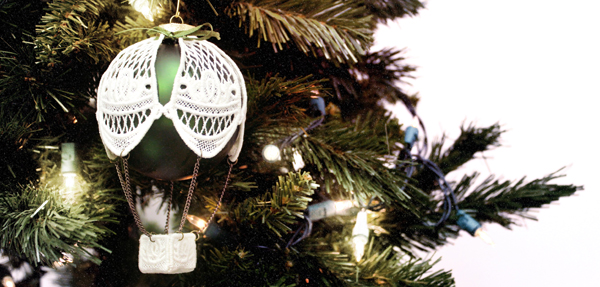
You can leave it simple and classy like this, or go nuts with more chains, charms and decorative accents. Add jewels to the lace, hang beads from the basket. You can even dye the lace. Let your ornament be as personal as you are, and let these special accents shine on your tree all through the holiday season.


