Freestanding lace is so spiffy. It can be used to make so many things, from masks to ornaments and more. Well, with the autumn season here, it of course had to be used to make one of fall’s favorites: a pumpkin! If we were feeling super trendy we would call this pumpkin spice lace, but that might be a little hipster even for us. Still, if you buy one of those Starbucks lattes and accidentally spill it on the lace - bingo! Pumpkin spice. So, spice or no spice, here’s how you can assemble your little lace pumpkin to craft a patch of autumn fun all to yourself.
Supplies
You’re going to want your lace pieces from the pumpkin design already stitched out. In this case, that would be six pumpkin sides, two pumpkin tops, and a stem. Check out these tips on stitching out great freestanding lace. For this assembly, you’ll also want:
- Your sewing machine. Much handier than hand-sewing everything.
- A needle and thread, because your machine can’t do everything
- Hot glue, because there are some things you don’t even want to try with a needle and thread
- As an extra bonus to help your lace get that perfect pumpkin shape, some scrap paper and maybe even some spray starch can help.
Designs Used
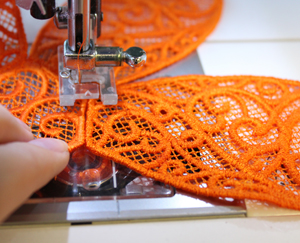
The easiest way to get all your pumpkin pieces to line up perfectly is to start with them all attached to one of the bases.
Make sure you orient all your pumpkin panels the same way on the base; they won’t fit in perfectly if they’re upside down.
I used my sewing machine with matching orange thread, and stitched them in place with a small zigzag stitch.
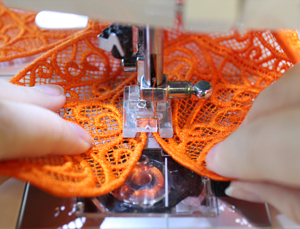
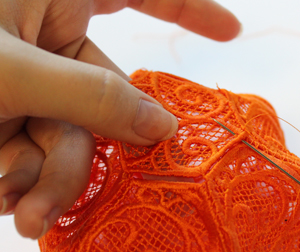
Once you have all your pumpkin pieces “petaled” out from one base piece (a bit like a flower) you’re then going to want to start attaching the panels to each other.
Start your stitching at the base, and push your panel pieces together with both hands as you stitch with your zigzag. You’re going to find your lace starts to curve upwards, which is just what we’re going for in a pumpkin shape.
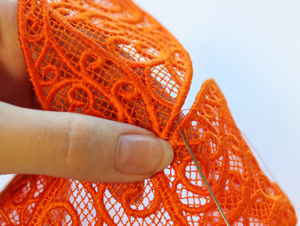
With any luck, you’ll be able to stitch all but your last pumpkin panel in place with your machine. For that last pumpkin, hand-stitching is the cleanest option. If you’re not feeling up for it, hot glue works too.
So! it’s starting to look like a pumpkin. You’ve got all your side panels stitched to one base. Now we need to close up the top.
(Technically, you could leave your pumpkin as is, in which case it makes a pretty cool little pumpkin votive holder for those little battery lights.)
Start attaching the top piece on by anchoring a few of the corners. If you want to use my super sneaky trick for getting a perfect pumpkin shape, leave one end open like a flap for now.
On those few corners you’ve anchored, you can then stitch the sides shut by hand. The anchoring helps to keep the top panel from shifting around while you’re sewing.
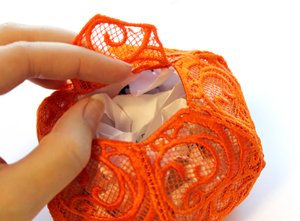
Here’s that super sneaky trick for getting a great pumpkin shape...
Grab your scrap paper and tear it into little strips. Wad up these little pieces of paper, and slowly stuff your pumpkin full with them. I find paper works a little better than softer material, you can force edges and corners out a little easier.
If your lace still happens to be damp from soaking, this will work perfectly on its own. If you lace is dry, spray it a few times with spray starch after it’s stuffed. Then let your pumpkin dry.
Once your pumpkin is dry, you should be able to remove the paper and the shape it was holding will stay in place. The pumpkin has a pretty good shape on its own, but in case you lace gets a bit finicky, this is a great way to get your pumpkin back in line.
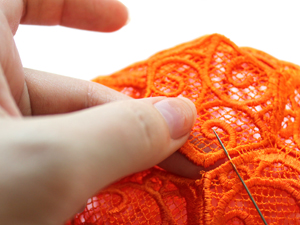
Once your pumpkin is free from its stuffing, you can finish stitching the top closed.
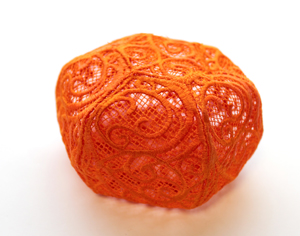
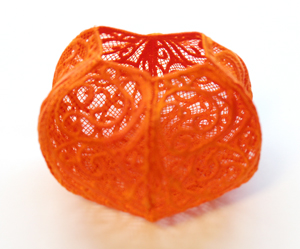
Ta da. A lace pumpkin.
Or a weird orange beach ball. Depends on how you look at it. However, it just needs one more little thing...
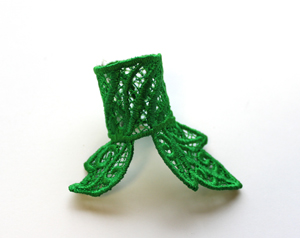
A stem! Wrap your lace stem in on itself so it makes a tube, like so. You can sew or hot glue the two ends together.
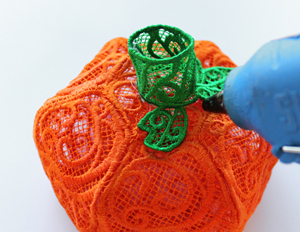
Finally, you can stitch or hot glue your stem in place.
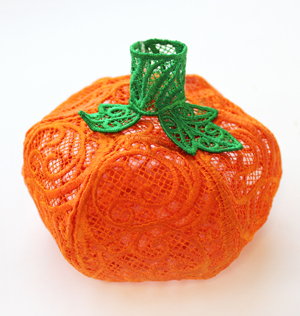
Your pumpkin is complete! You can make a whole patch for the holidays, to decorate around the house all the way into the Thanksgiving season.


