The days have gotten cooler here, and I’m noticing fall colors are starting to show here and there... including in my fabric stash!
OK, it’s probably just because I’m loving reds, yellows and oranges right now, but I’m really loving all the rich hues I find in my fabric stash and I have a great way of using them up.
Projects that use up fabric scraps are some of my favorites. You can use up some of those wonderful swatches you didn’t have enough of for a full project and celebrate the vibrant colors of autumn! Add a little bit of seasonal lace to your scraps, and you can make yourself a shabby chic garland worthy of any season.
Supplies
- Lots of colorful fabric scraps
- Scissors
- String
- Water-soluble stabilizer
- Seasonal lace leaf embroidery design (I used the small 4x4 size)
- Tape, if you like
Designs Used
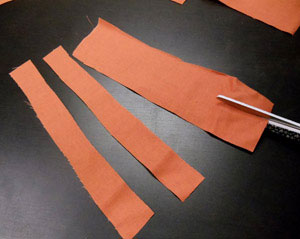
The garland itself is very simple to make. It’s basically a lot of fabric strips tied around a string. So, what you’ll need first is lots and lots of strips of fabric.
Start by measuring out strips about 6-8 inches in length and about an inch wide.

Continue cutting up your scraps till you have a nice big pile of fabric strips. Have fun mixing up colors and weaves. As well as bright fall golds and yellows, I mixed in some earthy creams and linen type fabrics, and even some shiny gold fabrics to give it some flash.

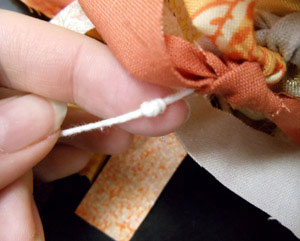
So, cut a length of string as long as you want your garland, leaving a little bit of length at the ends for tying. Tie a knot in one end. If you like, you can tape that end to your working surface to make tying the strips easier.
Start tying your strips onto the string, keeping the knot centered and even. I try to keep the colors similar as I move up the string, so they kind of blend one into another.
When you’ve worked up far enough on the string where you’d like to add an accent, it’s time to make some lace!
Lace leaves are perfect for adding a little seasonal flair, so let’s add a few to the garland!
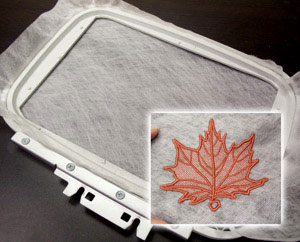
Hoop up a piece of water soluble stabilizer, and be sure to wind a matching bobbin of your chosen color. Stitch out your little lace leaf design.
I would recommend once you have the embroidery machine set up stitching, you should keep it sewing out more leaves as you tie more strips on the garland.
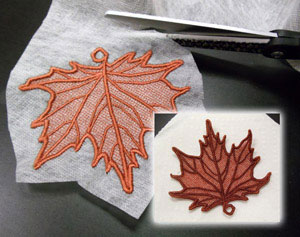
Once your leaf is stitched, cut away as much excess stabilizer as possible, and then soak it according to your stabilizer's instructions to remove it from your leaf. Pat your leaf dry. You’ll notice as it dries your leaf will start to curl a bit. Place it under a book or other heavy object to let it dry straight, or if you like the natural look the curved edges bring, let it air-dry normally.
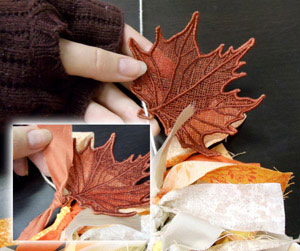
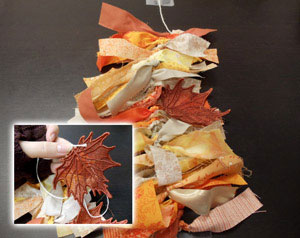
When you get to a point where you’d like to add a leaf, loop the end of your leaf onto your string and slide it down next to the last fabric strip.
To secure it in place, tie another strip on the other side of the leaf.
Continue adding strips until you get to a point where you’d like to add another leaf, slide it on, and continue adding as you like.
Keep going until you’ve got it as long as you like, or you run out of fabric!
To finish it off, tie another knot at the other end.If that’s not secure enough, you can tie a loop or tie it
on a ring to help with hanging.
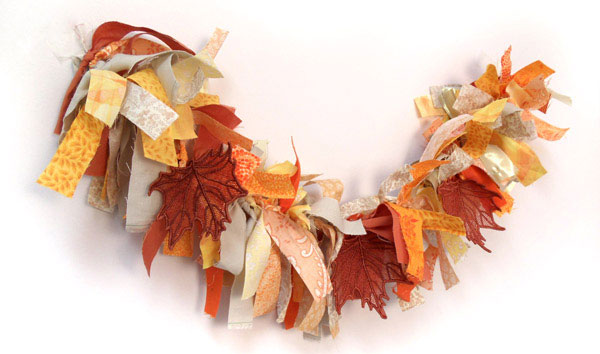
Your new shabby chic garland! Bright fall colors and elegant lace leaves make it cute and classy all at the same time. It’s perfect for adding a little rustic romance to your fall decor.
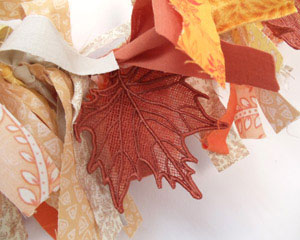
The lace leaves are perfect for adding a decorative but natural element to any of your fall decorations. These lace leaves can be added anywhere, not only on handmade garlands, but just hanging in windows or added to a beautiful fall wreath!
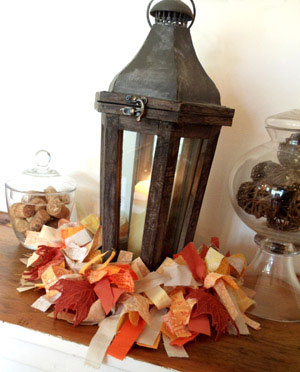
Your new garland can be hung up, or wrapped up around other decorative accents in your home to give them a seasonal flair.
A rustic lantern wrapped in the shabby chic garland suddenly becomes a great fall accent. Use up all your favorite fabric scraps and add a charming accent to welcome the autumn season!


