The real question is, what can't you do with a little lace top hat? Stitch yours in any color you like, adding any embellishments you please. Wear it as part of a costume or just a fancy outfit, add a loop and hang it as a festive ornament, stick it on top of your favorite stuffed animal ... the possibilities are endless! Here's how to build your own adorable freestanding lace hat, using your embroidery machine and a little creative flair.
Supplies
To make your mini lace top hat, you'll need:
- Lace top hat machine embroidery design. There are two similar versions available: the Tiny Top Hat (shown in black) consists of lace pieces no larger than 5" x 2.83", and the Dapper Top Hat (shown in red) consists of lace pieces no larger than 2.83" x 3.58". Both will assemble to make similarly shaped hats about 5" wide. There's also a taller Topper hat (shown in purple).
- Heavy water-soluble stabilizer, such as Vilene or Sulky Ultra Solvy
- Hot glue gun
- Hand-sewing needle, and thread to match your lace
- Any decorations you'd like to add to your hat -- ribbon, feathers, gems, up to you!
- Hair clip, bobby pins, or headband
Designs Used
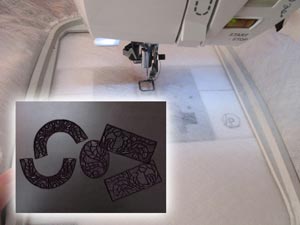
Start by stitching out your lace pieces onto heavy water-soluble stabilizer -- there will be five for the Tiny Top Hat, nine for the Dapper Top Hat, and six for the Topper. See this tutorial for more information on stitching freestanding lace. Once you've rinsed out the stabilizer and let your lace dry, you're ready to start assembly..
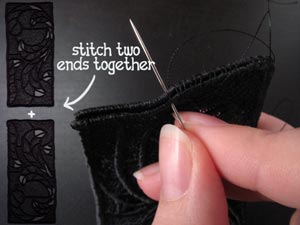
Firstly, grab your rectangular pieces for the sides of your hat -- two pieces for the Tiny Top Hat (black), and four pieces for the Dapper Top Hat (red) and the Topper (purple). Also grab your hand-sewing needle and thread. Hold your pieces short ends together, and sew them together.
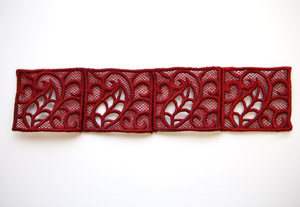
When you're done, you should have a long strip of lace that looks something like this.
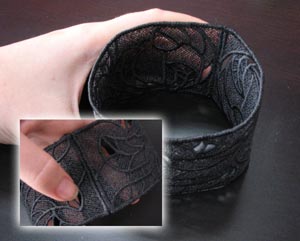
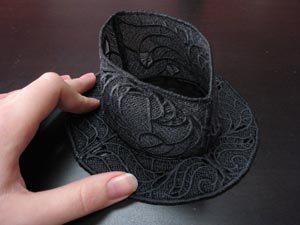
Curl your lace around, right side out, and stitch the free ends together. You should now have a fancy lace tube.
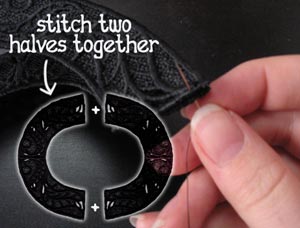
Now for the brim of the hat. Again, there will be two pieces for the Tiny Top Hat, and four pieces for the Dapper Top Hat. Stitch the pieces together, as shown, to make a ring of lace. I laid the two on top of each other, stitched the edges together, and then opened it up again.
The Topper hat has a one-piece brim, so you don't need to stitch anything together.
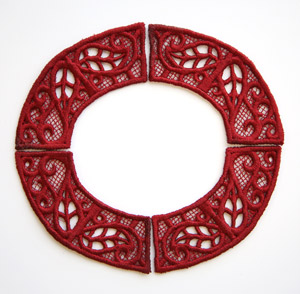
For the four-part brim, take care to line up the pieces exactly as shown -- with each end touching a matching end. Your finished brim should be in a slight oval shape.
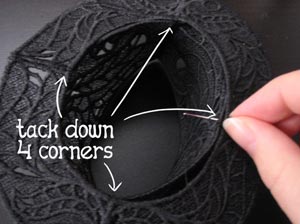
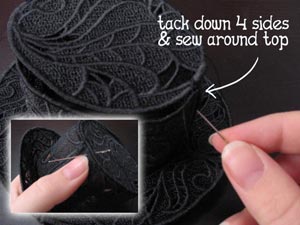
Now, the somewhat trickier part, stitching the loop to the brim. I found the best way to do it was to place the brim on top, and then tack down the four corners around the loop, so that you know that everything is going to line up properly when you stitch it all together.
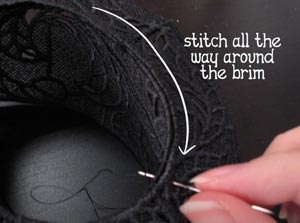
Once you have it tacked down, you can stitch all the way around the brim.
Ta da! It’s starting to look a bit more like a hat now. If you like, you can dab a bit of hot glue on the stitches and around the edges to make sure everything holds tight.
Now for the finishing piece. Much like the step before, place the top oval on top of your hat, and tack down four corners, then stitch all the way around the top of the hat.
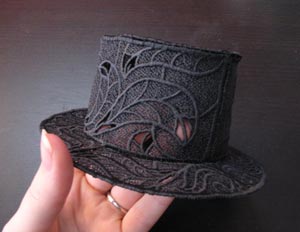
Your hat is fully constructed! Look how dandy it looks. But wait, we can make it so much dandier! Let’s accessorize!
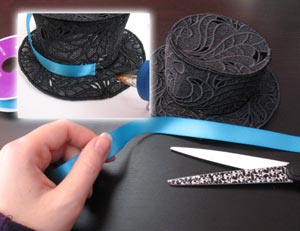
Grab your ribbon, and cut a piece that’s long enough to wrap around your hat.
Heat up your glue gun, and glue one end to your hat, just above the brim. Keep in mind where the overlap of the ribbon will end up, because that will be where we add all our flourishes. I placed mine just a bit off to the side of the front.
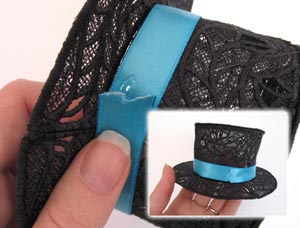
Finish gluing your ribbon in place. It looks dandier, for sure, but we’re going to want to cover up that raw ribbon edge.
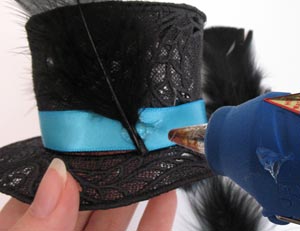
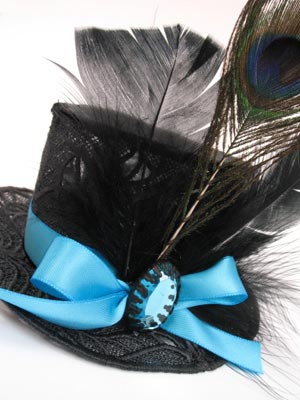
Grab your feathers! Place a bit blob of glue over that raw edge, and place one of your black feathers there.
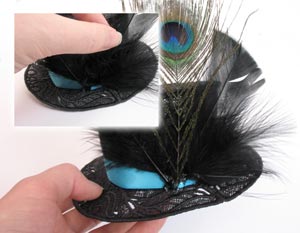
Add a little more glue, and add as many feathers as you please. I added three fluffy black feathers, and one pretty peacock feather for good measure.
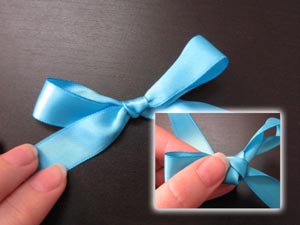
Now cut a piece of ribbon and tie it into a cute little bow.
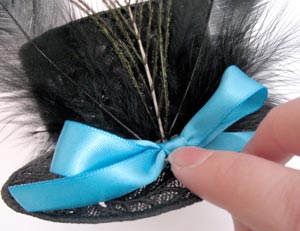
Place some more glue where the bottom of your feathers are, and stick your ribbon in place.
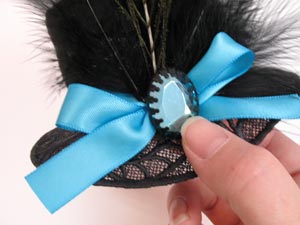
One more dab of glue, and you can stick your pretty jewel in place. This was originally a pendant; I used a wire cutter to removing the hanging loop.

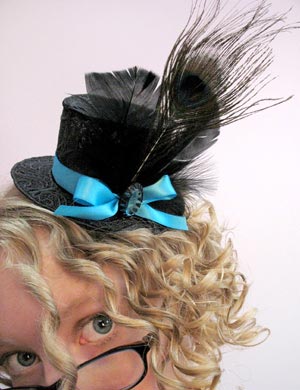
As a finishing touch, you can add what you want in order to secure your top hat to your pretty little head. My solution was as simple as hot gluing a hair clip to the underside of the brim. You could also glue it onto a thin headband, or if you don’t want to glue anything to your top hat, use some bobby pins to keep it in place.
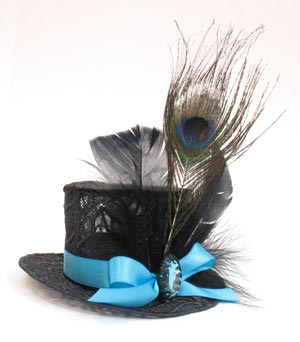
Your pretty little hat! Cute and elegant and oh so noir, a little lace hat is just a darling way of dressing up your most extravagant of outfits. Use it with a cute cocktail dress for a night out, or dress up your burlesque best for Halloween.
Best of all, all it took was some time with your embroidery machine, some ribbon, and a few feathers, and you have an absolutely fabulous hat! There’s no end to the ways your can customize it. Make one to match every outfit!
There really isn’t anything freestanding lace can’t do, including making fabulously dapper accessories. Flaunt your new fancies, after all, you made it entirely yourself!


