We’ve all played dress-up at one point in our lives or another. Who hasn’t wanted to play pirates? OK, maybe just I wanted to play pirate. But we all wanted the cool hat. Don’t deny it.
Want to make your own awesome little pirate hat from scratch, using the magic of your embroidery machine? Follow along and I’ll show you how.
Supplies
To make your tricorn hat, you’ll need:
- Tricorn lace hat embroidery design
- Water soluble stabilizer
- Spray-on starch
- Hot glue
- Needle and thread, or fabric glue
- Scissors
- Ribbon
- Feathers
- Charms
- Scrap paper
Designs Used

We’ve done a few freestanding lace projects, so I’ll spare you the excess details. You can check out our gothic lace tutorial or the lace top hat for a refresher. Hoop up some water-soluble stabilizer, wind a matching bobbin, and stitch out your four hat pieces. Two pieces for the brim, two mirrored pieces for the hat.
There are a couple of different ways to put your hat together. You can glue it, stitch it by hand, or use your machine.
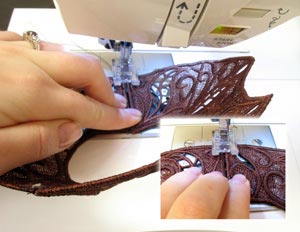
I started with the brim pieces. Stitch one end together. When you stitch the other ends together, your hat will bow up a bit, like shown. Remember, you can also glue ‘em or stitch them together by hand. Try to use thread that matches the hat as closely as possible.
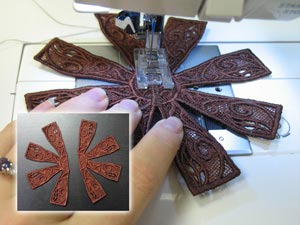
You’ll also need to stitch together your two hat pieces. Line them up together and stitch a short stitch down the middle.
Now the fun part... attaching the bowl hat to the brim!
You can stitch it together by hand...

Or you can glue it. I found it easiest to glue together a few pieces together, then start gluing them into the brim.
The way the hat is designed, the flaps from the top piece don’t all need to be touching to fit into the brim. It’s best if you leave a very small gap between each piece to fit it in evenly.
Work your way around the brim, gluing as you go, until your hat is all put together. If you stitched it, you’re ready to move on; if you glued it, let it sit and dry for a bit.
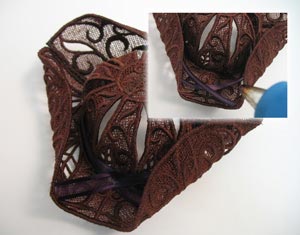
Now, to get the nice curvy brim of the tricorn hat, we’re going to starch it in place.
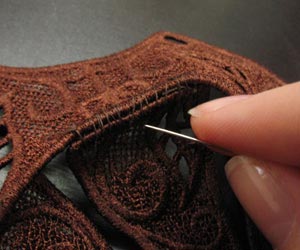
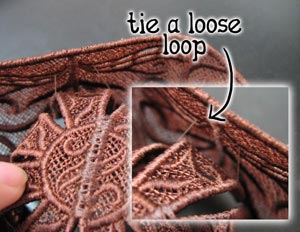
To start, take your needle and thread, and thread a loop through the top edge of one of the brims and tie it to the top of the bowl of the hat. Do this for all three corners. These should be nice and loose, they’re just to help hold the hat in place for starching.
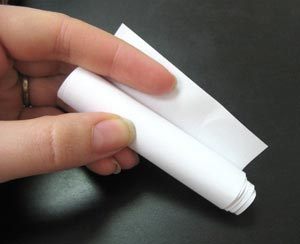
Now cut a small strip of scrap paper and roll it up into a little tube. Make three little tubes like this.
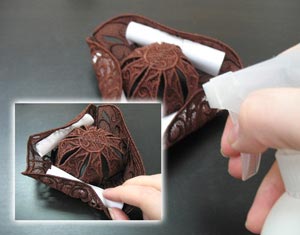
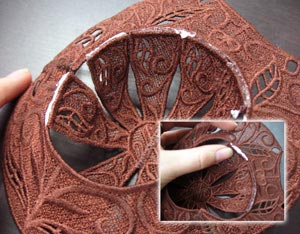
Carefully slide these tubes underneath the spot where you tied the threads, like shown. The thread will keep the hat corners in place, but the paper will give them a nice rounded shape.
Give your hat a nice coating of spray starch. No, I didn’t actually do it on my desk, it just photographed better there. Don’t do it on your desk either. You may have to coat it a few times to get the stiffness you need. Let your hat dry.

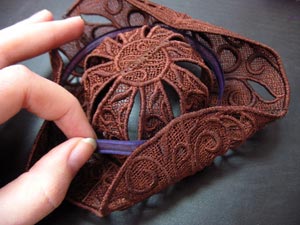
Once your hat is dry and ready to go, you can remove your paper tubes and clip the thread that were holding the brims in place. Your hat will keep its nice curvy shape all on its own now!
Now let’s dress it up a bit! Cut a long loop of ribbon, enough to go around your hat with a little excess. While you’re at it, you might want to plug in your glue gun to warm it up.
Glue the ribbon in place around the brim. I crossed the excess over at the front and glued it in place, but if you like you can just cut the extra ribbon off.
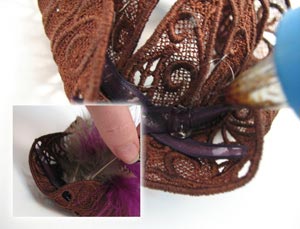
Put down a big spot of glue and place in your feathers. Really big ones. You want a fancy hat, don’t you?
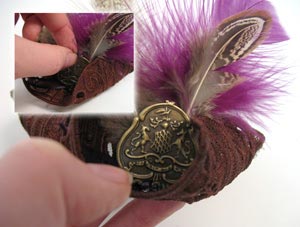
Finally, put another dollop of glue down and place your charm in front of your feathers. You can add whatever else you like, but my hat is all done!
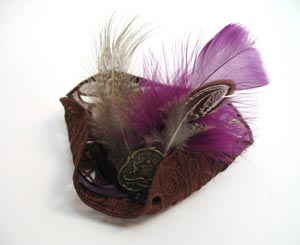
Sail the high seas in your awesome tricorn hat! Stitched entirely by you, decorated by you, and made awesome by you!

So awesome in fact, that a certain fanged bunny might be entertaining thoughts of being a pirate himself...
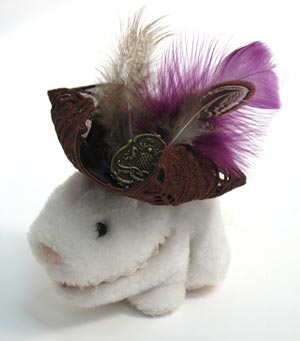
All hail Commodore Craft Bunny! Enjoy your new awesome tricorn hat, and swash and buckle your way to your crafty heart’s desire!


