Take flight with a pair of freestanding lace wings! Stitched onto the back of your favorite garment, these fluttering embellishments give a sultry and sassy new look.
Supplies
To craft your freestanding lace landmark, you will need:
- Graceful Wings (Lace) embroidery design
- Heavy duty water-soluble stabilizer, such as Vilene or Sulky Ultra Solvy
- Rayon embroidery thread (40wt.)
- Hand sewing needle
- Fabric tac/glue
- Scissors
- Shirt you'd like to embellish
Designs Used

Begin by stitching the twelve pieces of freestanding lace onto heavy duty water-soluble stabilizer using 40 wt. rayon thread. Hoop each piece individually, in the smallest hoop possible, for best results.
The total stitch count for the large wings is approximately 205,284 stitches, though the most you will stitch at one time is 28,074 stitches. The smaller wings have a total stitch count of 137,462 stitches, with the largest piece coming in at 19,211 stitches.
Once you're done stitching, rinse and dry each piece completely. (Here's more on stitching freestanding lace).
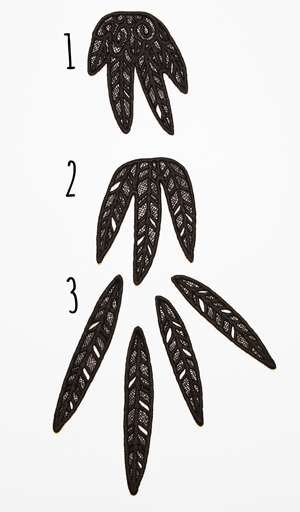
Here is the basic order for layering each wing piece. Start with #2 resting underneath #1 and your single feathers resting underneath #2.
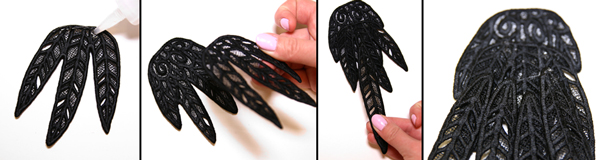
Next, use either glue or a hand sewing needle to adhere the wing structure together.
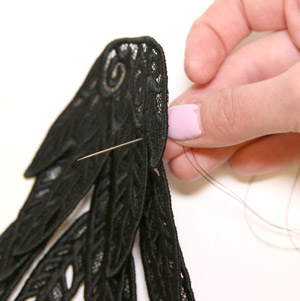
After the glue was dried (overnight), I added a couple hand stitches to make sure each feather sits securely.
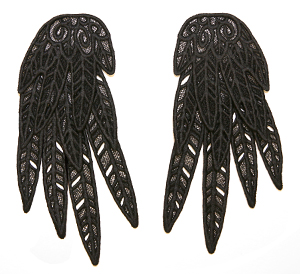
Here is what each finished wing looks like!
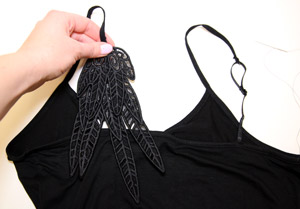
Finally, hand stitch your wings onto your favorite tank or top! Remember, if you have adjustable straps to try your shirt on first and adjust the straps accordingly -- after you stitch your wings on, you won't be able to adjust the length anymore.
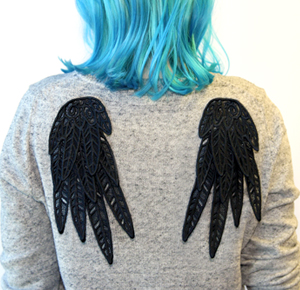
These graceful wings add intrigue to any top! Play around with the positioning and number of feathers to get your own unique look.
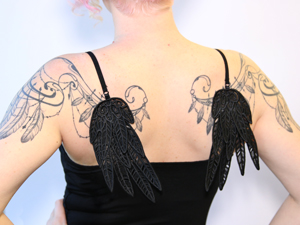
Sultry and sassy, or classy and chic -- you decide the look with placement, color, and how you style it!


