Designs Used
The laptop.
Tool of both the uber geek and the uber chic, and the uber geek chic. It used to be computers were nerdy, but when walking through college campuses now, you can hardly go anywhere without seeing hipsters sipping coffee while tapping away on their laptops.
When I decided to go abroad during college, I needed a laptop so my digital art could go mobile, and laptops and I have been inseparable since.

I work on a desktop while working on Urban Threads in the office, but when working at home my computer domain is all about my little Mac. It’s been good to me, I’ve decided now it’s time for me to be good to it. Too long it’s been toted around without the protection of a case.
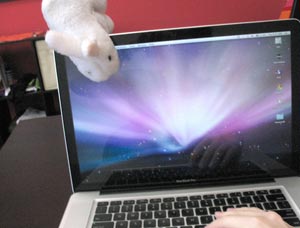
There are a lot of things out in the world that might do harm to your precious computer. One of these may be fanged bunnies, but usually that’s more my problem than anyone else’s. Scratches, bumps, and spills are usually more common ailment than bunny fangs, but all can be prevented with a case.
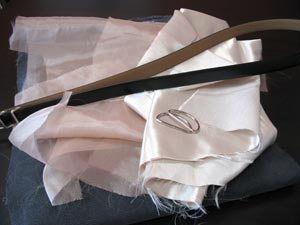
So, to make your laptop a snuggly cool case, you’re going to need some cool fabric for the outside, some soft, non-scratchy fabric for the inside, and some sheer fabric, (like organza) for a fun peek-a-boo effect. You’ll also want some regular stabilizer and water soluble stabilizer, two D-rings, and a thin belt. The belt can be leather, but make sure it’s not so thick that you can’t sew through it. I found a nice skinny one.
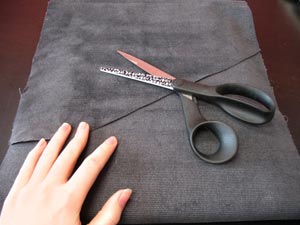
Since laptops do vary in size quite a bit, from brand to even model type, you’re going to have to measure your laptop. No point in making a custom case if it’s not customized to your computer, right?
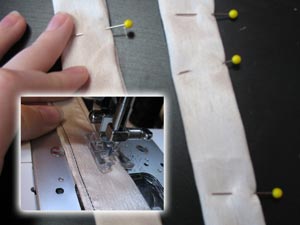
We’re going to be all different and cool and make a sideways laptop case, so what I’m measuring in the picture I’m calling the width. To get the width of your fabric, measure the width of the computer, and add at least 1 1/2 inches to each side. We need plenty of breathing room because we’re going to stitch a seam twice and lose at least two of those inches of width to seam allowances.

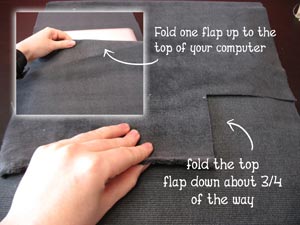
For the height of your fabric, I find it best to use your laptop to get the best measurements. Place your laptop on top of your fabric, and fold up one flap until it comes just to the top of the computer. Then fold the top flap down about 3/4 of the way. You can actually fold the top flap down as far as you like, it all depends on the look you want, but make sure you leave enough room to add our buckle closure. 3/4 is probably as far down as you want to go.
Once you have these measurements, add an inch for seam allowance.
To add some interest and leave some room for our fun see through window, I cut my flap at an asymmetrical angle. Plus, I had a wonky bit of fabric missing. Odd things like this guide my design choices more often than you’d think.
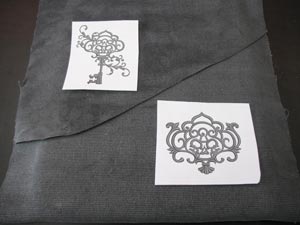
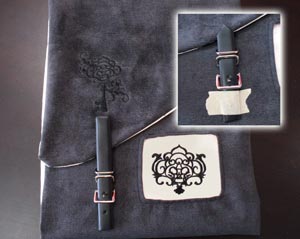
I thought it would be cool to use our skeleton key and keyhole designs as a way to make my design at least look stylishly secure. Embroidering a lock on my bag may not do much, but it looks pretty cool.
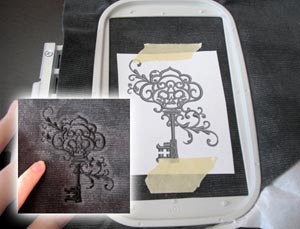
The top key design will be embroidered directly on the fabric, but the bottom lock design will be embroidered on our transparent fabric, as a small peek-a-boo square. I laid out the designs to mock up where I wanted them. I left room on the left, under the key, for my buckle closure. I taped the key design in place, and left a taped “x” mark for where the keyhole design will go so I’ll know for later.
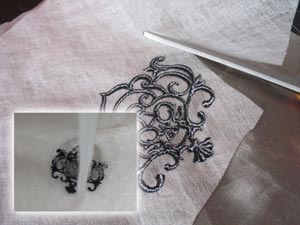
Hoop up the design you’re going to stitch on the cover with regular stabilizer, and stitch away.
Now for the peek-a-boo piece...
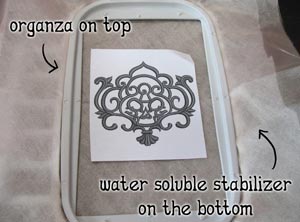
Take a piece of water-soluble stabilizer, spray it with some adhesive, and smooth your transparent fabric on top of it. We’re going to essentially do what we did with our floating embroidery tutorial on a slightly smaller scale.
Hoop up your fabric and stabilizer, and embroider it as usual.
When your design is finished embroidering, cut off as much of the stabilizer as possible, so there’s less of it to dissolve. Don’t trim the fabric at all – leave as much excess as you can so it’s easier to sew later.
Follow the directions of your water soluble stabilizer to remove it. I ran mine under warm water for a few minutes, and then patted it dry.
This is my design after it was dry and ready. Set it aside for later.

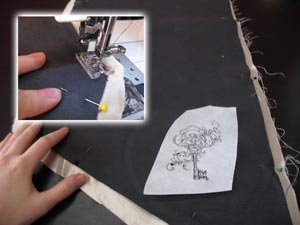
Lay your cut out cover fabric on top of your lining fabric, and trim around it, so you now have your two matching pieces of fabric for your laptop case.
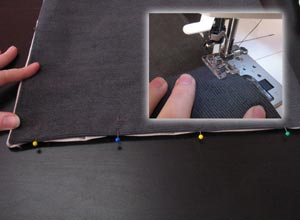
Pin the two pieces of fabric together, right sides in, and sew a seam around three sides, leaving the bottom of the cover (the flat side, not the asymmetrical side) open so we can turn it right side out.
Once you’re done sewing, turn your cover right side out again, and push out all the corners. Take the open side, and fold the raw edges in, pinning them in place. Sew a seam down that side to sew your cover fabric shut.
Now it’s time to make our little see-through window...
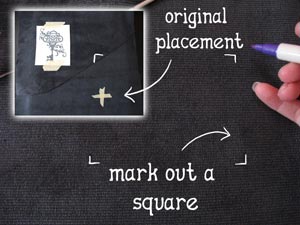
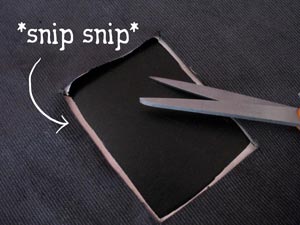
Remember the original placement of your designs? Use your marking to help you draw out a square. You want your square to be large enough to “float” our design inside, but not larger than the fabric you’ve stitched it on. Mark your square out a little bit smaller than you intend it to be, since we’ll have to widen it when we sew the fabric window in.
Cut out your square through both layers of fabric, and then snip in the corners so you’ll be able to fold the raw edges under. Take your keyhole design you stitched on the organza, and slip it in between the two layers.
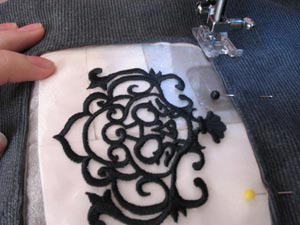
Fold the raw edges in on both sides, and pin them in place. This is sometimes easier said than done...
I found the easiest way to do it was fold the edges of the cover in first, pin them in place, and then flip it over to the back and pin the lining edges in place. When the two layers are folded in properly from both sides, you can place pins through both folded layers and remove the excess pins. This should mean you have a clean, folded edge whether you’re looking at the outside or inside of the bag.

Sew a 1/4 inch seam around the edges of your window, securing your edges and the organza fabric in place. Make sure your fabric is folded under enough to be caught by your seam.
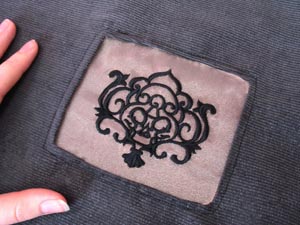
Your finished window! This fun peek-a-boo effect is a great way to add interest to your projects, and if you’ve got a groovy hot pink laptop or something, it lets your personality shine through.
Now it’s time to give our bag a way to stay shut. Lock and key designs are fine, but are somewhat superfluous to actually keeping the thing closed...
Grab your belt (make sure it’s not too large, and thin enough to be sewn), and loop it shut on its loosest setting. Now snip the back section off, giving yourself about 5-6 inches of belt. Set the rest of the belt aside, we’ll use it as our laptop strap later.
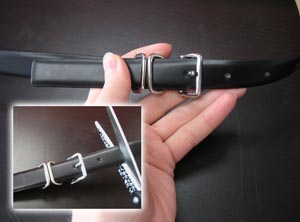
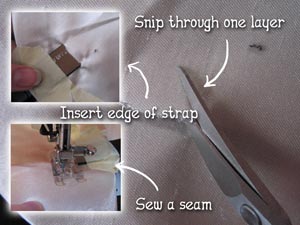
Place your belt buckle where you think you’d like it on your case. Since I’m going with the whole asymmetrical thing, mine ended up on the side. Once you like the placement, tape down either side of your buckle so you can sew it in place. You want to make sure that when you close your flap, your straps are close enough to buckle together properly.
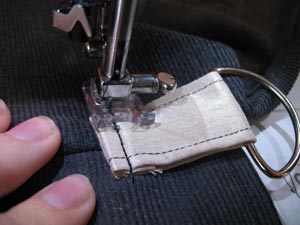
To secure your strap, snip through one layer of fabric, slide the end of the strap about 1/4” inch in, and sew a seam to secure it in place.
I sewed the top buckle to the inside of the cover flap, and the bottom strap to the front of the cover.
Now we need to sew the whole case together. Take your laptop and wrap it up in the cover again. Make sure your front flap lines up with the top of your laptop. Mark that spot with a pin so you can find it again without the laptop.
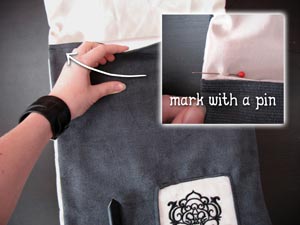
Fold your fabric the other way around, so the lining side is facing outward, and line it up with that marking you made with your pin.
You’re going to sew a seam around three sides of the bag. Starting on the bottom right, sew up the side, around the flap (so it has a finished seam and looks pretty) and continue down the other side. The bottom, of course, doesn’t need to be sewn, as it’s already folded.

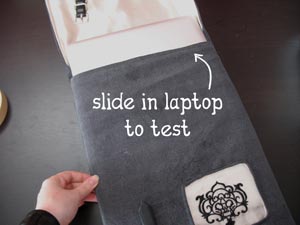
Now turn your case right side out again. Ta da! You now have a swank laptop sleeve. Slide your laptop inside to make sure everything fits properly. All we need to do now is add a strap.
First we need to make two loops to attach the D-rings. Cut two rectangles of fabric and fold them in on themselves to hide the raw edge. Sew a seam down either side so you have a nice finished strap.
We’re going to attach these on either side of the top, right along the seam. Fold the raw edges of the bottom in, (with the d ring inside) and sew a seam across to secure it to your bag. You might want to double stitch it for extra strength, because the last thing you want your nice new laptop case to do is drop your laptop on the floor.
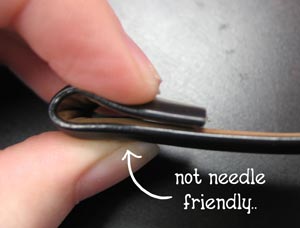
Now, it’s time to grab the rest of that belt and attach it to your bag. Only one problem... we can’t exactly fold the belt in on itself and sew it together. Your needle wouldn’t thank for you for that. It can go through one layer OK, but probably not two... so what do we do?
Instead we’re going to patch on a little strap that will hold the leather in place, so your needle only has to go through one layer of leather. Cut a strip of sturdy fabric (either matching your bag or matching your belt) that about matches the width of the leather.
Overlap one side of it onto the edge of your leather, then sew a seam. Then, wrap the excess fabric over your d ring and back under the leather, and sew the seam again. Stitch it a couple times for strength.

Finally, slide your laptop snug in its case, and secure it shut.
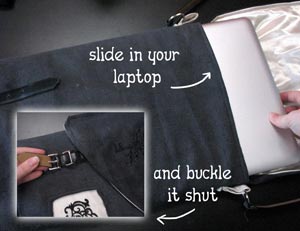
You’re done! Tote your laptop around in style with your skeleton lock and key case. Matching embroidery accents, peek-a-boo windows, and a recycled belt makes this bag one of a kind and unique!
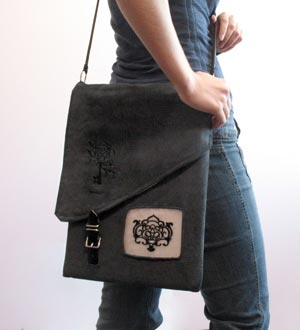
Now you’ve got a bag that’s customized just for you and personally sized for your laptop. Keep your most prized geek possession (other than your comic books and action figures, of course) snug and secure and safe from scratches. Your laptop deserves better, and so do you. Besides, being a computer nerd is cool these days, your laptop bag should be as hip as you.


