It's a classic. The popular combination of leather and lace ... and embroidery? Well, you might not think it, but embroidery and leather make a pretty cool combination. In fact, we've played with stitching on leather before, and we learned all it takes is a few tricks and special hooping techniques. Certain kinds of designs are also more leather-friendly than others. The plus side, though, is that leather is such a beautiful, raw material, that you don't need to add much to it after it's embroidered to make a pretty cool project. Say, for example, these super easy leather wrist cuffs.
Supplies
These wrist cuffs are just as simple to make as they are pretty to look at. All we need to make them is:
- Soft leather strips
- Scissors
- Temporary spray adhesive
- Cool, light stitching embroidery designs. Scribbles or running stitch designs work best. (I used French Script 1, Avian, and Ctrl-Alt-Delete.)
- Snap plier and snaps. These often come together in a kit.
- Lace, if you're feeling fancy. I often feel fancy on Fridays.
- Cutaway stabilizer
- Strips of cotton or other light fabric
- Leather needles (they will help minimize perforation of the leather, but they're not required)
Many folks ask where one might get leather like this. I got mine in a big ol’ bag of scraps at a leather store, you can also often find leather at specialty fabric stores. For this, thin but flexible cowhide is best. Thinner leathers like lambskin is often too soft and flimsy to hold up well to stitches.
Designs Used
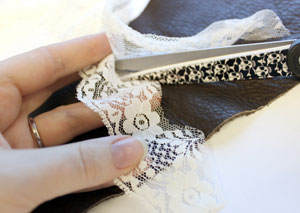
There are really all kinds of ways of dressing up your leather cuff, and one of the softer ways I like to complement the leather is with some lace. Lace will add visual interest to your cuff, but might also compete a bit visually with your light stitching designs, so it's great for a more subtle effect.
I found this cute lace edging in our scraps bin. I didn't want the hard edge on one side, so I carefully trimmed around the lace shape to get a scalloped edge on both sides.
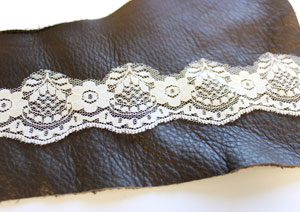
Find a piece of scrap leather large enough to stitch your design on, and long enough to go around your wrist. Lightly spray the back of your lace (if you're adding it) and smooth it down firmly on top of the leather strip. This will be enough to hold it in place, and our stitches will make it permanent.
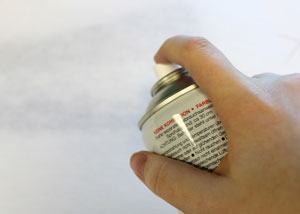
Hooping leather is actually easier than you might think. For one, real leather often has a more rough, raw side that takes to spray adhesive very well. Cut a piece of cutaway stabilizer larger than your hoop, and generously spray it with some adhesive. Or if you're smarter than me and want to avoid a sticky hoop, generously spray the back of your leather. That's a much better idea. Smooth your leather carefully over your stabilizer. You'll find it sticks pretty darn securely, and any edges not large enough to hoop are well and truly held in place for stitching.
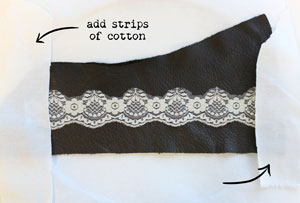
Now, though it is an admittedly creepy thought, leather is essentially skin, and doesn’t like to be scratched any more than your skin does. Because of its makeup, hooping leather alone can sometimes cause a permanent mark of “hoop burn,” where your embroidery hoop leaves an imprint. To lessen this a bit, cut some small strips of cotton (or something similar) and lay it on top of your leather where it will meet the hoop. This should help prevent the hoop from scratching up the surface.
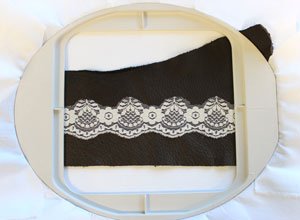
This is my leather strap all hooped up. The sides of the leather are held tight in the hoop, and the rest is stuck firm on the stabilizer with adhesive. It's ready to stitch!
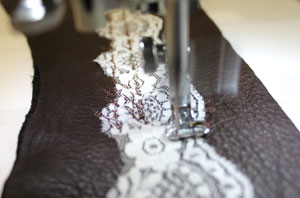
Going for a slightly romantic effect, I chose our French Script 1 design (6.8" x 2") to stitch across the lace.
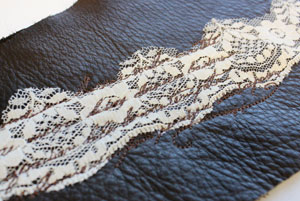
When your design is done stitching, remove it from the hoop and carefully cut away the excess stabilizer. Here it is all stitched out. It’s super light and pretty subtle, but I kind of like having the secret of the French love letter stitched within the lace, plus it has an amazing textural effect, especially in person.
Choose a bolder color to make it stand out, or remove the lace to just let the type stand alone.
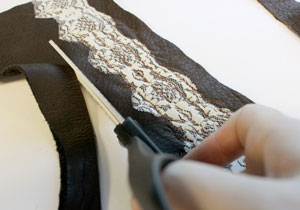
Unless you're going for a gauntlet effect, it's also probably best to trim down your leather a bit to more suit your wrist. Leave the leather and lace bits long for now, until you figure out how long it needs to be for your clasp.
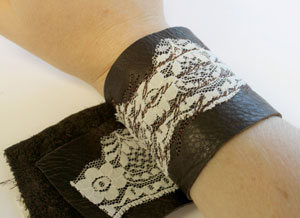
To figure that out, we use the totally scientific method of wrapping it around your wrist and mostly eyeballing it. We know we're going to be adding clasps for the closure, so mark one spot where you want the button clasp to go, and then see at what point it overlaps the bottom piece. Trim your leather just shy of those spots by about an inch. Leave the lace a little longer than the leather.
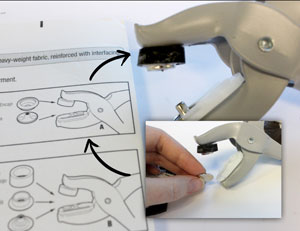
If you’ve never used one of these cool snap tools before, they’re pretty neat. You just need to put the right pieces on in the right order to add your clasp. Though I’ll walk through it here, I highly recommend following the instructions included on the back of your packet.
First I added the top piece, which involves sticking the shiny button top into the bottom of the tool, and the round spiky bit into the top. These are all technical terms I'm sure are used on the packet.
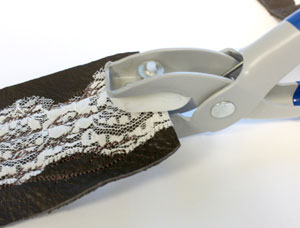
Before you add your first piece, wrap the edge of your lace (if you added it) around the end of the leather, so the end can be secured by the clasp. Place the tool over your desired spot and clamp down hard. You should be applying this so the shiny button piece will end up on the same side as your embroidery.
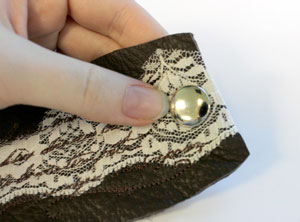
Ta da! A shiny little clasp, and now your lace is held in place too! Let's move on to the other side.
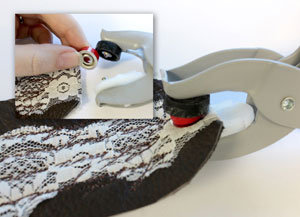
To make this one, you add a bottom clasp (this one has a metal bit sticking up in the middle) into the bottom of your tool, and the top disk with your adaptor (mine is that red thing) into the top. Don’t you love how accurate I am with my descriptions?
Make sure you check that your marking is still looking accurate now that you've added the top piece. If everything is looking good, fold your lace edge underneath and add your last clasp. Clamp down hard on this one; I found mine wanted to pop out when unclasping the cuff if I didn't add enough pressure.
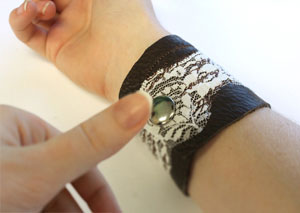
That's it! Wrap it around your wrist and snap it in place to make sure everything fits just as it should.
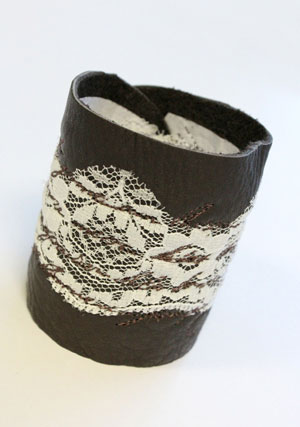
It's really as simple as that! Just grab strips of leather, some embroidery and a clasp. The results look amazing and very boutique. In fact, it was SO easy ... I just had to stitch up a couple more!
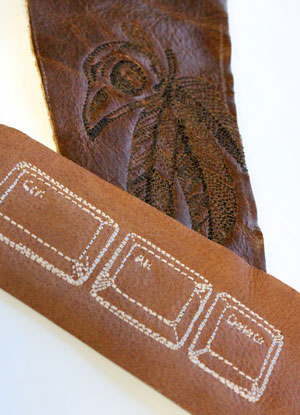
I tried a couple of different effects with these. The dark brown leather uses the Avian design (2.36" x 3.85"), but I skipped the fills and just stitched the outline. It created a gorgeous, almost embossed effect that is both subtle and very striking in person. The second piece I stitched our Ctrl-Alt-Delete design (3.85" x 1.1") in a brighter, more contrasting thread to really let it pop. You can play with all kinds of effects, and because they're all light-stitching, it's really quick to whip up.
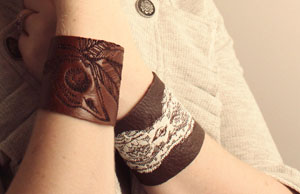
Then you just trim them and clasp them, and you have some stunning new leather cuffs. In person, the light plays of the stitching and the texture in a really rich way.
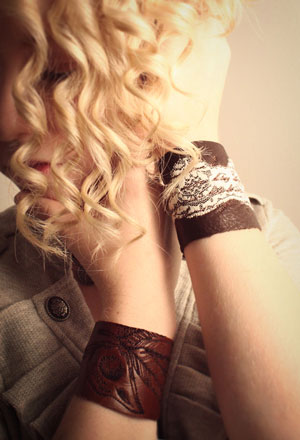
Embroidery brings a really simple yet classy effect to these otherwise plain bands, and lets you rock and edgy style while showing off your favorite embroidery designs.
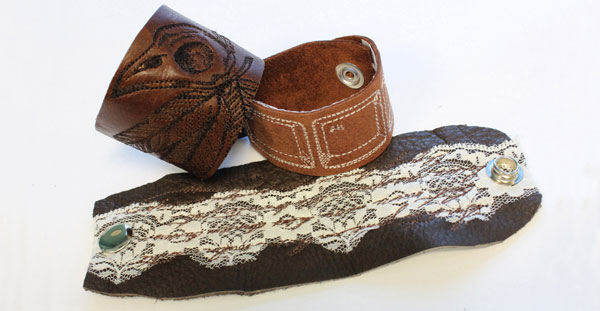
You can literally whip out half a dozen of these in an afternoon if you’re good with the clamping tool, which makes them perfect for last-minute moods or personalized gifts. Let everyone who sees them utter every crafter's favorite phrase...
“Wait, you MADE that?!”


