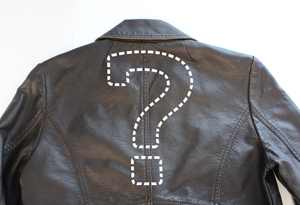
Though I have only been on a motorcycle once in my life and will likely never have the guts to be a biker chick, I’ve always loved the look of leather. Leather jackets, leather gear, all looking tough and bold. Biker-inspired gear is also often a place you find a lot of cool embellishment. So what if I don’t have my own biker gang? I can invent my own look, even with a limited hoop size, and with a few tricks for getting around stitching on leather, it’s easy to upcycle a plain thrifted leather jacket into the latest biker chic look.
Supplies
To get around this, we’ll go back to the original no-fuss solution. Pleather! Now, you’ll either want pleather that matches your jacket (which is easy, if you’re working with black leather) or perhaps contrasting, if you can’t find an exact match. Here’s the full roundup of supplies:
- Thrifted leather jacket
- Pleather (matching or contrasting, your choice!)
- Awesome Lucky 7 embroidery designs (I’d get the pack!)
- Medium weight cutaway stabilizer
- Scissors
- Printed templates for placement
- Pins and masking tape
Designs Used
OK, so the first thing we need to figure out is what to put on your jacket. You might be thinking “But wait, I don’t have a hoop big enough to do a jacket back!”
Ah, but that’s where the fun of the Lucky 7 collection comes in. You see, it’s a combination of bolder-stitching feature designs and lighter-stitching background designs that you can combine to create a big, bold and beautiful complete design that is totally up to you!
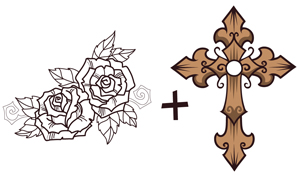
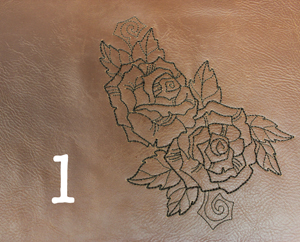
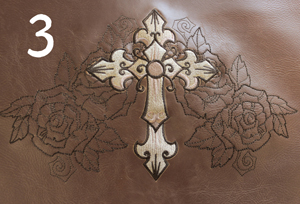
What do I mean? Well, take for example these two designs. We have one lighter-stitching background design, and one big and bold cross design. Combine them together with a little creative mirroring, and what do you get?
A bigger, badder design than any on its own! The beauty of these designs is the lighter-stitching features can easily be stitched over and layered with the heavier designs, so you can combine them in lots of ways in the background.
How many?
Well, a lot! All kinds of combinations can come to mind if you get creative with how you mirror and repeat things.
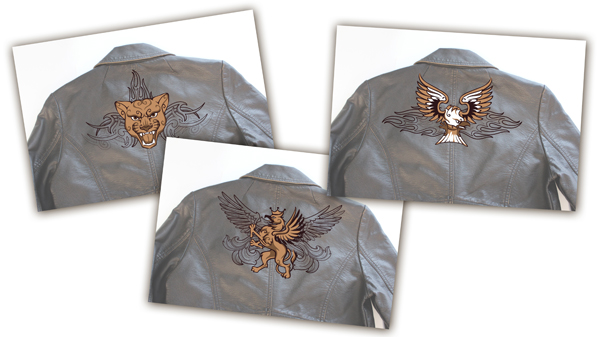
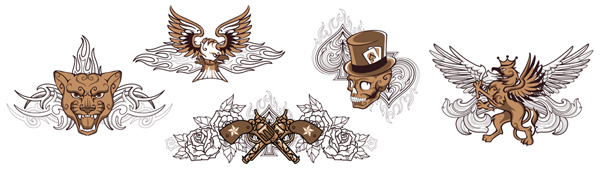
All these designs would make fantastic new showcase pieces for the back of your rad new jacket, or anywhere really! If you really want to explore, try printing templates of each design, and rotating, combining, and seeing what you can come up with!
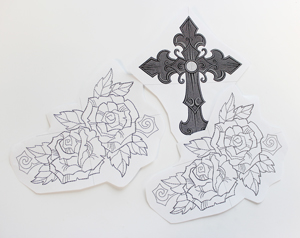
Here’s how I mapped this design out. First, I had two printed templates of the rose, and one of the cross.
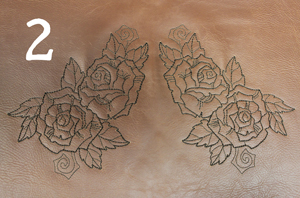
Hmm, but I want a mirrored version of the roses so I can work out both sides of the design. Can’t figure out how to do that in your software? Never fear...
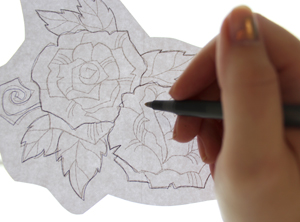
Just hold your template up to a window and trace the basic elements with a pen. You’ll now have a reverse image of your design.
(Make sure you'll be able to mirror the design on your embroidery machine, too!)
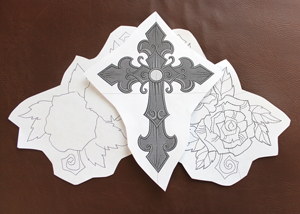
Flip ‘em around and play with spacing on your jacket until you find a layout you like and suits the space on your jacket, or wherever you’re stitching it.
The nice part about this custom layout option is you can expand or contract the design space to suit exactly the garment you’re stitching for. Wider shoulders? Just space the roses out a bit more.
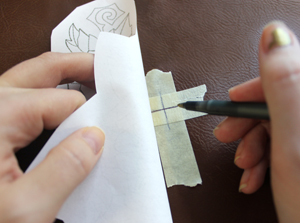
Once you’re ready, you can either tape your templates in place, or mark the crosshairs of the center of your design with some tape to help you get exact hooping.
Remember, if you have a real leather jacket, you should be marking this on your pleather piece. If you don’t have a real leather jacket...
Well, go ahead and stitch right on that baby! You may wish to open up the lining of your jacket to hide the stabilizer, but other than that the process is just like stitching anything else.
But I get ahead of myself...
OK, so let’s do these one at a time. Hoop up your pleather with some medium weight cutaway stabilizer, to properly support the embroidery to come.
First stitch your right roses...
Then your left roses. Be sure to mirror the design in your software, so you get an exact alignment.
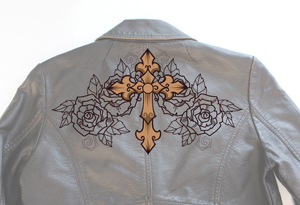
Finally, you can stitch your big showcase piece right on top. Yes, some of your roses will get covered up. That’s OK! They’re supposed to be background pieces.
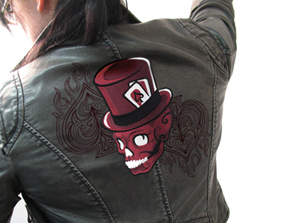
Look at that! A big beautiful jacketback just using 5"x7" designs. Neato.

Now it’s time to “patch” our pleather onto the jacket. Cut around the shape of your design, but leave yourself plenty of excess around it, like at least an inch or more.
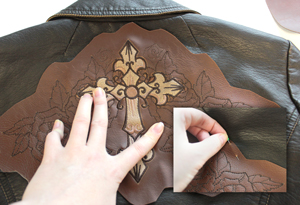
Now center your new pleather design on the back of your jacket. Once it’s exactly where you want it, fix it in place. If you're using pins, use as few as possible and place them strategically, since the perforations will remain when the pin is gone.
Even better, avoid puncturing the fabrics altogether by using masking tape to hold the patch in place (just remove it right before you sew over the taped area). Test first to make sure the tape won't damage the leather surface.
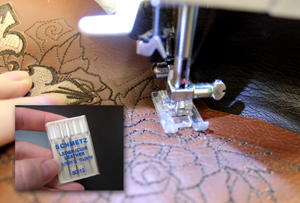
When it comes to stitching your piece onto your jacket, there are a couple of things you may want to try. If you have really thick leather, you could try using leather needles. These may help go through leather more easily and leave less obvious penetration marks.
Most of the time though, a regular needle will work. Stitch around your design as close as possible while still keeping an even edge all the way around. This will take some careful maneuvering with the jacket under your machine.
You might want to use a bit longer stitch than usual, so that the needle perforations in the real leather won't be too close together and weaken it.
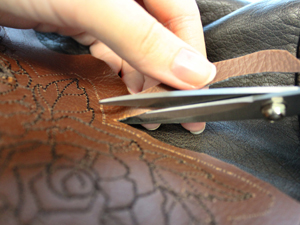
Once your design is patched on, trim away the excess pleather around the edges. The closer you can get to the stitched edge, the neater your patch will look.
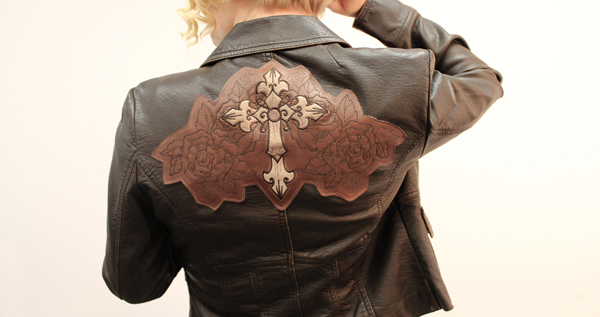
And that’s it! A totally wicked new look for your thrift store jacket, customized entirely by you. You choose the designs, the rotation, the colors ... everything!
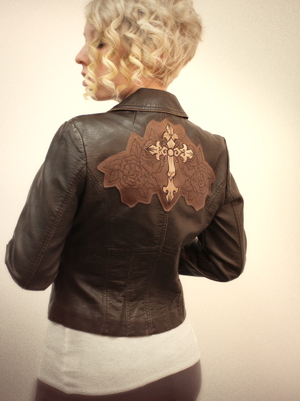
You can start your own motorcycle gang or just look biker tough with your new embroidered leather digs. Adding heavier-stitching designs to leather is easy once you know the pleather patch trick. If you get yourself some matching pleather, and keep your patch neat, no one will even notice! It will all look like one large seamless embroidered piece.
There are a lot of sad neglected leather jackets out there in those thrift stores. You know how that song goes... with only 20 dollars in your pocket, you can pop some tags and use your embroidery machine to seriously pimp some cool new jackets.


