I was wandering around various boutiques lately, last-minute Christmas shopping as usual, and I noticed an abundance of cute, simple scarves. Upon inspection they turned out to be simply a long rectangle of jersey fabric. Upon closer inspection they turned out to be bloody expensive. Far more expensive than a rectangle of fabric ought to be, especially a plain one.
If you’re a bit of a last-minute Christmas person like me, and you’d rather not rush out and spend your hard-earned cash on things you could make yourself, why not try out this tutorial for making your own sew simple jersey scarf, fast enough to stitch up even days before the holidays. With just a touch of embellishment and a tiny bit of sewing, you can make one that’s even cuter than the ones you find in stores!
Designs Used
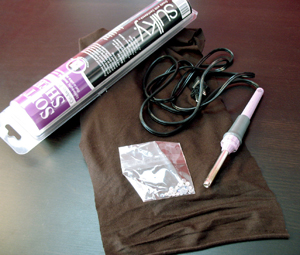
All you need for basic scarf making is some jersey fabric, at least 9 inches by 60 inches long (longer if you want a scarf you can really wrap up in), and some light mesh stabilizer. Making the scarf is the easy part here – after all, it’s pretty much just a long rectangle of jersey fabric. If you want to take it one step further, I have a few ways of jazzing it up to boutique status. My favorite way, of course, is with a little bit of embroidery, but if you’re super crafty, you can crystallize it too!
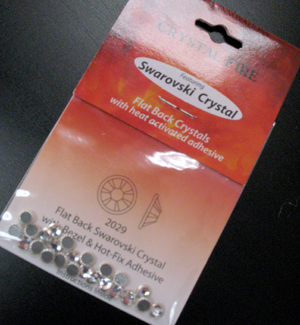
There are these neat little things called heat set crystals that you see all over boutiques these days, and you’d think for the prices they’re charging in boutiques these things require a master’s degree in jewel setting.
In actuality, these things are super simple. All you need is a pack of heat set crystals, and a heat set pen. You can find both these items in many craft stores. With it you can easily and quickly add permanent crystals to your work, launching your crafts into the fashion forward world.
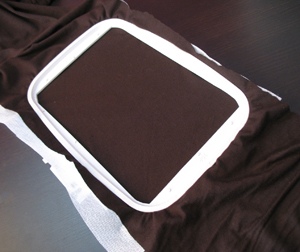
First, grab your rectangle of fabric. If you can’t actually find jersey fabric, any tight knit will do. Soft, light and stretchy is the key. You’ll want it at least as wide as your hoop, and I would recommend 60 or more inches long, so you have enough to wrap yourself up in. The size of the scarf is all up to you.
For the embroidery, we want something nice and light because we don’t want to weigh down our flowy scarf. A small design or scribble is perfect for this. We’re also using special no-show light stabilizer, so it doesn’t bulk up the scarf. To hide the stabilizer on the back when we’re done, you’ll want to leave enough excess under your design that it will fold over and cover up the stabilizer, so don’t hoop it right at the bottom of your scarf.
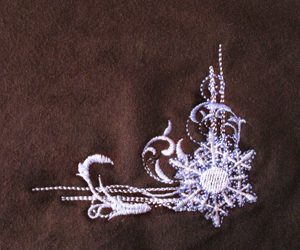
Since it is a scarf after all, even if it’s more of a decorative one, I chose a cute wintry design to go with it, the snowflake swirls corner. I stitched it just at the bottom corner of my scarf.
When you’re done embroidering, carefully snip away as much of the excess stabilizer as possible.
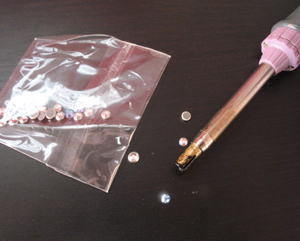
If you want to add some sparkle to your scarf, grab your crystals and heat pen. This step isn’t required to make your scarf, so if you’d rather go crystal free, you can just skip ahead. You’ll be missing out on some pretty swank embellishment though....
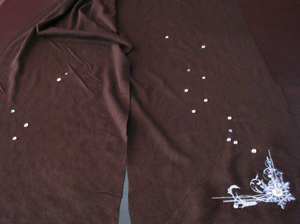
I would highly recommend laying out your crystals on the scarf before you set them. You can do any design your heart desires. I decided I just wanted a sprinkling of sparkles, almost to suggest more snowflakes. Remember, a little sparkle goes a long way. You don’t want to look like you’re going to Vegas or anything.
Don’t forget about the other side of your scarf!
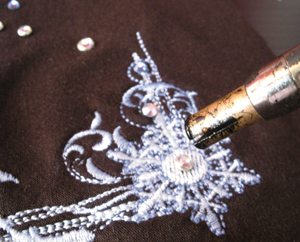
Once you like the placement of your crystals, it’s time to set them. Follow the directions that came with your heat pen. Generally, you find a metal tip that matches the size of your crystal, and you simply press down with the heated tip, holding it for about 10-15 seconds. The glue on the back of the crystal will melt and adhere to your fabric.
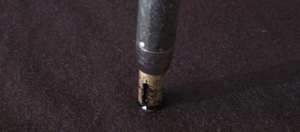
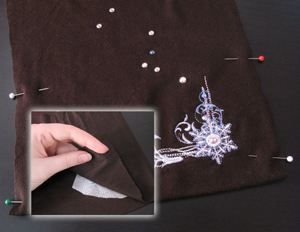
Once your crystals are set, it’s time to finish our scarf and hide the stabilizer on the back. A lot of jersey scarves I looked at just had raw edges, but we’re going to add just one little touch to make it look a bit better, and hide the stabilizer at the same time.
Fold the excess fabric over the exposed stabilizer on the back of your scarf, and pin the edges in place.
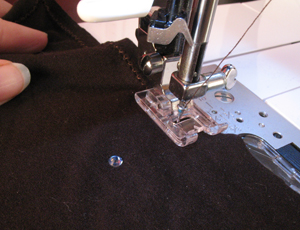
To stitch the folded piece in place, we’re going to do a zigzag stitch all the way around our scarf, securing the back and adding a cute border at the same time.
Stitch about 1/2 inch away from the edge of your fabric, and use your sewing foot as a guide. Since the fabric is stretchy, it will bunch the zigzag stitch a bit and give it a cute raised border. Keep your stitches safely away from the edge, though, because stretchy raw-edged fabric can move about easily and you don’t want to zigzag over the edge.
We still keep the cute raw-edged look, but add a border and hide the embroidery backing all at the same time.
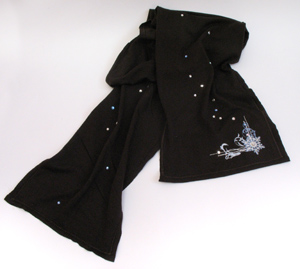
That’s it! That’s all you need to do to make your simple stylish jersey scarf. A little embroidery and a few crystals go a long way in adding some class, and you can make it in under 15 minutes! For those of us in need of some serious last minute gifts ideas, a sew simple scarf is perfect!
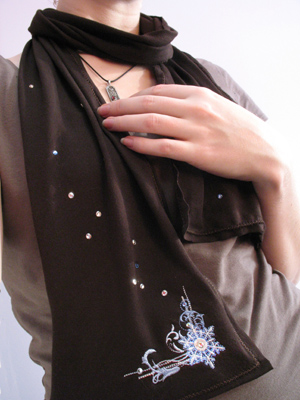
With just a little bit of embroidery, you can add a lot of personal touch to your scarf. Go light and sparkly for some, stitch a cute little lonely robot on another. There’s barely any work involved, and you can have your own personalized jersey scarf for a lot less than those you find in stores.
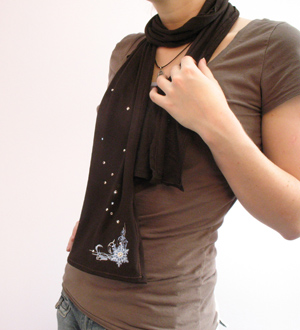
You can also totally customize the length and width of your scarf. A wide one will be extra scrunchy when wrapped around your neck; a long one will add fun layers and makes a perfect accent for any outfit. Jersey scarves are light enough to wear around indoors, and considering how easy they are to make, you can have one for every outfit! Stitch up a bunch for your friends, and let everyone enjoy the soft stretchy warmth.
People will wonder how much you had to pay to get that crystal embellished embroidered jersey scarf, and only you have to know you did it for only a few bucks, in under 15 minutes! Crafty people prove fashion doesn’t always have to come with a price.


