Hey. Karline here, stepping in for Niamh to bring you your weekly dose of project inspiration. This week’s drawstring bag tutorial should probably get credited to my mom, a former home ec teacher who used it to teach sewing basics to me when I was but a wee crafter, then to my 4-H group, then to my entire fourth-grade class. I have no idea how many times I’ve made this bag.
It’s an old standby that’s fantastically versatile: Make a teeny one out of fancy fabric and you’ve got a luxurious jewelry pouch. Make a giant one out of canvas and you’ve got a laundry bag. Over the years I’ve experimented and found a process I like … here, I’ll show you.
Supplies
You’ll need:
- Equal amounts of two different kinds of fabric – one for the outside and one for the lining.
- Ribbon or cord to cinch the bag closed - four times the width of your bag, plus a healthy bit extra.
- Embroidery design(s) of your choice – I used the Proud Peacock.
- Medium weight cutaway stabilizer.
- Thread for sewing and embroidery.
- Any other embellishments you care to add, like this pretty peacock feather.
All seam allowances are 1/2 inch unless otherwise noted.
Designs Used
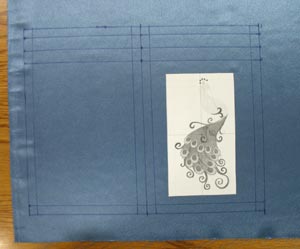
For starters, plan the size of your bag. I want my finished bag to be 6 inches by 10 inches. Add 1 inch to each direction for seam allowances. So I’ll want four 7 inch by 11 inch rectangles – two of the outer fabric, two of the inner fabric. Mark these out using an always-handy air-erase pen or dressmaker’s pencil, but don’t cut yet – it’ll be easier to embroider before you cut. Mark the center point and crosshairs for the embroidery too. In this picture I’ve also marked the seam allowances (mostly for illustrative purposes).
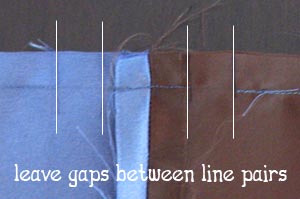
Also mark out a pair of parallel stitching lines for the channel through which you’ll feed the drawstrings. Make this wider than you think it needs to be, and set it lower on the bag than you think it needs to be. You’ll thank me later.

You can make this bag out of pretty much any material you can get under a sewing machine, but I’m using satin, which can be a slippery little bugger. Since you don’t have to worry too much about drape with this bag, use some medium weight cutaway stabilizer. Using temporary spray adhesive, stick the stabilizer to the back of the fabric. Make sure everything’s smoothed out all pretty.
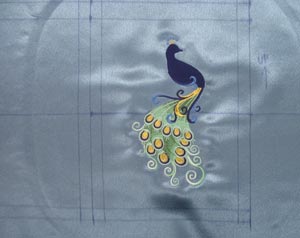
Hoop it up and embroider. Again, satin is slippery, so test to make sure it’s hooped firmly before you start stitching. The stabilizer stuck to the back will help hold everything in the right place.
When it’s done stitching, trim the excess stabilizer from the back of the embroidery.
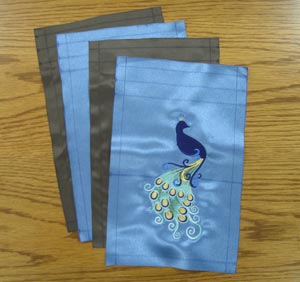
Cut out all your rectangles of fabric.
Put an outer piece and a lining piece right sides together, and stitch them together along the top edge. Do the same for the other pair of rectangles.
Press the seams open.
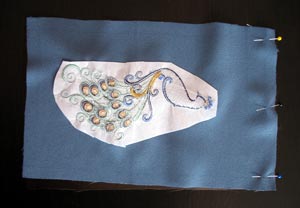
Lay these two pieces right sides together and pin. You’re going to stitch all the way around, minus a few gaps.
Grab your air-erase marker and extend the channel marks to the wrong side of the fabric. Stitch all the way around, leaving a gap for each channel space …
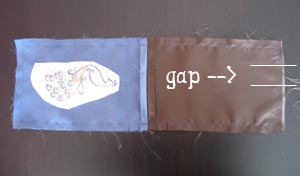
…and a bigger gap at the bottom of the lining side. You’ll use this latter gap to turn the whole thing inside out, so make it big enough that you’ll be able to do that. Keep in mind that the embroidery may be bulky. (Mine’s kinda on the small side. Learn from my mistakes.)

Clip the corners.
Turn the whole thing inside out by pulling the fabric through that little gap at the bottom of that lining pocket. Press it again, making everything as neat and straight as possible. You can use a pointyish (but not sharp) object like a chopstick or knitting needle to poke out the corners.
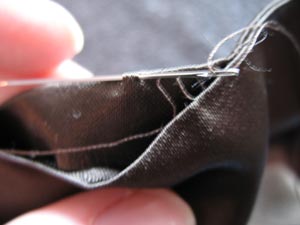
Slipstitch the bottom of the lining pocket closed.
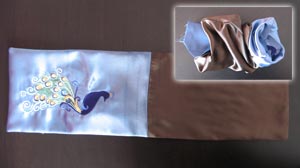
Tuck the lining pocket inside the outer pocket. Now it’s starting to actually look like a bag!
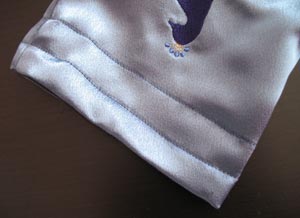
Pin together the top edges and stitch along each stitching line, all the way around, to form the drawstring channel. Make sure the outer and inner side seams are very neatly lined up with each other.

Now it’s time to add the drawstrings. Cut two equal lengths of cord, long enough to loop all the way through your channel and have some extra sticking out. This photo shows how they’re going to be oriented once they’re looped through the channels.
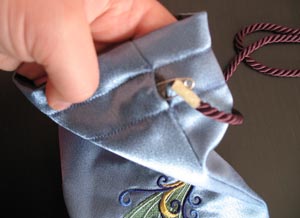
Take a safety pin and stick it through the end of one of the cords. Use it to scoot the cord through the front channel, then through the back one, so it goes all the way around and comes out where it started. Add the other drawstring in the same way, starting and ending on the opposite side.
Autofocus fail. Yup.

This is how it should look when you’re all done. Tie off the cords.
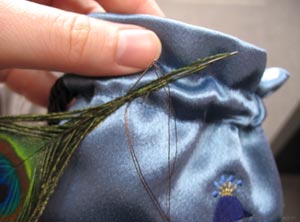
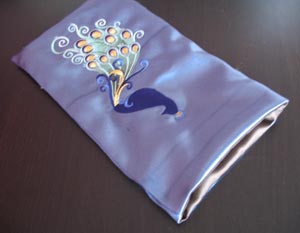
Add any embellishments you like. In keeping with the theme, I stitched on an actual peacock feather. These are readily available at craft stores … awesome. I think they will be my new craft medium of choice.
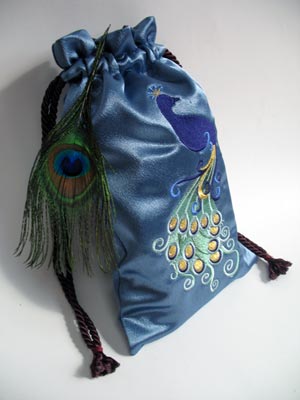
And you’re done! Use your new bag as the classiest gift wrap ever, a purse, or just a place to stash special treasures. Make it tiny for holding jewelry or huge for playing Santa. Make it tall and skinny to contain a wine bottle or short and wide for a snazzy handbag.
Enjoy your wild new pouch!


