So, you've found this super cute lace pennant design, but now you need to know what to do with it! OK, I know you're not daft, you've probably figured out what it's for. Unless you're thinking its a new hat or perhaps a pizza coaster. Then you are daft. But surprisingly creative. Good for you.
So, for the rest of us not looking for lace pizza coasters, this super cute Mr. & Mrs. is made to be strung into a festive bunting for the big day. You can, of course, simply sew a whole bunch to make into bunting, but if that's a little to much lace stitching for you, I've got a fast and cute little rustic addition that will have your bunting ready for the newlyweds in no time.
Supplies
To make your rustic wedding bunting, you'll need:
- Our Wedding Bunting (Lace) design
- Thread
- Water-soluble stabilizer
- Ribbon
- Scissors and pins
- Rustic fabric (OK, so my fabric says it's not linen, but linen-like. I’m cheating, but real linen is hard to find)
- Doilies
Designs Used
The first thing you might notice is, well, things are a lot brighter around here. True, I could have picked a better project to go all white on, but it's better lighting and a better camera, so I'm hoping our pictures come out clearer and cleaner! So ignore the whole white on white thing. I'm learning here.
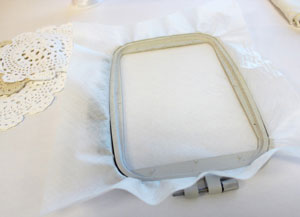
We begin with, where else... the embroidery! Hoop up your piece of water-soluble stabilizer, and don't forget to wind a matching bobbin.
If you want a refresher course on the finer points of lace, you can check out this tutorial.
Once your magic machine is done stitching, you should have a fine piece of lace. To make a nice size banner, you'll probably want to stitch two pieces, more if you want a nice long banner, less if you don't like the newlyweds all that much. Once it's stitched and un-hooped, trim away the excess stabilizer and soak according to your stabilizer directions.
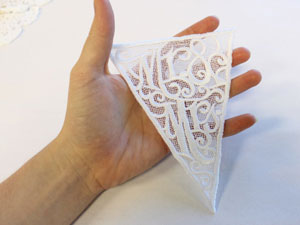
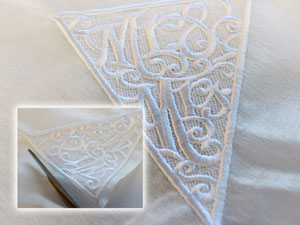
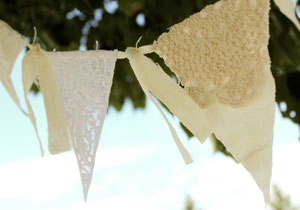
Your lace piece! Mr. and Mrs.
Awwww.
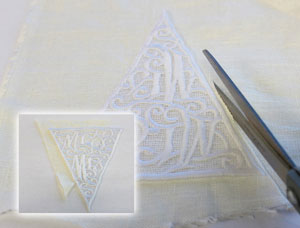
So, since we don't want to spend our whole afternoon stitching lace pieces (or maybe we do, but someone advises us that staring at our machine for 4 hours may not be the best use of our time) we're going to make a few cute rustic bunting flags that you can use with your stitched piece. Using your lace pennant as a template, lay it on top of your fabric and cut a piece the same size.
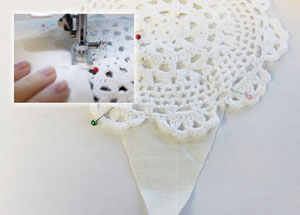
Overlay one of your doilies on top of your flag, and pin it in place. Despite how it's pinned in the main picture, I actually found it easier to stitch from the underside, since you can see your seam line much easier, so you may want to pin from the back. Yeah yeah, do what I say not what I do. You know the drill.
Once you have it pinned, stick it under your machine and using matching thread, sew a seam along the edges, stitching the doily in place. I'd keep going all the way around the flag, to keep the edges from fraying too far. Once you've gone around the edges, you may also want to add a few small seams along the doily center, to keep it tacked flat to the flag.
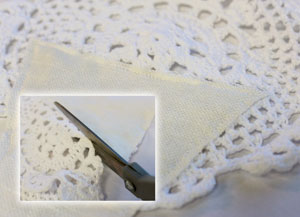
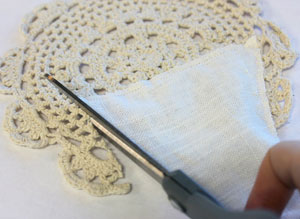
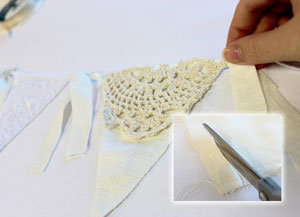
When you have the doily stitched on, you can trim off the excess till it matches the flag shape. If you're worried about fraying at this point, you can always add a touch of glue to the raw edges to keep them from unraveling. Me, I'm more a rustic, frayed-is-beautiful kinda gal, but if you plan for this to be a keepsake you might want to keep it a little more contained.

Yay! Cute, simple and rustic. Perfect when you need a whole bunch for a wedding.
Speaking of... lets make a couple more! If you're making, say two lace pieces, I'd recommend three doily flags.

So here we have our finished pieces!
Lets turn them into some festive bunting.
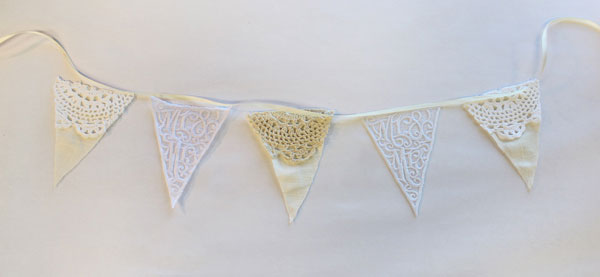
Cut a long piece of ribbon, with enough room to leave about a 1 1/2 inch gap between the flags, and enough slack at the end for easy tying. Lay the flags out in the order and position you'd like them.
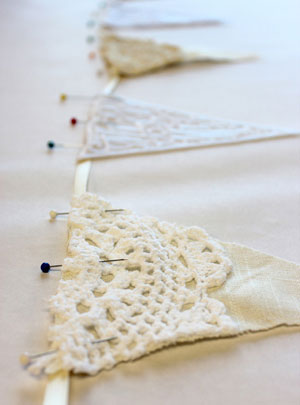
Pin your flags in place, carefully lining up the ribbon with the back edge of the pennants.
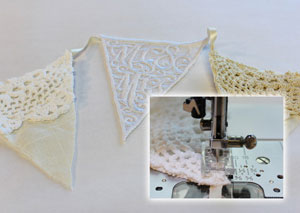
Sew a seam down the middle of the ribbon, just over the flags. Trim off the excess.
For a little extra rustic cuteness, cut some strips of your fabric about an inch wide and 8 inches long. Tie these in between the spaces of each flag.
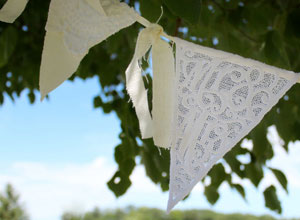
And as simple as that, you have a rustic wedding bunting. At a glance, it's a cute and simple banner with a raw-edged flair, but a closer inspection will reveal the whimsical little typography in the pennants. Linen and lace never looked so good together!
Or, linen-like. But that just didn't roll off the tongue as well.
The doily pennants have a natural, handmade feel without a lot of the extra toil, and the texture of the weave nicely mimics the dimensional look of the embroidery.
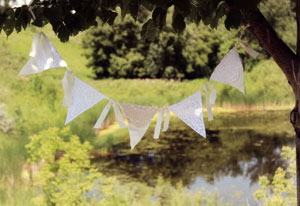
Hang your bunting up anywhere, from ceilings, beams, or even trees for that extra rustic feel. It's the perfect way to quickly and cheaply dress up a space, and it makes a great heirloom to keep from that memorable day.


