I love to travel, but I’ve discovered over numerous flights, red eyes, long lines, and waiting, that the last thing you want at the end of your trip is to lose your luggage. Sure, it gives you an excuse to go clothes shopping in Italy, but you’re probably not going to be able to replace your contacts in a hurry.
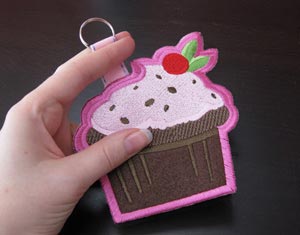
The biggest problem nowadays is everybody thinks that dark luggage is stylin’, and because of that, absolutely everyone’s luggage looks the same. You’re now just as likely to lose your luggage by someone accidentally walking off with it than to the faults of tired baggage handlers. Well, I’m going to take a wild stab in the dark and say that not everyone’s luggage has a hot pink cupcake tag on it. Why not make ours the first?
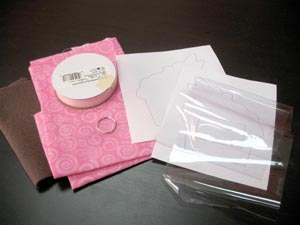
Yessiree, we’re going to make our luggage a cute customized cupcake tag, and assure that we never again lose our bag at the hectic airport. To make your luggage tag, you’ll need two different fabrics, one for your cupcake back and one for the front, some clear plastic vinyl, some ribbon, a key ring, and your cupcake templates. You’ll also want some cutaway stabilizer (for backing) and some tearaway stabilizer (for stichin’).Optional: You can also download a matching cupcake card to print out and slip inside your luggage tag when it's done.
There are several ways to get your templates:
If you have embroidery software, you can print out the dieline files that come with the cupcake luggage tag design (UTZ1104aDL and UTZ1104bDL). If you don’t, you can hoop up a piece of paper and “stitch” the dielines (no thread needed unless your machine won't sew without it), then cut out along the perforations to get your template. Or you can use spray adhesive to attach your fabric to your stabilizer, hoop it up, stitch the dieline directly onto the fabric, then cut out along the stitching line.
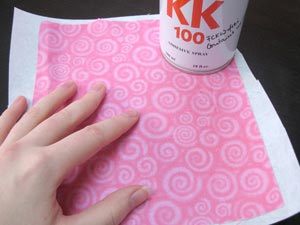
First, we’re going to cut out the back piece of our little tag. Back your chosen fabric with some regular stabilizer, using spray adhesive to keep them together.
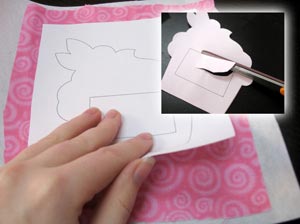
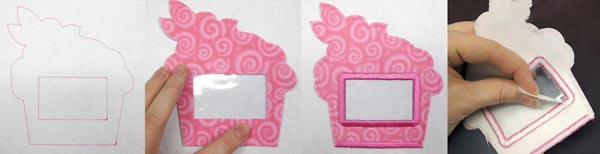
Grab the back template of the cupcake (That’s the one with the little rectangle in the middle). Use a little spray fixative to stick your template on top of your fabric, and cut out along the printed lines. Don’t forget to cut out the little window shape too.
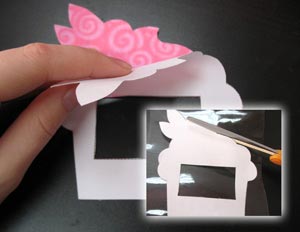
Once the back piece is cut out, peel the template off and stick it onto a piece of the clear vinyl, and this time cut out only around the outside, leaving the little window part intact. When you’re done, you should have one fabric cupcake with a window cut out, and one vinyl cupcake that’s solid.
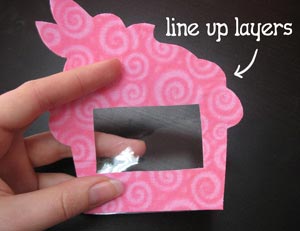
Lay the two layers on top of each other, with the fabric on top of the vinyl, making sure the edges are flush. From the front, it should look like your little cupcake just has a little vinyl window.

Now, cut out the front piece of your cupcake. Back your fabric with some cutaway stabilizer, and cut out around your other template, the one without the square in the middle.
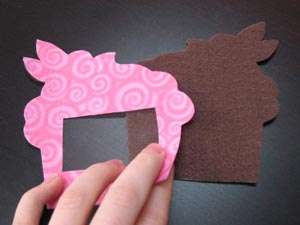
Now you have your cupcake pieces!
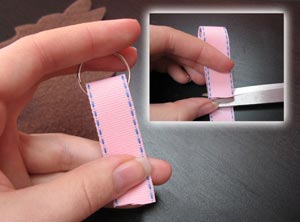
The last thing we need to do is cut a little ribbon so we can hang our cupcake off our luggage. Snip a small piece of ribbon and loop your key ring inside of it. Set this aside for later.
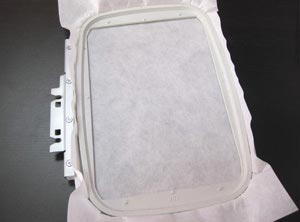
All right then, it’s time to start stitching. Hoop up a piece of tearaway stabilizer, and set it up in your machine. One last thing before you begin... wind yourself a matching bobbin for whatever color you’re going to stitch the border in. Put this aside for later too.
To begin, you’re going to stitch the back piece, the one with the window. Your machine is first going to stitch a dieline. Spray the back of your cupcake and place it just inside of the dieline shape. Once you set your machine to stitch again, it will stitch a tack down stitch all the way around your cupcake, and then do a satin stitch around the window and along the bottom edge. Once your cupcake back is finished stitching, carefully tear it out of the stabilizer, and tear away the excess stabilizer at the back square, so you have a clear view through your little window.
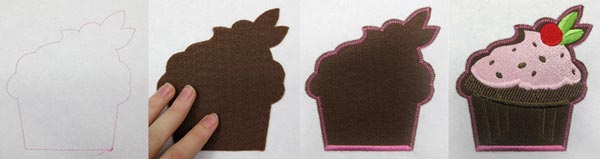
Now, hoop up another piece of tearaway stabilizer, and load it up under your machine. Your machine will stitch a dieline first. Spray the back of your remaining cupcake piece, and place it carefully inside the dieline. Set it sewing again, and it’ll stitch a tack down, and a satin stitch along the bottom of the cupcake, followed by all the inside elements.

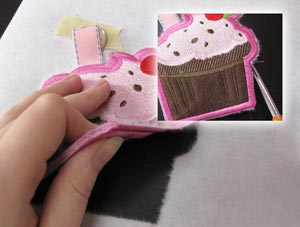
Now, carefully take your hoop off your machine (but don’t unhoop it!!) and flip your design over. Grab your little ribbon and key ring, and tape it to the back of your cupcake, so it stays in place while it’s stitching. Take the back cupcake piece you stitched out before, spray the back with fixative (avoid the window) and place it on top, carefully lining up the edges (You might also want to tape the key ring out of the way, since that’s one thing you absolutely don’t want to stitch over). Now flip your design back over, and press down on it from the front. Remember that bobbin you wound? Stick that bobbin (mine in this case is hot pink) in your machine for this last step. Secure your hoop back under the machine, and let it finish the satin borders all around the cupcake.
Tear your finished cupcake tag carefully out of the stabilizer. Depending on what stabilizer you used, you might need to trim fuzzies away from the edges of the cupcakes. (My tearaway stabilizer is especially guilty of excess fuzziness.)
Your luggage tag is finished! But wait... don’t we need the whole “tag” part?
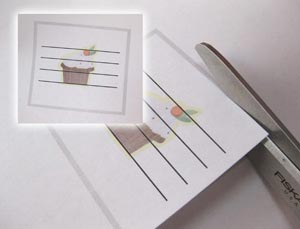
If you like, you can just write your name or message on a blank piece of paper and slide it into your cupcake, but if you want it all swank and matching, you can download our cupcake address card and print it out. Cut it out by trimming just inside the dark square, so you have a clean white edge.
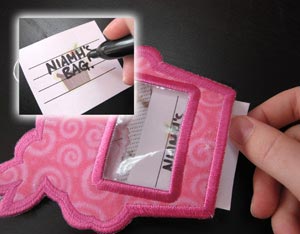
Write your name, address, or whatever snarky message you choose on your little cupcake tag, and slide it into the cupcake so it shines through our little window.
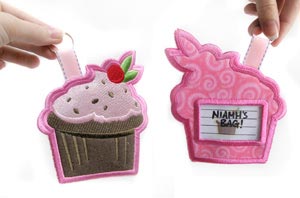
Your little luggage-identifying cupcake is complete! Admire your adorable handiwork and know that you’ll never again lose your luggage to a stranger, although you may lose your tag to a hungry baggage handler.

Clip your tag on and let its cupcake goodness shine. Stitch up all different flavors of cupcake to suit your tastes (har har) or stitch a whole bunch of matching cupcakes to keep a group of luggage easily identifiable. If you do for some reason ever come across someone with another embroidered luggage cupcake, well, know your luggage is among friends. You can spend your time waiting in the customs line talking about how awesome your embroidery machine is.


