The days have turned cold, and the nights twinkle with frosty stars. Take some inspiration from the heavens and the cycles of the moon with this elegant lunar scarf. Watch the moon wax and wane across a cozy accessory of the season, and make a statement no matter what the night sky might hold.
Supplies
To make your celestial scarf, you’ll need:
- Light stitching Luna embroidery designs (I used the 4.84" x 4.92" version of the pack)
- Scarf
- Sheer mesh cutaway stabilizer
- Fabric paint or dye
- Brush and cup for water
- Extra fabric that compliments scarf fabric
- Temporary spray adhesive
- Fabric glue
- Printed templates of the designs for placement (Here's how to print templates)
- Masking tape and pen
Designs Used
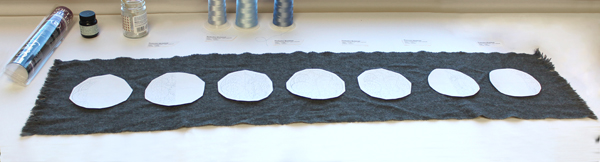
First, you’ll want to cut out the printed paper templates and space them along your scarf. You’ll want to do this in the order of the moon phases, with your full moon in the middle and the others waxing and waning to the sides.
Mark the spacing you like with some masking tape. I’d recommend placing a piece of tape at the top and bottom of your scarf, then using a ruler or something similar to mark the crosshair line on the tape itself.
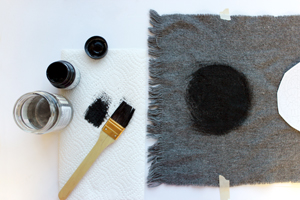
Before we stitch, it’s time to paint! I’d recommend practicing your fabric paint on a test piece of fabric or paper towel. It’s always handy to get a feel for the medium you are using before you apply it directly to your final piece.
Follow your fabric paint’s instructions for proper application. Mine says to paint directly onto the fabric.

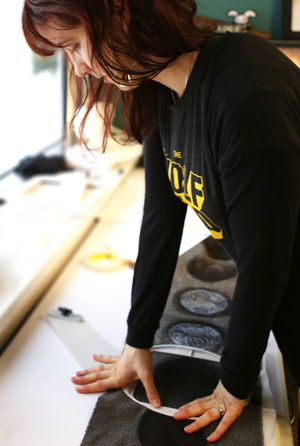
You’ll want to paint loose moon shapes in each space you marked with tape. You’ll want to make them roughly the same size as your moon design. Don’t worry about perfection - the organic nature of the paint is what adds the beauty!
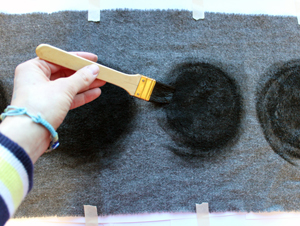
I like the quality of being able to see brush strokes, so I tried to move fast and not over-work any one moon shape.
After the paint dries, my paint says to heat set the paint with a quick ironing. Make sure to check your paint’s instructions to see if there are any additional steps.
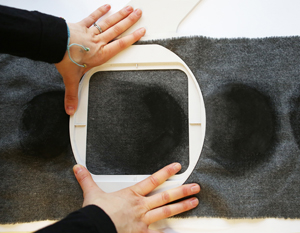
Spray your sheer mesh cutaway stabilizer with temporary spray adhesive, and smooth it onto the back of the fabric. Hoop both layers tightly together.
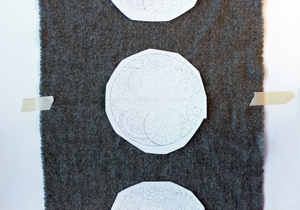
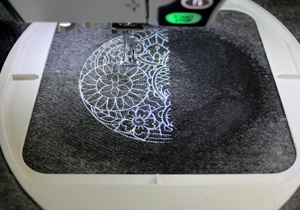
I started with the full moon design first, right in the center. From there, it’s easy to work outwards for each design.
Stitch out your embroidery designs!
I started with the full moon in the center, and the worked out in both directions.
For easier placement, tape each printed template on top of your painted moon shape, and use the crosshairs to guide your hooping. Then you can remove the template before you stitch.
This is important, because the center of the painted moon may not match the origin center of the non-full moon embroidery designs. Use your templates to double check the correct origin point as you work.
I also realized halfway in, I could use one long piece of sheer mesh cutaway stabilizer along the back of the scarf, instead of cutting and spraying individual pieces each time. This made the second half of the moon phases stitch out more smoothly.
Only try this if the stabilizer you are using is wide enough to still be hooped properly!
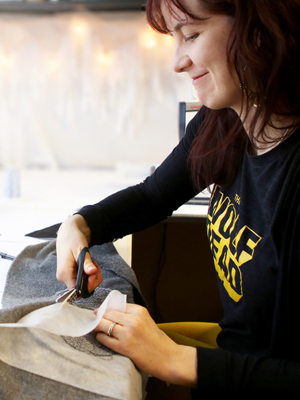
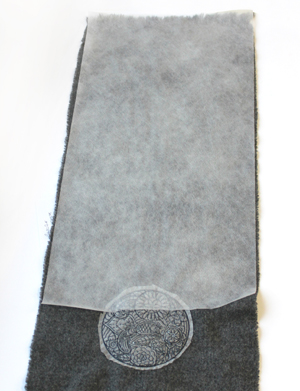
Once all your moon phases are stitched, you can flip your scarf over and carefully trim the stabilizer on the back.
Optional!
I dislike the look of stabilizer on the back of garments, especially when they will be visible like they could be with this scarf.
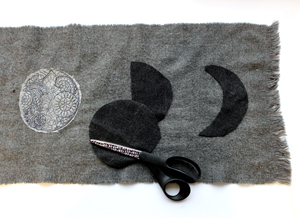
I used my printed templates as patterns to cut out moon shapes. I used a soft light fabric that went well with the scarf I was using. I simply glued the fabric pieces over the stabilizer and back stitching. These can also be hand stitched in place with a few discreet stitches to make them more secure if it will be worn frequently.
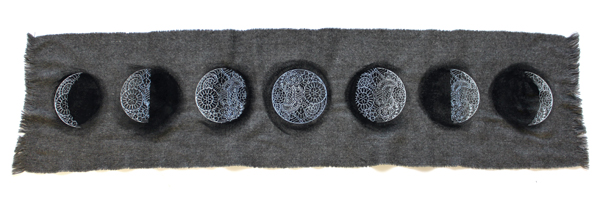
When you’re done, you have a beautiful hand painted, custom embroidered scarf. Dark washes set off the beautiful gradient of stitches as your moon waxes and wanes across your scarf.
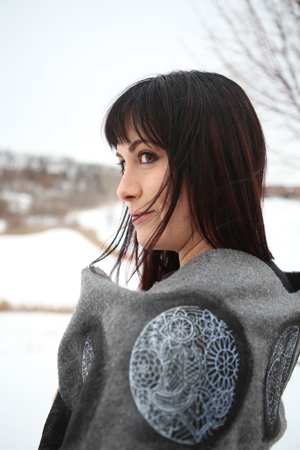
Wrap up in your beautiful new creation against the frozen winter days and cold starry nights.
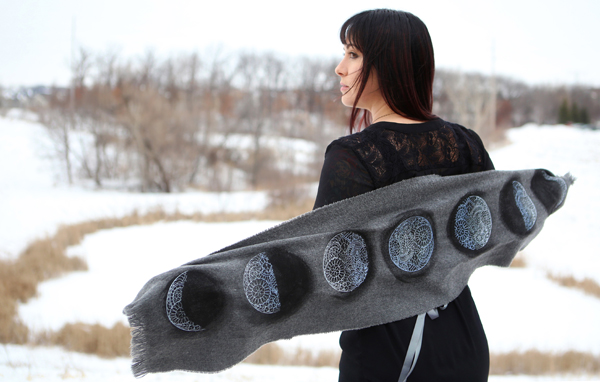
It’s sure to make a statement, day or night!


