This tutorial is brought to you by the fabulous Lindsay Hartwell of owl lace neckline fame. She's been making these awesome embroidered cuffs for awhile now, and contacted us with the great idea of creating a caduceus design for a medical information cuff that her rockin' boyfriend would actually wear. Check out her other crafty creations on twitter and flickr, and enjoy!
Supplies
Gather your materials. You'll need an interior fabric that is comfy or printable inkjet fabric sheets if you don't plan on embroidering the medic alert info.
Also, you'll need exterior fabric, stabilizer, tailor’s chalk, fastener (velcro, button, or snap), soft measuring tool, and possibly spray stencil glue for keeping the fabric from wiggling.
For the exterior embroidery, you'll need a kewl caduceus like this one, so the paramedics will know to take it off and look inside.
Designs Used

While sitting at home patiently waiting for my boyfriend to get back from India, I got an alarming message from him that he's okay, but almost had an incident regarding cashews. India is not the place to go if you're allergic to cashews or pistachios - he's allergic to both.
Concerned for his life, I thought up this idea for a medic alert cuff. His info and allergies will be neatly embroidered on the inside while he sports a kewl caduceus on the outside. I messaged Urban Threads right away with my idea. Here's my tutorial so you can make one too.
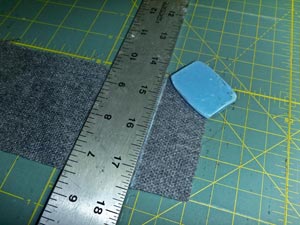
Measure the fullest part (just above the bone) of the wrist you're making the cuff for. Add 2.5" for seam allowance and overlap. My wrist is 7" at its fullest, so I will use 9.5" to measure the length of my material.
The width will always be 3".
You will be using your stabilizer as lining, so when cutting the stabilizer, be sure to check the length against the length of your material - they should be the same.
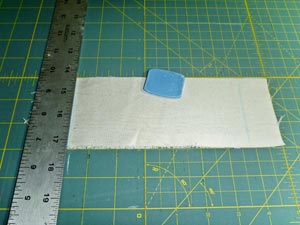
Once both pieces are cut, take your tailor's chalk or a water soluble pen and a ruler and measure 1.25" from the edge, lengthwise, of each piece. Mark that line. This area is for fasteners and you don't want to accidentally embroider in this area. Use these lines to center the material in the hoop.
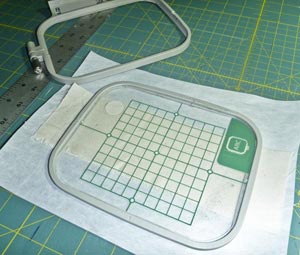
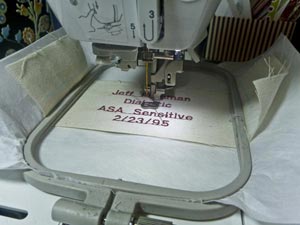
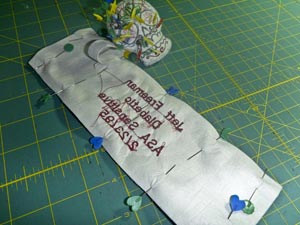
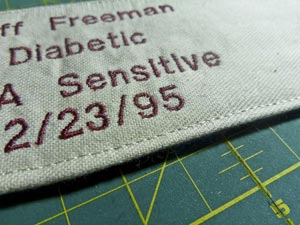
If your embroidery machine has a built-in lettering function, you can use your smallest machine lettering to create the text on the inside of the cuff. Things to include are first and last name, birth date and allergy/medical condition. Center the fabric horizontally in the hoop.
(If you can’t or don’t want to embroider the text, printable fabric is another great option. Just follow the directions on the package to print the important information on the fabric using your computer printer, making sure the text fits within the size and shape of the cuff.)
In this next part a pencil and paper will come in handy… you'll be doing a little math.
To fit 4 lines of text (5/16" high letters, in this case) on a 4" machine, make sure the first line of text is 1.85 cm from the top edge of the fabric. The best way I've found to do this is to position the needle exactly over the edge of the fabric, write down the position from the embroidery machine's screen, then subtract 1.85 from that number and you'll have the position of your first line. Mine was sitting at 3.75. My first line, then, was at 1.90.
Half an inch is plenty of room between lines, so subtract 1.25 cm from the next position.
If you don't need 4 lines, then you can choose to space them out more or just use the same measurements.
When crossing the zero line subtract the smaller number from the larger number (which is a bit backwards from what you have been doing so far). For example, my line 2 was at .65 cm so I subtracted that number from 1.25 and got .60. My third line position was now going to be -.60. The fourth line simply requires you to add 1.25 to the last line position. So mine was at -1.85.
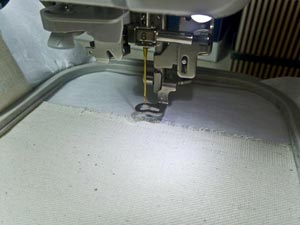
Embroider all text on the inside cuff piece. Set that piece aside when done.
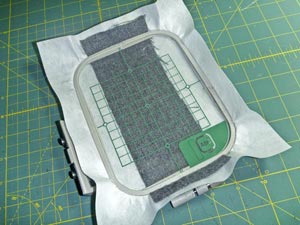
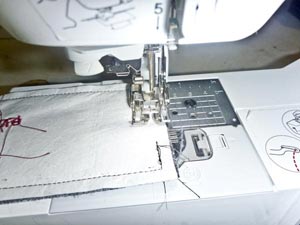
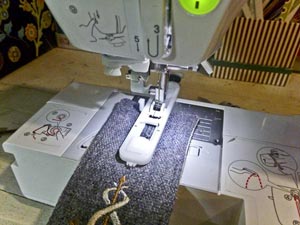
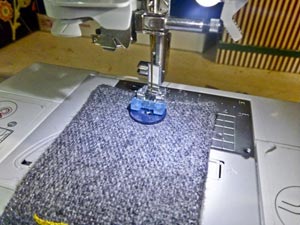
Now, take your exterior fabric and center it in the hoop vertically using your chalk lines.
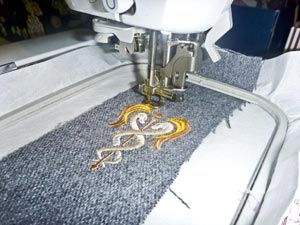
Stitch out your embroidery design.

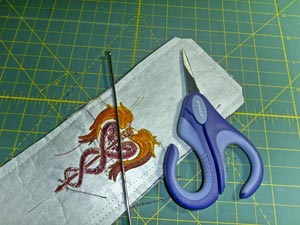
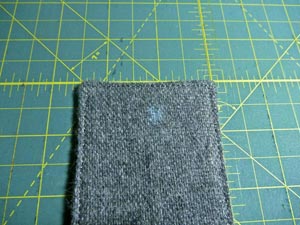
Trim the stabilizer on both stitched pieces to the shape of the fabric. Remember, we're using the stabilizer as lining.
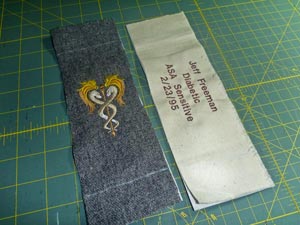
Here are both embroidered pieces, with stabilizer trimmed to the shape of the fabric.
Assembling the cuff is really easy. Just pin the fabric together, embroidery designs facing each other…
…and sew around the edges, leaving a 2" opening at one end.
Clip the corners, being careful to not cut the thread. Turn the cuff inside out with a bodkin or a long thin object to make sure the corners are square.
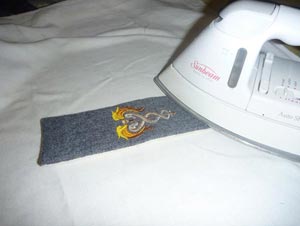
Once turned, iron the edges, making sure the un-sewn hole is folded in and flush with the rest of the cuff.
Top stitch close to the edge - around the perimeter of the cuff - to finish.
Whether you chose a button, snap or Velcro, you will need to try the cuff on and check for overlap. If using a snap, it needs to line up and be comfortable. If using Velcro, it should be within the overlap with the soft part facing the skin.
Mark the location for the button hole or other closure.
I used the button hole foot on my machine. Be sure that if you're making a button hole to align the hole horizontally along the cuff. It will stay on much better that way.
Add a button to the other end of the cuff, by hand or by machine.
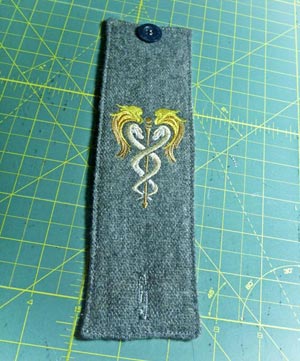
Now you have a comfortable, stylish medic alert cuff to wear…
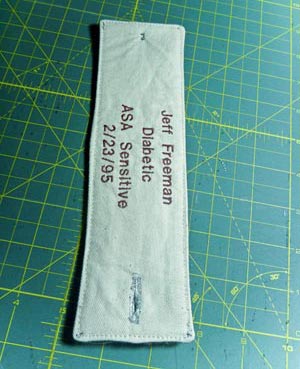
With all your loved one’s important information stitched or printed inside.
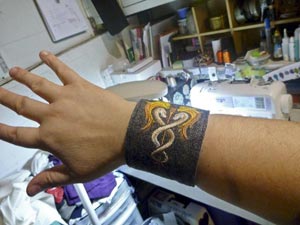
For once, sport a caduceus that’s ultra hip…
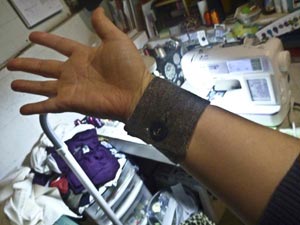
...with a comfy button closure on the inside of the cuff.
Happy crafting!


