Patch designs are always a fun way to add personality to your wardrobe and accessories. Open center patch designs, like the Doughnut Patch, add an extra level of intrigue with an opening in the center that lets your background fabric shine through! These designs work a little differently than normal patch designs, but are relatively simple to acheive.
Supplies
To craft your open center patch design, you will need:
- Doughnut (Patch) embroidery design
- Two fabric colors
- Thread to match both fabric colors, and for your embroidery design details
- Tear away stabilizer
- Temporary spray adhesive
- Razor knife
- Scissors
Designs Used
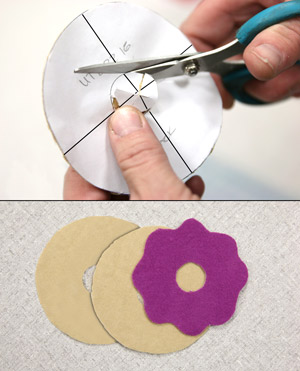
Begin by using embroidery software to print templates of your "DL" files, you will need these to cut your patch fabric shapes. If you don't have embroidery software, you can stitch the shapes out onto the fabric. Here's more information on printing or stitching dielines.
You should end up with 3 fabric pieces -- a front, a back, and a detail piece. Carefully cut the center holes out of each piece. It helps to first mark an "X" in the center with a razor knife then use scissors to cut the hole out.
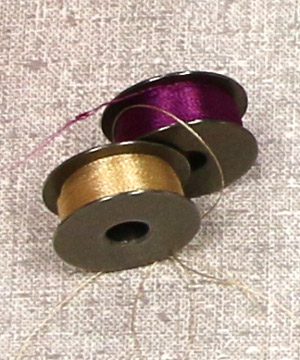
This patch design requires two fabric colors. For best results we recommend matching your main thread to both fabrics, then winding two bobbins to match the these colors. This will keep the edges of your patch clean and sharp!
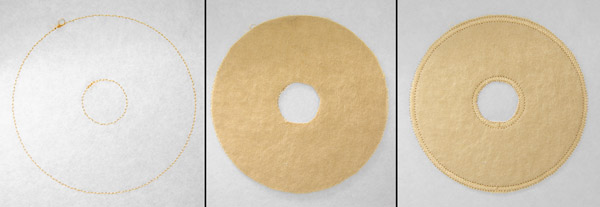
Once your shapes are cut, hoop up a piece of tear away stabilizer, taut in the smallest hoop possible for the design (In this case a 4 x 4" hoop works best). Use the bobbin thread that matches your first fabric piece (in this case a light tan). The first color change stitches out a dieline. Spray the back of your front patch piece with temporary spray adhesive and carefully place it on top of this dieline. The next thing to stitch is a tackdown for the patch piece.
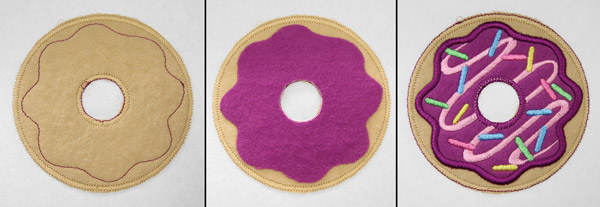
Next, a dieline will stitch out for the detail fabric piece. Spray the back of this fabric with temporary spray adhesive and carefully set it on top of the dieline. NOTE: you may have to rotate the fabric piece to make sure it's fitting the dieline exactly.
A tackdown will hold the fabric piece in place, then the inner design details will stitch out.
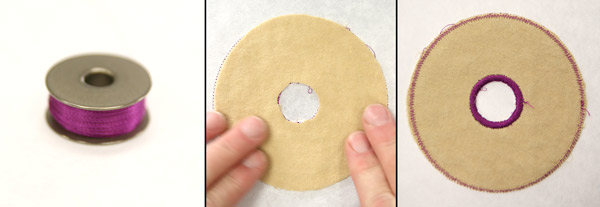
After the details finish stitching, the thread list will note the "hole tackdown." Change your bobbin thread to match the detail fabric (in this case a magenta color). Carefully remove your embroidery hoop from the machine, but DO NOT UNHOOP your stabilizer. Spray the back patch piece with temporary spray adhesive and carefully place it on the back side of your stitched design. The design will then stitch a finishing border on the inside of the hole.

Change your bobbin thread back to match your first fabric color to stitch the final tackdown and outside border of the patch.
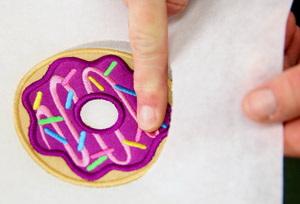
Finish your patch design by unhooping the design and tearing away your stabilizer, inside and out.
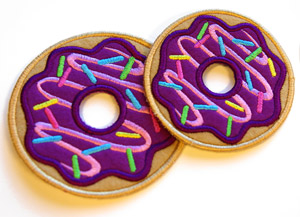
Your finished patch design is perfect for tote bags, backpacks, denim jackets, and so much more! Let your imagination run free with different fabric choices and applications.


