Sometimes something as simple as a nice drape cardigan can go from cozy to couture with just the right touch, by creating a big bold windowpane embroidery panel at the back! You might be thinking, but I can’t make a big design like that! Never fret. There’s actually a super easy way to get a giant back piece design. All you do is combine designs with similar stitches, and make them all one chic monochrome, and they suddenly all fit together!
Supplies
That’s right, you don’t even need designs from the same collection. The trick is making them all the same color. So, to make your chic fashionista cardigan, you’ll need:
- A cardigan. One would hope that was obvious.
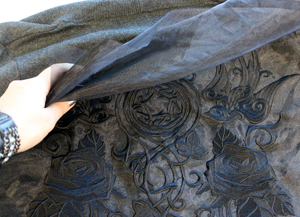
- Matching organza. Take care to look at the weave. You want a nice tight weave in order to hold all these heavy stitches.
- Pretty dimensional designs, or designs with a similar stitch quality
- Heavy duty water soluble stabilizer. This time I used a brand called Vilene. Sulky Ultra Solvy works well too.
- Scissors and a ton of pins
As some of the reattachment of the panel can be kinda fiddly, it’s helpful to have a dress form or a helpful friend nearby.
Designs Used
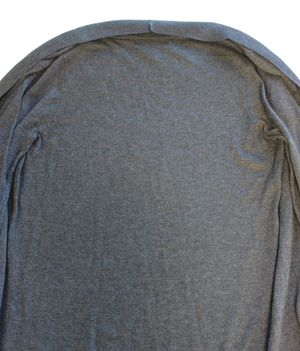
So, let’s start with the cardigan. You want one with a nice plain open back, large enough for some fun. Lay it out flat like so, so you can start scheming about your design.
I would highly recommend either designs from our dimensional category, or anything that heavily features satin stitch. You could also go the other way, and compose your back piece using just running stitch designs. The trick is to pick things with a similar stitch type.
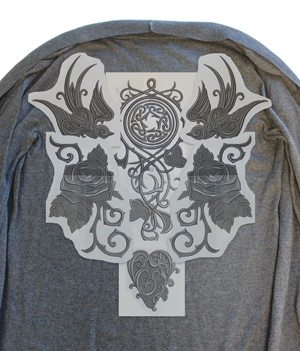
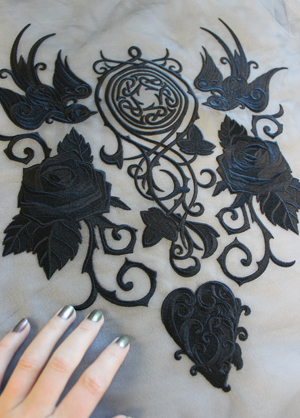
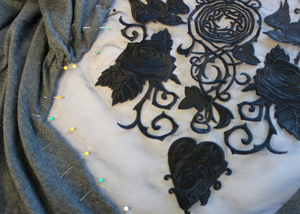
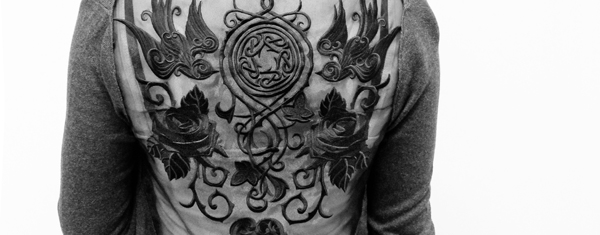
Here are the designs I picked. I used a lot of mirroring to get an overall symmetrical look. I picked the medium size of the Baroque Punk Swallow, the large size of the Elven Court Knotwork Circle, the large size of the Baroque Punk Rose, and the medium size of Regal Love, but just using the heart.
Really, the possibilities are endless! I’d recommend picking out a few designs and then printing templates like so to try out different compositions.
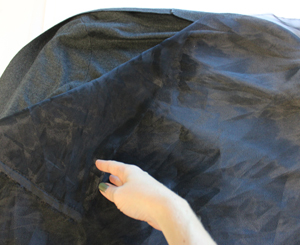
Got your designs all picked out? Good! Next we want to prep our organza. Now, we want a nice big piece for the back. Not only should it be plenty large for hooping, but it should be a bit larger than your cardigan to make pinning it back in easier later. Trust me on this one, extra fabric is easier!
Now we begin assembly. We’ll stitch each design one at a time, hooping up the organza with the heavy duty water soluble stabilizer. Colors are easy. It’s all just the same! This helps the designs blend and coordinate together as one.
I started with the middle design, to help center the rest.

Continue stitching and re-hooping. Especially if you’re using large designs like me, this will take awhile! But that big bold back panel will be totally worth it. At least with a single color thread changes are avoided all together.
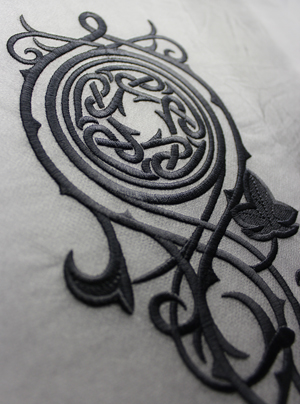
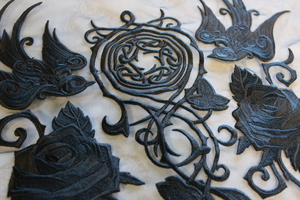
After many hoopings, you’re finally done! A little mirroring and careful placement, and you’ve got a big bold matching design. Now we just need to get it ready for the cardigan.
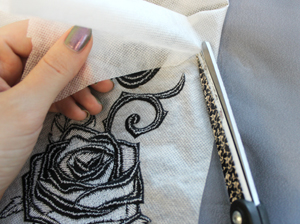
Turn your embroidery over and very carefully trim away the excess stabilizer. Take care! Thin stabilizer and sheer fabric make it super easy to cut through multiple layers. That would be a darn shame after all this work!
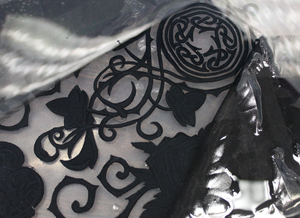
Soak your embroidered organza in water according to your stabilizer package directions to remove the rest of the stabilizer.
Remove it when it’s ready and let it dry. Now your embroidery is floating gracefully on that sheer organza! Perfect for showcasing on the back of apparel.
Let’s map out exactly where this panel will go, and what kind of shape you need to cut out.
Lay your cardigan out flat again, and lay your embroidered piece on top of it. Center the design on the cardigan where it looks best.
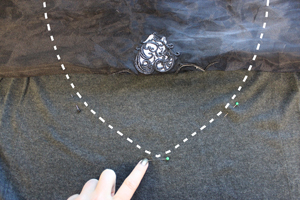
With many areas, we can use the natural seams around the shoulders and neck as cut points. However, we’ll need to design a nice elegant scoop to end at the bottom. You want this to frame the natural shape your embroidery makes.
Since mine came down to a point, I marked out with pins where the swoop should start, and how far out it should go.
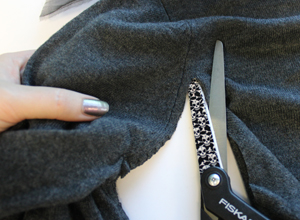
Begin cutting out your panel shape. Keep this all in one piece, because it’s helpful as a template guide later.
Trim the edges around your sleeves and collar, leaving about 1/2 inch for turning under.
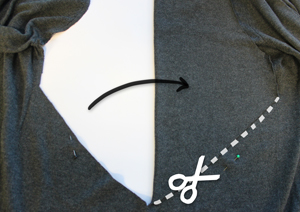
Start by cutting the shape of one half (especially that downward swoop) and then fold it over in order to get a perfectly symmetrical cut.
Now comes the fiddly part. Lay your embroidery down flat, and place the cardigan over it, centering your design in the panel you cut from the cardigan. Start by pinning a few key places. You’ll want to fold the raw edge under, and then pin that flat along with the organza.
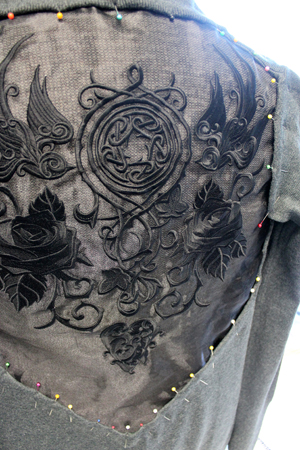
As the drape of a flexible cardigan is awfully tricky to judge flat, use a friend or a dress form and drape your cardigan and organza panel over it. This will take a bit of adjusting and lots of pins! Even if you’re new at it though, it just takes patience, and the willingness to adjust here and there.
Remember, fold the raw edge under, and then use your pin to keep that and the organza pinned in place. Your organza should still be in one giant panel, so adjustments should be pretty easy.
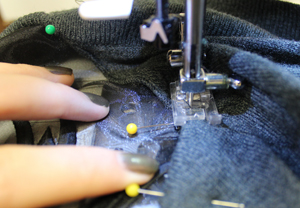
When everything is pinned in place and draping correctly, it’s time to sew your seam all around the edge of the open panel. I stitched my seam pretty near the edge to make sure to catch both sides of the folded cardigan edge. Take your time with this!
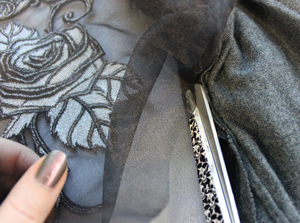
Once everything is stitched in place, try it on once to make sure it’s all draping properly. If it all looks good, you can finally cut off all that excess organza from the edges.
Your cardigan has transformed from an everyday comfy accessory to a totally chic runway ready look! Rock it with light-colored tees and tanks underneath to showcase the floating embroidery to its best effect.
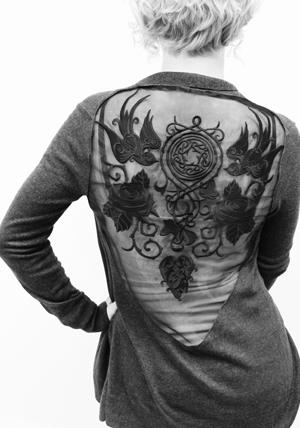
It’s sexy and chic, but still comfy and easy for everyday wear! Lots of different designs and styles all come together effortlessly as one big panel design just by using a unifying color scheme. It’s a neat trick to get the most out of your favorites!
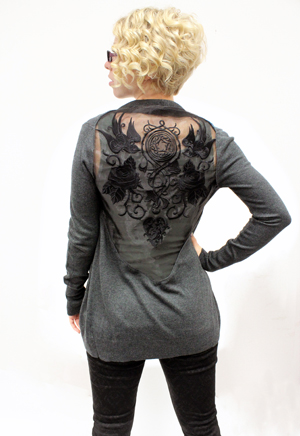
Wear it with a little attitude and it’s sure to take you into the fall season in full fashionable style.


