It’s happened to all of us. You’re going along, minding your own business, rocking one of your coziest sweaters for the season, and somehow you get a rip in it. Maybe you caught it on something, maybe it happened in the wash. It’s so tough with sweaters because you know there’s a good chance that hole could get bigger. Do you patch it old school? Well, yes you could, but there’s a much more chic and sneaky way to save that sweater. Patch it with an embroidery design!
Supplies
So don’t toss that cozy fall item just yet. Let’s see if a little embroidery magic can save it. To repair your sweater, you’ll need:
- The unfortunate sweater
- Cutaway stabilizer (a sheer mesh cutaway such as Sulky Soft 'n' Sheer or Floriani No Show Mesh will be nice and flexible under your knit, but more substantial/detailed designs might call for a medium weight cutaway -- here's how to decide)
- Temporary spray adhesive
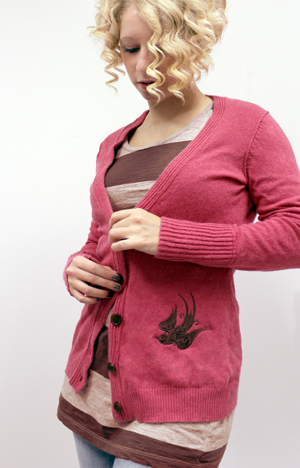
- Small but awesome embroidery design (I used the Baroque Punk Swallow)
- Printed template of the design, for placement (here's how to get it)
- Scissors
- For large holes, you will also want a piece of scrap fabric that closely matches the color of your sweater.
The embroidery design will really depend on the size of your hole and your sweater type, but generally something on the smaller side (under 4"x4"), and with good stitch cover in at least one area larger than the hole, should work well.
Designs Used
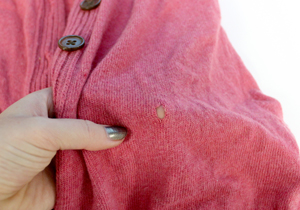
So, let’s start with the offending injury. This was caused when my scissors caught my sweater. This is a small tear with most of the knit still intact. This is the easiest to fix, as most of the fabric is still present to hold the stitches of our patch.
You might have a much larger hole, where the sweater has almost started to unravel. That’s OK, as long as it’s not larger than a quarter. We’ll just need some special tricks.
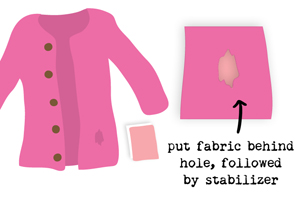
If your hole is so large that your sweater has some large area without fabric, we will need to provide a fabric base for our new stitches to take hold on.
This is easy to do! Grab a piece of semi-sturdy but soft scrap fabric (felt works great!). It helps if it’s a similar color to your sweater. Cut a piece roughly as large as your design, and much larger than the hole. We’re going to put that behind the hole and stitch over it with our embroidery. It will also still need stabilizer, like any other design.
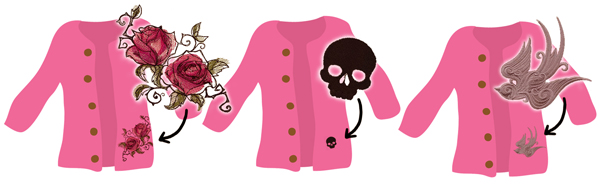
The type of embroidery design can also vary. if you have a very tiny hole that really just needs to be held together, you can use a lighter design like the painterly style, and position the heaviest stitches over the patch area. This is also excellent for sweaters that won’t hold denser designs well. Do you have a tiny hole? Try one of the minis! Maybe just a touch of embroidery is all you need. Got a bigger problem? A small, solid stitching design will work on most sweaters. Just keep the design under 4"x4", because too many stitches on a stretchy sweater can sometimes add too much bulk. Smaller is better when it comes to patching.
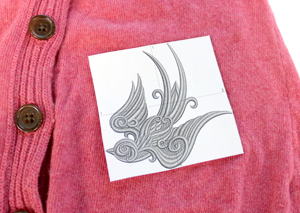
Once you’ve chosen your design, use your printed template to carefully position it over the hole. You’ll want to make sure that an area with lots of stitches will cover that hole, in order to make sure it’s both covered, and not going to get any larger.
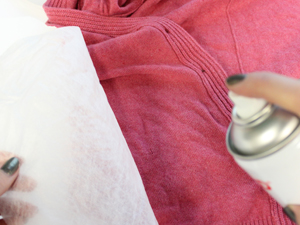
We’ll want to make extra sure that our sweater and our design don’t move around. Spray the back of your sweater with the temporary spray adhesive, and smooth it carefully on top of your stabilizer.
It’s important here to do two things. One, don’t stretch the knit of your sweater. Two, try and keep the hole as closed as possible without disturbing that knit.
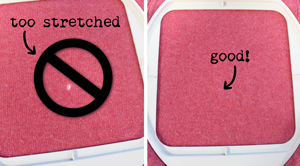
Basically, the same principle applies when hooping it.
Make sure your fabric is lying taut but straight and flat, not stretched in any direction. Otherwise, you might stitch distortion into your sweater and make it lumpy when it’s unhooped.
Remember, if your hole is too large, you’ll also want that fabric scrap behind the hole, with the stabilizer behind that.
Ready? Stitch away! Watch how those stitches cover and seal that hole like magic. You’ll never know it was there. When it’s done, un-hoop your design.
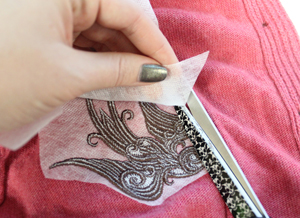
To keep your sweater as light-feeling as possible, cut away the excess stabilizer around your design.
Be careful! No sense in adding ANOTHER hole here...
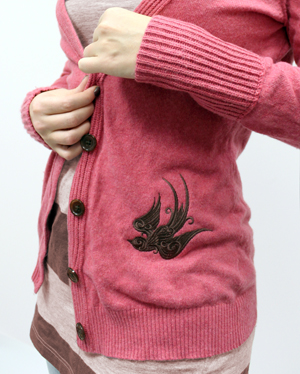
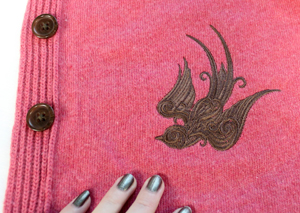
That’s it! Your hole is patched and you’ve recycled your sweater into better than new. Better, because now my awesome cardigan comes with a sweet sparrow!
Those layered stitches will ensure your hole is totally covered, and better yet, never going to get any bigger.
This patching technique works on any article of clothing heavy enough to take solid stitches like these. It won’t really work on light tees, but sweaters, jeans and more can all get repaired easily with the magic of embroidery. If you can hoop it, you can fix it!
So dig through those closets again, and save all those cozy clothes you thought were a loss. Not only can you save them, you can make them infinitely more awesome.


