Every chef knows the importance of a perfect apron. Why not make your own, customizing it from start to finish? Our step-by-step project instructions below will walk you through the process, showing you how to cut your fabric, embroider different elements, and assemble!
Supplies
- 1 yard of cute fabric for your apron
- 1/4 yard of fabric to make a waist tie
- Long strips of fabric to make the shoulder straps
- Pocket/patching fabric, at least large enough to hoop
- Measuring tape
- Scissors
- Some awesome embroidery designs
Designs Used
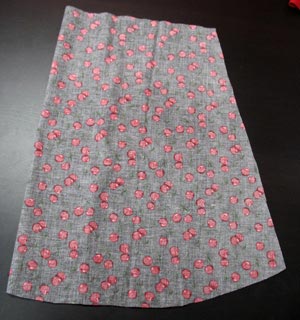
To start, we’re going to cut out the shape for the bottom of our apron. First, measure as far around your waist as you want the apron to wrap. We'd recommend it wrap a little towards the back for a more flattering fit. Take that measurement, and add about 6 inches to it since we’re going to gather the top, and we’ll lose some length. Now measure how long you want your apron to be.
Take your fabric, and fold it in half. Measure out half of your waist measurement (because it’s folded) and the desired length down. If you want it to flare out a bit at the bottom, angle it out a bit from the waist measurement, and then cut it at a slight curve towards the middle, as shown.
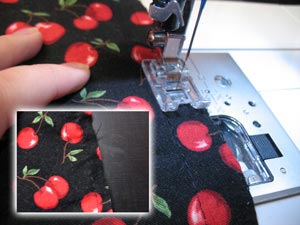
Now we’re going to gather the waist. If you have a gathering foot, go ahead and use it. If you don’t, follow along with me and we’ll do it old-school.
Set your machine to the longest stitch possible, and sew two seams across the top of your apron, one about 1/2 inch away from the top, the other about 1/4 inch away. Be sure to leave lots of excess thread at the beginning and end of each seam for pulling.
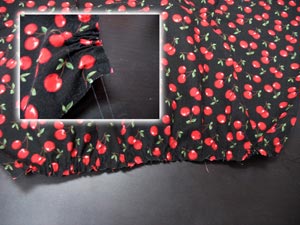
Take a look at one end of your seams, with all the excess threads, and you’ll notice four threads. Two for each seam, one on top and one on bottom. Separate out just the bottom threads from each seam, and gently tug on them together. Your fabric will start to bunch slightly. Use your fingers to slide the bunch father down the fabric, and then tug on the threads again. Continue this process CAREFULLY, because if you break the threads you have to start all over.
You can gather your fabric as much or as little as you like, but don’t gather it so much that it’s too short around your waist.
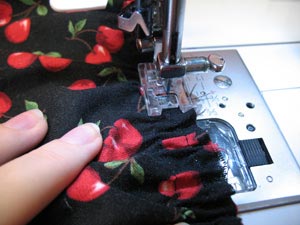
Once you have the gathers the way you like them, sew another seam on top to secure them all in place.
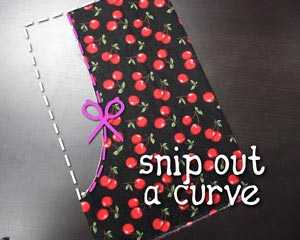
Now it’s time to cut out the top piece. The bottom of this half should be the same length as the top of your gathered apron, and about 12 inches tall. Cut a rectangle to these measurements, and fold it in half. Now on the top side, measure 6 inches out from the folded edge and make a mark. You’re going to cut a curve down from the top, ending just about 4 inches up from the bottom, like shown.
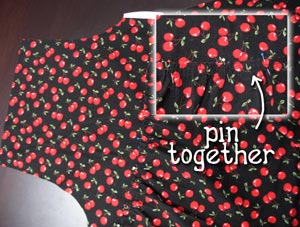
Now you have the top and bottom of your apron. Pin the two layers together to make your full apron shape, overlapping it about 1/2 inch.
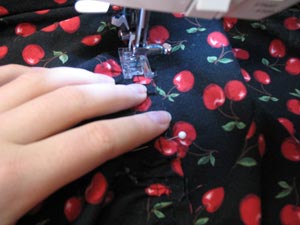
Sew a seam across to stitch the two halves together. Don’t worry about the edges right now; this seam will be covered up by our waist tie later.
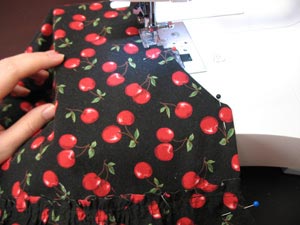
Now we’re going to clean up the edges of the apron. Fold the raw edges of the apron under, all the way around, except for the very top edge, which we’ll finish later. Pin your fold in place and sew a seam all the way around your apron, leaving the top alone.
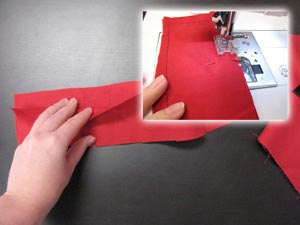
Next, we’ll make the tie for the waist. Cut two long strips of fabric, about 4 inches tall and wide enough to tie around your waist, and pin them right sides together, making sure the edges line up all the way down the strip. Sew a seam all the way around the strap, leaving just one short end open.
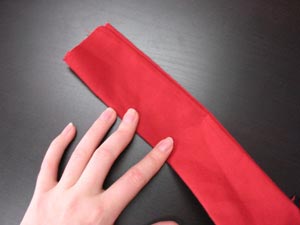
Turn your strap right side out again, pulling it through the opening you left at one side. Given this piece is long and slender, this can take a little while...
Once you have your strip right side out, press it flat with an iron, and pin the raw edges under on the side left open.
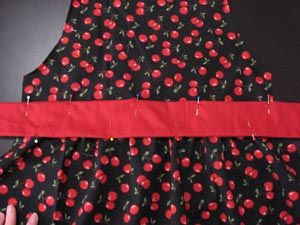
Find the middle of your strap, and the middle of your apron, and line them up, so you have an even amount of tie on either side of your apron. Pin the tie in place across the apron, covering up the seam you sewed before. Test the placement of this on yourself, you want it to fall to the middle of your natural waist. You may move it up and down a little bit, provided it still covers the seam.
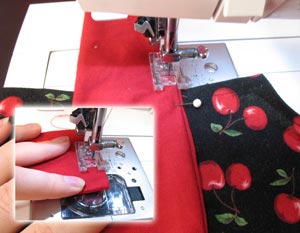
Starting at the pinned end of your strap, sew a seam along that edge to secure it shut, and then continue going all the way around your strap. When you come to the edge of your apron, make sure nothing is caught underneath. Continue sewing, all the way across your apron, around the edges of the strap on the other side, and across the apron again, until you get back to where you started.
Now your strap is nice and flat and secured onto your apron.
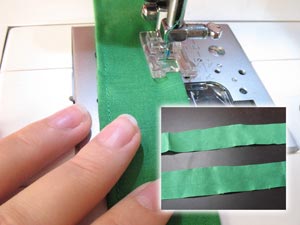
Cut two long strips (about 12 inches by 2 inches wide), fold the sides under, and sew a seam down both sides to make two finished straps. Make sure at least one end of each strap has the raw edges folded under; the other side will be hidden underneath the apron.
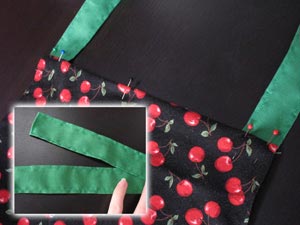
Take your apron, fold that last raw edge at the top under, and pin the two rough edges of the straps onto the top, one at each end as shown.
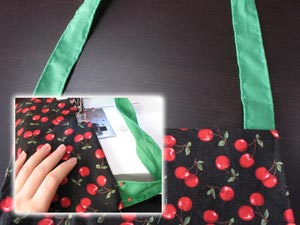
Sew a seam across the top to secure your straps in place and finish the last edge of your apron.
If you want, your apron is ready to wear, but we want to add a little bit more flair!
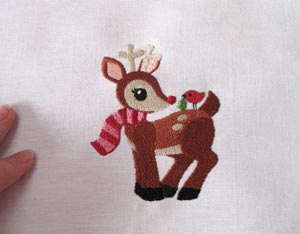
Pick a cute design you want on the front of your apron, and stitch it out onto a piece of fabric we’re going to applique to the front. We chose our little retro reindeer to match our retro apron.
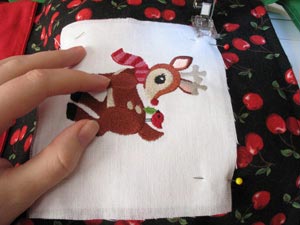
Cut this piece to a size you like for the top of your apron, and pin it in place. We used a decorative zigzag stitch to applique it on.
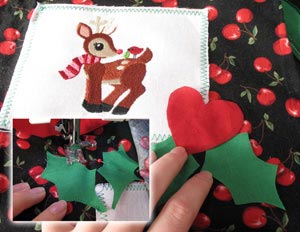
For even more fun, you can cut out shapes and applique them on with your design just using your sewing machine. We might have gone a bit overboard on the “cute” factor here, but hey, to each their own.
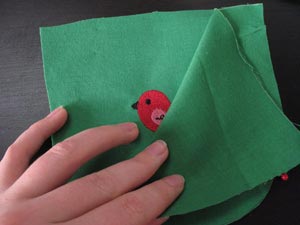
We also decided we wanted our apron to have a pocket. We embroidered a little birdie that matches the one with the reindeer, and cut it down to a pocket shape.
Pin another piece of fabric on top of your fabric shape, right sides in, and cut it to match, so you have two pocket size pieces of fabric pinned right sides together.
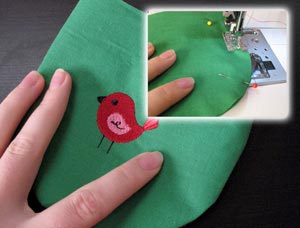
Sew a seam around the curved edge of your pocket, leaving the flat top open, and then turn your pocket right side out again.
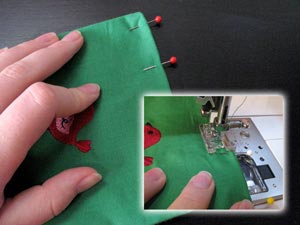
Pin the raw edges of the top under, and sew a seam across the top to close your pocket. We stitched a double seam because we think it looks spiffy.
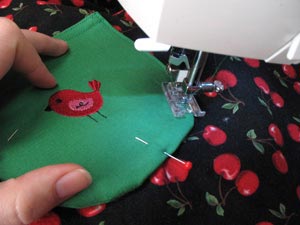
Finally, find a place on the bottom of your apron where you think a pocket looks best, and pin it in place. Sew a seam around the curved edges, leaving the top open. You’re all done!
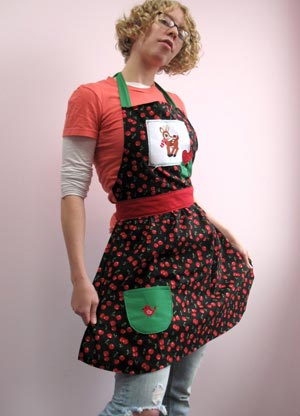
You now have a super cute apron to keep yourself looking cute and your clothes tidy.


