Ever wanted to craft on the go, but always find your tools getting lost in your bag? Keep your supplies organized with a clever craft tote bag, personalized for whatever your passion is! Pockets can be adjusted however you'd like to make the perfect fit for your trade.
Supplies
To make your craft tote, you will need....
- Your favorite I like to Party design to fit the theme of your tote
- 1 yard heavier exterior tote fabric
- 1 yard pocket fabric
- 1 yard interior tote fabric
- Roughly 12 x 17 inches of a solid color fabric to embroider your design on - with enough extra for hooping
- Medium weight cutaway stabilizer
- Temporary spray adhesive
- 50 inches of fabric strap, cut into two 25-inch pieces
- Scissors and pins
- Ruler or measuring tape
- Disappearing fabric ink pen
Designs Used
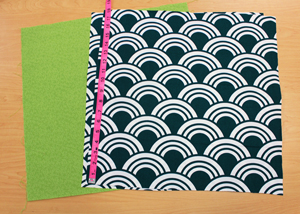
Start by cutting two 18 x 18 inch squares of your exterior and interior tote fabric. You'll want to use a heavier weight fabric for the exterior of the tote, and a lighter weight fabric for the interior of the tote. I used a sturdy canvas print for the exterior and light cotton print for the interior.
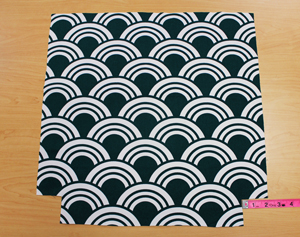
Cut a 2 x 2 inch square on the bottom of each piece of fabric. We will stitch these square together later in order to give the tote volume.
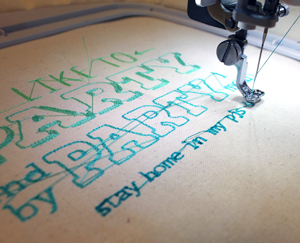
Adhere your medium weight cutaway stabilizer to the back of your chosen embroidery fabric with your temporary spray adhesive.
Hoop both your fabric and stabilizer tightly together and start stitching out your design! (I chose the Make Art version for my embroidery). Be sure to go back and trim the jump stitches with embroidery scissors if necessary.
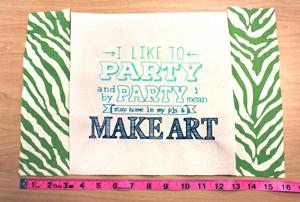
Time for pockets! Cut down your embroidery piece to a 10 x 10 inch square and cut two 3 x 10 inch additional pieces of your pocket fabric to add to either side. These side pieces will become smaller pockets later! Pin and stitch together the three pieces as shown, using a 0.5 inch seam allowance and pressing the seams flat with an iron.
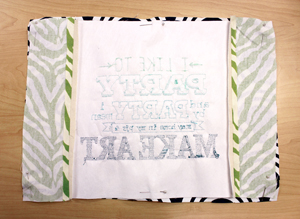
Cut a piece of exterior tote fabric to match the size of your pocket. Pin together with the right sides facing in, making sure to mind the direction of the pattern if your fabric has one.
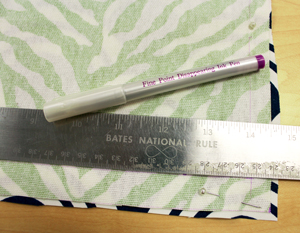
Use a ruler and a disappearing ink pen to make seam marks. It's important to get the pockets the right size so they will fit on your tote bag easily. My front pocket ended up being 9 x 14 inches when finished.
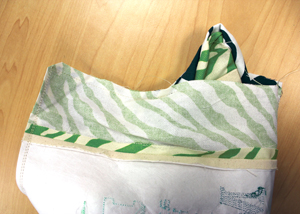
Trim the corners of your pocket and turn it right side out. Use a pencil or pen to push out the corners and make them sharp. Press the seams flat with an iron, folding the open seam inside the pocket. The opening will be sewn shut when you attach it to the tote.
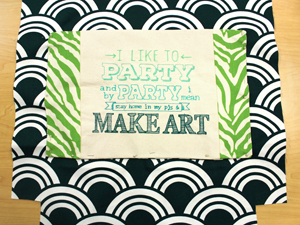
Pin your pocket to the front piece of your tote. There should be two inches on either side of the pocket to allow the tote to fold when completed. Stitch the pocket to the fabric on the sides and bottom, leaving the top open.
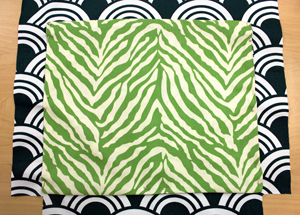
Create a back pocket by repeating the above steps. I used two 15 x13 inch pieces of fabric to create a 14 x 12 inch pocket (with a 0.5 inch seam allowance on each side).
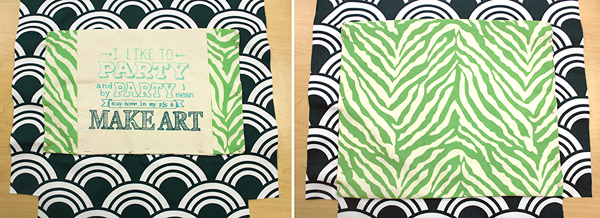
Before stitching the back pocket, make sure it lines up with the top of the front pocket. Then stitch the sides and bottom, leaving the top open.
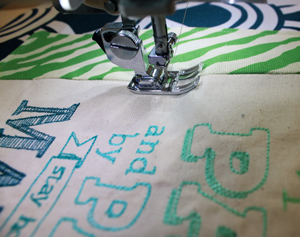
To divide up the front pocket into different sizes, stitch down the seams where the fabric joins. Stitch from the bottom to the top so the pocket stays flat. This will create one large pocket and two narrow small pockets for your paintbrushes, knitting needles, scissors, etc.!

Time for interior pockets! We are going to make two large pockets and divide them up in the same manner as the front pocket. I cut two 17 x 11 inch pieces of both the pocket fabric and the interior fabric. I measure out a 0.5 inch seam allowance, making the final pocket 16 x 10 inches. We want these pockets to be a bit longer than the others since we will be adding in pleats to give the pockets more room.
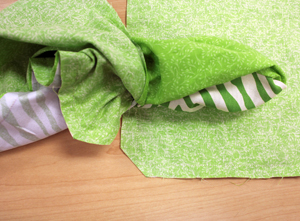
Sew the pockets together, leaving a few inches open. Cut the corners and turn out through the opening. Press flat with an iron.
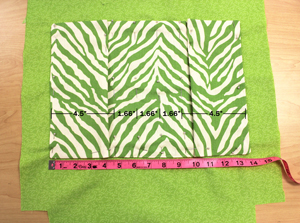
I placed these pockets about 5.5 inches up from the bottom so the openings will be nearer to the top of the bag. Start by pinning either side of your pocket to the interior fabric. You'll want the sides to line up with the 2 inch square cut from the bottom. Then start pinning marks where you'll be dividing up your pockets. You can do this however you want, but you'll have to add in two 0.5 inch pleats somewhere in order to get the pocket to fit.
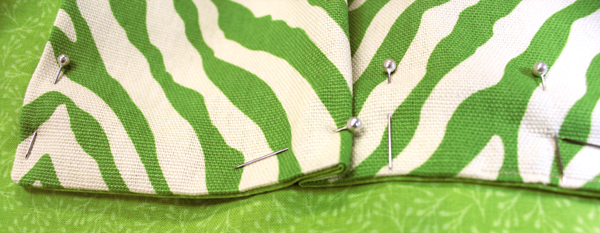
Add the pleats to your larger pockets by folding over 1 inch of the fabric. When you sew the bottom of the pocket to the fabric the pleat will be held down. This will give these large pockets extra room for storing bigger craft tools.
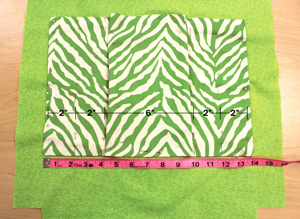
Measure out pockets for the opposing side. I sort of did the reverse of the other pockets, making one large double-pleated pocket in the middle rather than on the other side. This way your bag won't get too bulky if you have those pockets filled. Stitch on the sides and bottom of both pockets, leaving the top open. Then make the dividing pocket stitches, starting from the bottom.
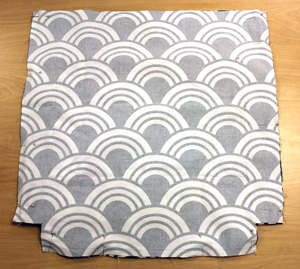
Time to sew the tote together! Place the exterior fabric together with right sides facing each other. Pin together and stitch a half inch seam on both sides and bottom. Leave the top and bottom corners open. Repeat with the interior fabric.
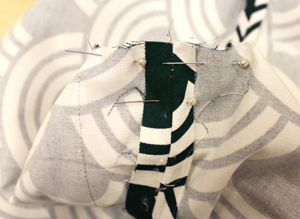
Press the seams you just made open. Fold open the bottom corners of the tote, lining up the seams. Pin and stitch across. Do this for the other corner and both corners of the interior fabric.
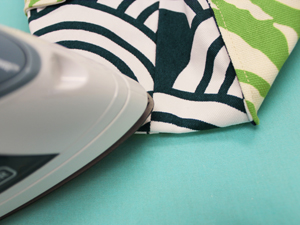
Turn the exterior bag right side out and press the corners flat. Then turn inside out again so we can attach the lining!
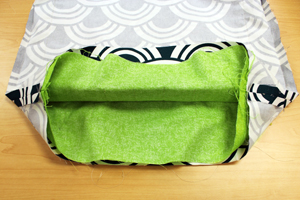
Now turn the lining right side out and place inside the exterior tote to the right sides are facing each other. Push the bag out as much as you can so it will be snug when finished.
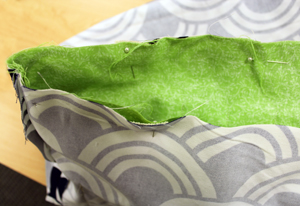
Match up the seams and pin together. Add in the canvas strap between each piece of fabric and pin about 4 inches away from the seam on either side. Be careful to not twist the strap around when doing this.
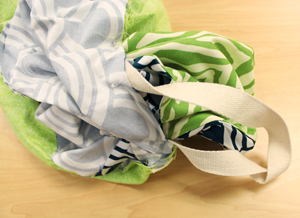
Stitch all the way around the top, leaving about a 4 inch opening to turn out the bag. Start turning out by pulling out the exterior of the bag first.
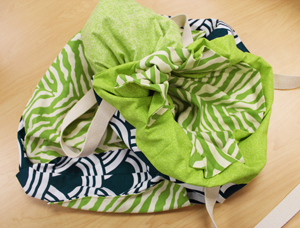
Then push out the lining. Tuck this back inside the bag and push to fit in.
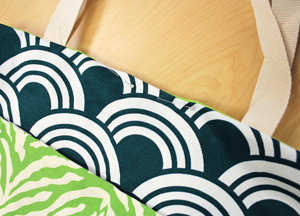
Iron the top of the bag flat, pinning down the opening. Sew all the way around the top of the bag, sealing shut the opening and giving the edges a little bit of extra flattening.
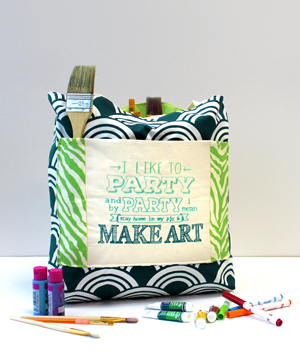
And we're done! Fill your bag with the tools of your trade and you're ready to craft anywhere!
And snacks... don't forget to pack the snacks.


