Ruffles are hot right now.
They've been seen on shirts, skirts, shower curtains and more. I'm not afraid to admit that I kinda have a thing for ruffles. Yes, it's true, sometimes I can be downright girly. Though I suppose that secret was out when I was photographed in a big ol' poofy dress. Still, ruffles are romantic, rustic, and more than a little feminine and I just don't care. Thankfully, ruffles are also pretty easy to make once you know the trick. So let's use them to upcycle something ordinary into something ruffled and fabulous.
Supplies
What do you need? Just two ordinary T-shirts (the same color, if you want the ruffles to match), a pair of scissors, a kick-butt design (I used the Parisian Crown and Laurels) and some cutaway stabilizer. That's all we need to make some ruffled glory in bag form. That's right, we're going to upcycle our tees into a totally cute and styling bag.
Designs Used
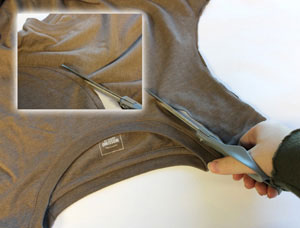
First, let's chop off the bits of the tee we don't need. Cut away the sleeves and the neckline of one of your T-shirts.

And now we've made... a tank top! Ta daaa. I'm so good at tutorials.
I'm only kidding. Just what do you take me for anyway? These will be the handles of our bag. See, now you're beginning to see it.
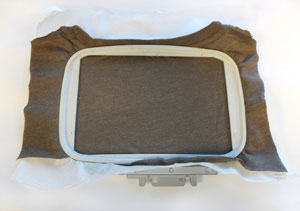
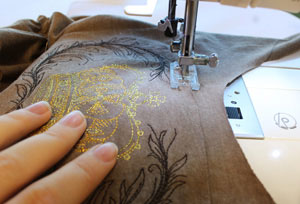
At this point, I wouldn't be any kind of self-respecting embroidery nut if I didn't tell you to add some thread-based bling. Cut off just the top of your other tee (just the section from the bottom of the arms and up) and hoop it up with some tearaway stabilizer. Set the rest of the tee aside for later.
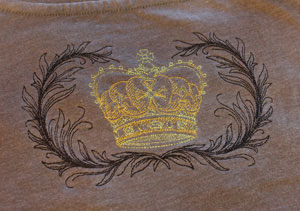
Stitch something classy to suit your ruffles. Or you know, a pirate. Ruffles go with anything, so the fashion world tells me. I have to assume this applies to pirates too.
Set your embroidery aside.
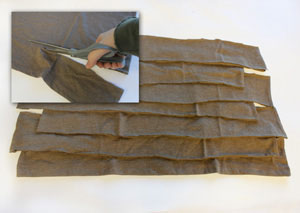
Go back to that tee you cut up for the embroidery, and cut the rest of the T-shirt up into strips, like so.
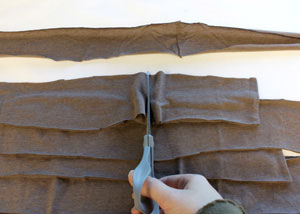
We'll want to cut these strips open so they form one big strip of fabric, just long enough for ruffles. Though you could just cut them all up one side of the seam, I snipped them in different places so the seams on the strips would be in different places, and therefor create kind of an interesting texture when they become ruffles. That could just be me being a little compulsive.
Now to the big show... how to make ruffles! They're easy. Do you think I'd be here if they weren't? You should know me better than that by now.
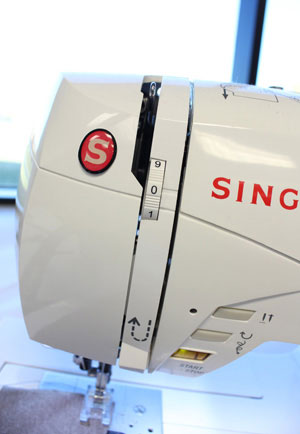
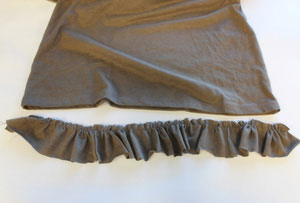
Set your machine to a zero tension, and to the longest stitch possible, and stitch along the edge of one of your fabric strips.
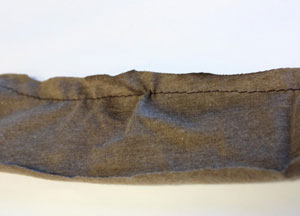
Here's my first strip. You can see that the T-shirt knit is so stretchy it's already starting to pucker.
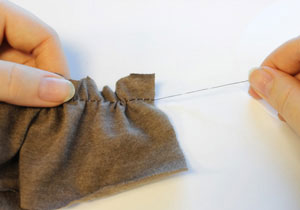
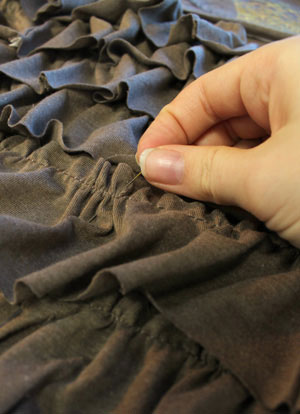
To really get that fabric to ruffle, grab one of the threads from your seam and gently tug. Your fabric should start to pucker. You'll have to gently push the ruffles down your strip, and then tug a little more. Be careful not to tug too hard, you really don't want your thread to break.
Ruffles really gather up your fabric, so your double wide strip will likely become half the length it was once it's all ruffled. Shuffle your ruffles (that's really fun to say) around until it's just about as wide as your tee.
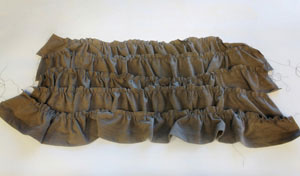
Now become a ruffle making machine! I made lots of ruffles. Too many in fact. They're just so much fun to make. And to say. Ruffle ruffle ruffle. Kinda like the hamburglar but weirder.
Did I lose you? I digress. My apologies. Maybe this is what happens when I get in touch with my feminine side.

Not that ruffles themselves aren't great, but let's actually put these ruffles on something. Go back to the shirt you turned into a tank top, er... purse.
Snip it up the sides, along both seams. Then, open it up (it should flap open at the tops of your "handles") with the front of the shirt facing up. We want it facing this way so we can mock up our ruffles and embroidery.
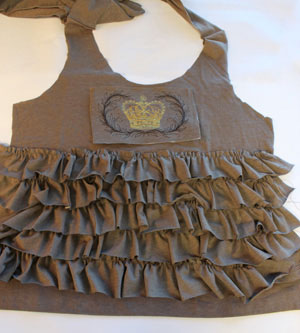
Lay out your ruffles like so. I put my embroidery up at the top of the bag, and then overlaid each of the ruffles. Try and arrange them so one tier of ruffles covers up the ruffle seam on the one below it. You may find your shirt is a lot longer than it actually needs to be to make a bag, so I snipped of the last few inches at the bottom to make it more purse sized than laundry bag sized.
Pin your ruffles and your embroidery in place.

Now it's time to sew it all down, ruffles and all. Start with your bottom most ruffle, lifting the above one out of the way as you're stitching. This seam will not only stitch the ruffle onto your bag, but keep all the ruffly bits (technical term) in place.
Once you've got all your ruffles in place, stitch around your embroidery design, appliqueing it in place.
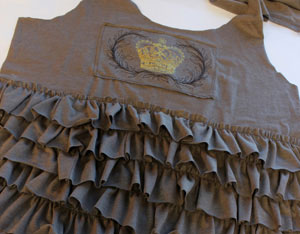
A wonder of ruffles! OK, at this point it looks a bit more like a little tot's dress (not a bad idea actually, almost two tutorials in one) but all we need to do is stitch everything together to make our beautiful bag.
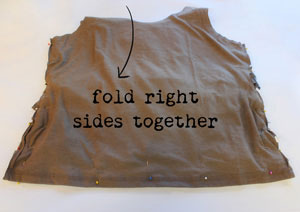
Fold the other half of your T-shirt on top of your ruffles and design, so the right sides are together. Pin it in place around the sides and the bottom. If your bottom ruffle is very close to your bottom edge, you might want to pin or tape it up so it stays clear of the seam.
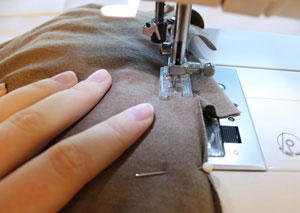
Sew a nice wide seam all the way around, to make sure you catch all the ruffled, stretchy edges.

When you're done, reduce some of the bulk of the bag by clipping away any of the excess ruffle bits on the sides.
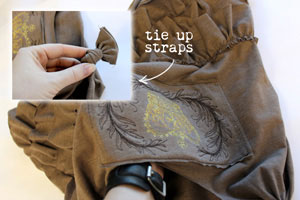
Finally, turn your bag right side out again, and a special little touch, you can tie up the straps to make it a little bit shorter and a little bit cuter.
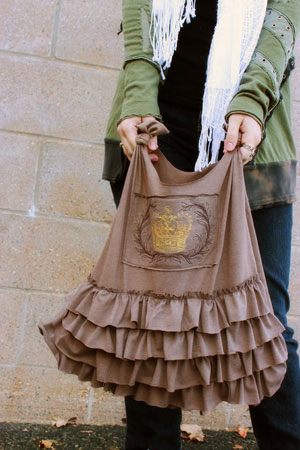
Fill your bag with your bits and bobs, and rock your ruffles, baby. And to think, this started out as nothing but two T-shirts.
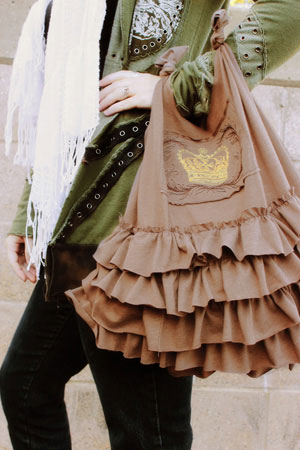
A little bit flirty, a little bit fashion, totally girly and I don't even care. I kind of want to add ruffles to everything now. You know what would be even more awesome, if you inner tomboy is groaning at you? Go grab some old heavy metal T-shirts and ruffle the heck out of those.
Heck yeah, baby. Ruffles are back.


