There's nothing more magical than Santa's visit on Christmas Eve! Bring that joy to life on Christmas morning with this custom made Santa sack, shipped directly from the North Pole and filled with gifts from the workshop. You can even easily customize it with your little one's name for an extra-magical morning. Quick-stitching designs and super simple construction means you can whip this up as fast as Santa's elves.
Supplies
To make your Santa gift sack, you’ll need:
- Your favorite North Pole Express designs (We used the largest design pack)
- Bag fabric -- to make a sack similar to this one, you'll want two pieces of fabric at least 30 x 50 inches
- Printed templates of your designs for placement (click here to learn how to print them)
- Ribbon to tie your bag shut
- Medium weight cutaway stabilizer
- Temporary spray adhesive
- Scissors and pins
- Any holiday accents you'd like to add (like these fun jingle bells)
- Ruler
Designs Used
To start, cut your two pieces of fabric around 30 x 50 inches. Grab one piece, to be used as the front of your bag, with some excess room for hooping.
Grab your printed templates, and start laying out your design ideas. The fun part about these designs is that they can be scattered around any which way and they'll look pretty cool.

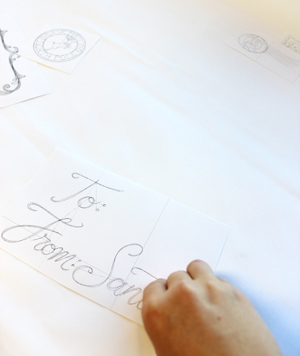
Once you have a design layout you like, mark each template in place (I usually just tape mine in place and remove each as I stitch it).
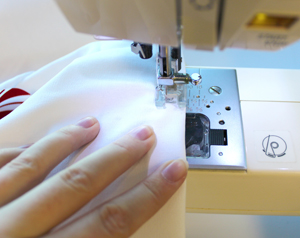
Adhere your medium weight cutaway stabilizer to the back of your fabric with temporary spray adhesive, and hoop both tightly together. It's best to use the smallest hoop possible with each design and rehoop as you go.

Stitch up your first design. As these are all fairly light-stitching, they go pretty fast.
Once your first design is done, remove your hoop, and move on to the next.
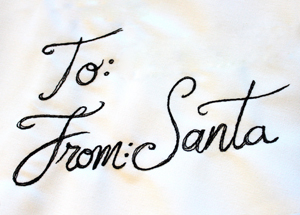
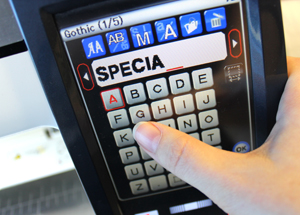
There are some designs that allow for a little extra customization, like this "From Santa" design. This is a place where you can easily add a name to make your gift bag extra special.
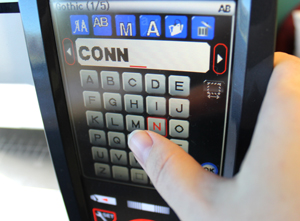
This customization is very simple to add with the basic text that comes on many embroidery machines. This is often under a setting called "monogramming".
If you want some text that's a little fancier, you can always use one of these alphabet designs.
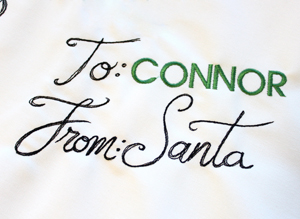
Here's the name added to our "From Santa" design. Stitching it in a different color calls a little bit of extra attention to it.
You can continue customizing your Santa sack with other basic phrases like "Special Delivery" and "To be opened: 25th Dec". Basic block text will add to the look of an "official" mail stamp style.
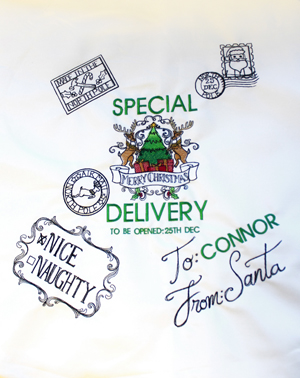
Here's everything stitched onto the bag. You can, of course, lay out your designs however you choose, adding more or less embroidery.
At this point, we're going to move into turning it into a simple gift sack; however, you could also embroider the back piece if you want embroidery on all sides of your bag.
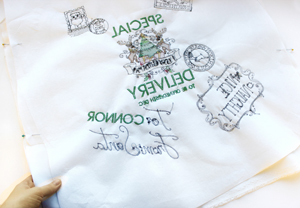
Once you're happy with all of your embroidery, pin both pieces of your bag fabric together, right sides facing in.
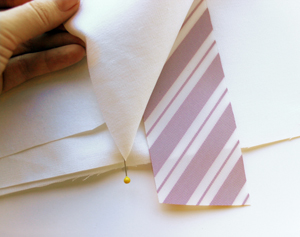
About 6-10 inches from the top, pin in a 2-foot piece of ribbon on either side of your bag, with excess coiled up inside. Then when your bag is turned right side out, you can use these two pieces of ribbon to tie your bag shut.

Once everything is pinned in place, sew down the sides and the bottom of your bag, leaving about a 0.5 inch seam allowance. Leave the top edge open.
After you've stitched the three sides of your bag, you're going to box the corners so the bag sits a little wider.
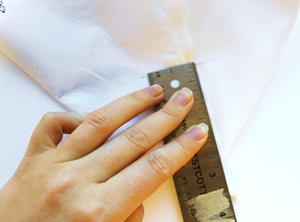
At the bottom corners of the bag, pinch the side and bottom seams together and flatten them. Then measure up about 3.5 inches. Mark a line across the corner at this height and pin the flattened corner in place.
Do this on both sides, making sure you're measuring up to the same height on each side.
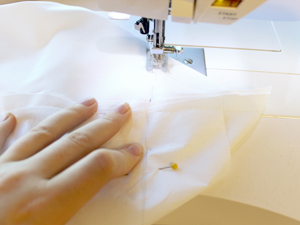
Sew a seam across the corner, along the line you marked. Repeat on both sides.
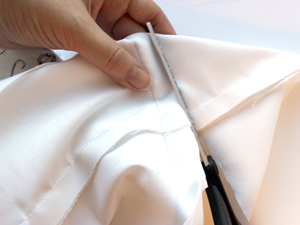
To test your boxed corner, turn your bag right side out and push out those edges.
If you're happy with how much the corners flatten out the base (making sure it doesn't encroach on your embroidery), you can turn it inside out again, and cut off the excess fabric past the seam.
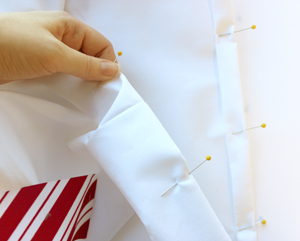
Finally, take the top raw edge all along the opening of your bag and fold it down about 0.5 inches, then fold it over again. Pin your double fold in place.
Sew a seam all along the folded top edge of your bag to finish everything off nice and neat
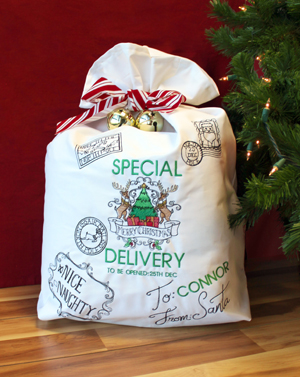
All that's left to do is stuff your Santa gift bag full of goodies, wrap it up tight with your ribbon (adding some holly or bells for good measure) and set it under the tree for Christmas morning. Little ones will delight in receiving this "special delivery" with all kinds of festive stamps straight from the North Pole workshop, especially when this magical package is addressed right to them!


