Hey folks! Karline here, your friendly neighborhood doer-of-things-that-are-not-making-embroidery-designs here at Urban Threads. (Hey boss: when do I get those “Ringmaster” business cards??) At the moment Niamh is all busy other doing things for other people, so I bring you this week's project: the steampunk stocking!
Between their shininess and their love of all things Victorian, steampunk and Christmas go perfectly together. We’ve unveiled quite a few new steampunk Christmas embroidery designs this year, and we can't wait to see what you do with them. Here’s one nifty idea - a fancy heeled boot, dressed up in a fully functional spat with steampunk snowflakes and spiffy brass snaps. Pattern and instructions are below … enjoy!
Supplies
To make your stocking, gather up:
- A Niamh to draw a stocking pattern - j/k, I already did that for you. Download the PDF and print it out. Or you can make up your own pattern if you want. I’m cool with that. Rock on.
- 1 yard fabric for the boot - in mine, the light rosy/tan suedecloth.
- 1 yard fabric for the spat - here, the dark red faux suede.
- 1 yard fabric for the lining - red and tan stripes for the win!
- 1 yard quilted cotton to give the stocking body - you won't see it, so it doesn't much matter what color it is. Though I’d aim for something that doesn't clash too much, just because.
- Steampunky embroidery design(s) - probably going to have to be less than four inches wide to fit with this pattern. I used a steampunk snowflake.
- Brassy snaps, buttons, and/or any other hardware/bling you like.
- Medium weight cutaway stabilizer
- Temporary spray adhesive
- Air-erase pen or dressmaker's pencil
Designs Used
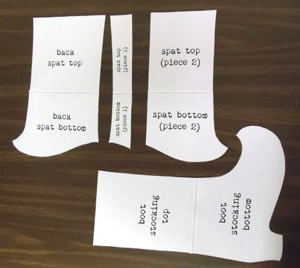
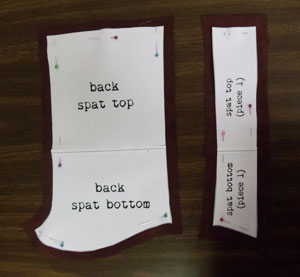
Got your PDF pattern printed out? Great. Cut out all the pieces and tape them together as directed. They should look like this. Note, and I’m resisting the urge not to bust out the blinky text here because I know *I’ll* forget it in five seconds: you will need to ADD SEAM ALLOWANCE (I’m using 1/2") around all sides of all these pieces.
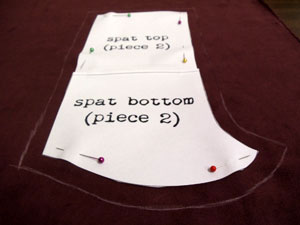
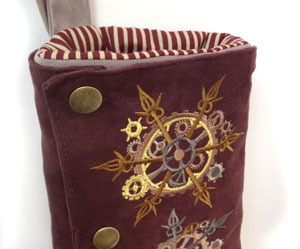
Take spat piece 2 and trace it onto your spat fabric. Remember ADD SEAM ALLOWANCE around the edge! This is the piece we’ll embroider, so don’t cut it out yet.
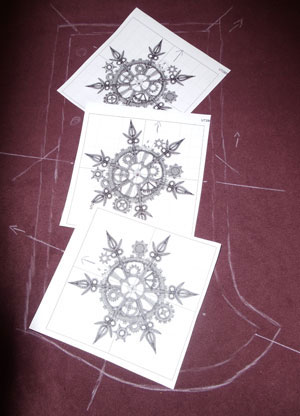
If you’ve got embroidery software, print out paper templates of the design(s) you want to use to help with placement. If not, cut out a piece of paper the approximate size and shape of the design. (For more info, see this placement template tutorial.)
Arrange the template(s) how you want them on the fabric, and mark their centers and crosshairs on the fabric. Remember to leave room for seam allowance and snaps/buttons/hardware.
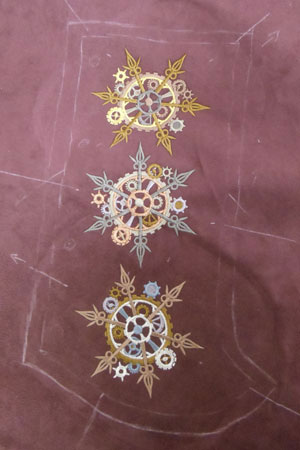
Spray a piece of cutaway stabilizer with temporary spray adhesive, and stick it on the back of the fabric. Hoop ‘er up and stitch. Repeat as desired.
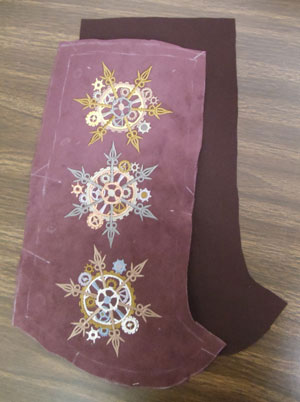
After it's done stitching, cut out the pattern piece, along with another one that is its mirror image. Remember to ADD THE SEAM ALLOWANCE. Yes, I’m going to keep saying that. You’re welcome.
Cut out two mirrored pieces from each of the other spat pattern pieces, too. A handy way to do this it to fold the fabric in half and cut ‘em both out at the same time. Add seam allowance, yo.
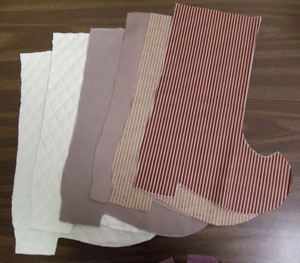
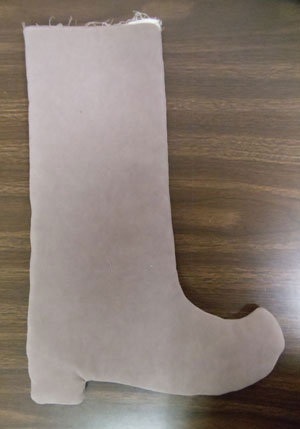
For the full boot stocking pattern piece, cut front and back pieces out of the stocking fabric, quilted fabric, and lining. Once again, add seam allowance to everything.
Also, cut two 3" x 8" rectangles: one of the outer stocking fabric, and one of the spat fabric.
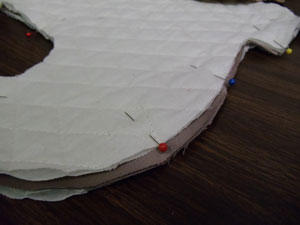
Now that all your fabric pieces are cut out (whew!), it’s time to stitch them together. Lay the two outer fabric pieces (my suedecloth) right sides together, and sandwich them with a quilted piece on each side. Stitch around everything except the top edge.
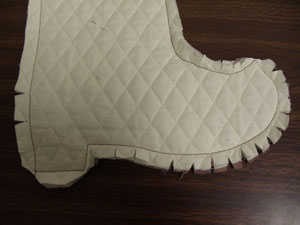
Clip curves as shown. This helps keep the seam from puckering once the stocking is turned inside out.
Turn the whole thing right side out.
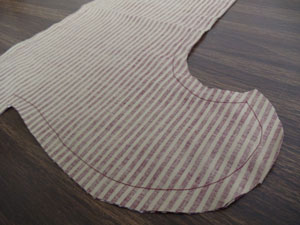
Lay the lining pieces right sides together, and stitch around everything except the top edge. Don’t turn it inside out - it’s already as it should be.
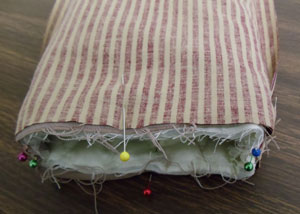
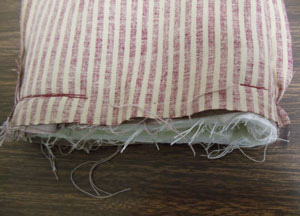
Stick the right-side-out outer boot into the wrong-side-out lining. Pin the top edges together.
But wait, don’t sew just yet...
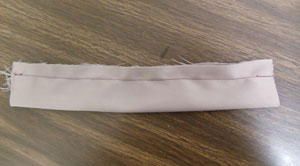
To make a hanging loop for the stocking, take a 3” x 8” rectangle of the same fabric as the outer boot is made out of, and fold it in half the long way, right sides together. Stitch and turn.
Fold it into a loop and tuck it between the outer and lining layers, with the raw ends sticking out (you can barely see them on the left in this picture). Scoot the loop around until it’s positioned where you want it and will be a good length. Stitch around the top of the stocking, leaving a gap of several inches at the back.
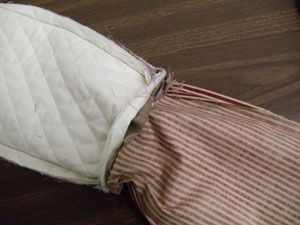
Time to turn the whole thing inside out. This gets kinda crazy, so I’ll show you in steps. First, pull the outer stocking out of the lining, so only the seam you just made is holding them together.
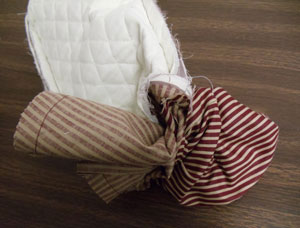
Turn the lining part right side out by poking the toe of the lining through the gap in the seam.

Keep on going - push the fabric of the outer stocking through the gap to turn it inside out, as well.
At which point you will have this.

Tuck the lining into the stocking. Looks better now, eh? Fold under the raw edges and pin in place to match the rest of the stocking top.
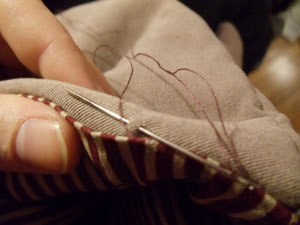
Hand-sew the gap closed.
Technically, you’ve got a stocking now … but it needs some dressing up, wouldn’t you say?
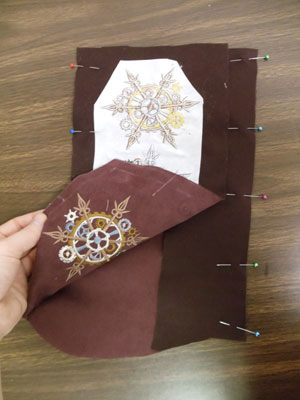
Now it’s time to construct the spat. You’re going to make two assemblies like this. Take the back spat piece and pin the front pieces 1 and 2 to it, as shown. Stitch. Press seams and clip curves.

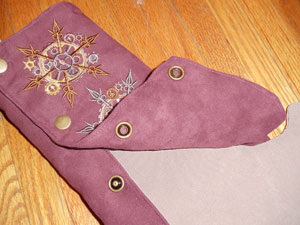
Pin these two pieces right sides together. Stitch around all sides, leaving a gap for turning (along the side of the short piece is a good place, because it will be hidden). Clip corners and curves, and turn right side out.
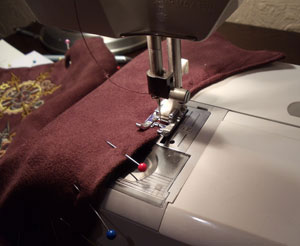
Which means you’ve now got this. Stitch close to the edge around the whole thing to give it a nice finished look.
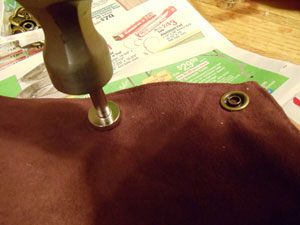
Add snaps along the sides of the spat, according to the package directions.
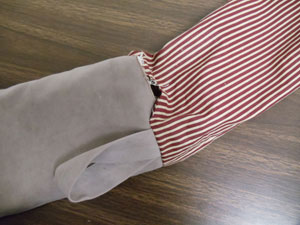
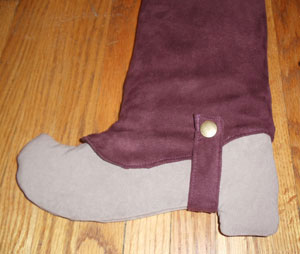
Wrap the spat around the boot and snap it shut. Pretty, eh? One more little thing…

Take a 3" x 8" rectangle of the same fabric the spat is made of. Fold it in half the long way, right sides together, and stitch along the side and across one end. Turn it inside out so you have a little strap. (I then sewed all the way around close to the edge to finish it off.) You’ll want it to overlap a little in the back (with just enough room for a snap…
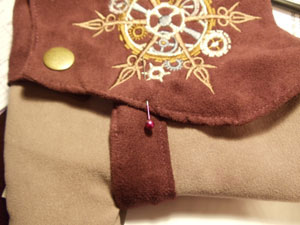
And tuck under in the front (it’ll be sewn in place here).
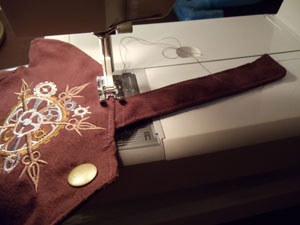
Stitch the strap to the front of the spat.
Add a snap to the other end of the strap to attach it to the back of the spat.
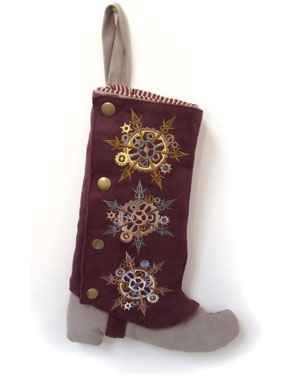
Ta daaaa! Your stocking is done, just waiting to be filled with trinkets and curiosities.
Hang up a few steamflake ornaments, and stitch more fanciful festivities with steampunk Christmas designs.
Sparkling steampunk snowflake designs put a marvelous mechanical spin on holiday decor, and brass snaps are the perfect finishing touch.
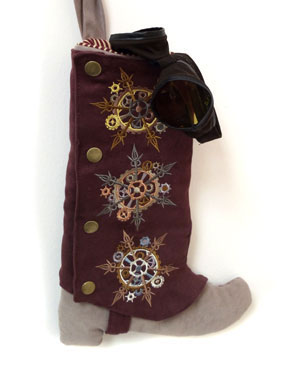
New goggles? For me?? You shouldn’t have!


