Embroidery designs can do some pretty magical things. In-the-hoop designs that give you a little embroidered object when the design is done are always extra rewarding ... and these designs take the popular in-the-hoop stuffie to the next level with the addition of applique fabric! Read on to discover how to put these enchanting plushies together.
Supplies
So, to make your little applique stuffie, you need:
- Gnome Way embroidery design (and for Christmas, there's a Santa gnome too!)
- An embroidery design that's a stitch-and-turn stuffie with applique -- Gnome Way, Lady Gnome, Cozy Owl, or Playful Penguin. We're demonstrating with Gnome Way.
- Fabric for the main body and applique details -- we stitched the gnomes using felt and the owl using quilters cotton
- Printed templates of the dieline files, which come with the design and have DL in the filename (here's how to print dieline templates, or stitch if you don't have software)
- If your design has vinyl applique, you will need clear vinyl
- Tearaway stabilizer
- Cutaway stabilizer
- Temporary spray adhesive
- Scissors
- Needle and thread
- Polyfill stuffing
Designs Used
Let's start with those printed dieline templates...
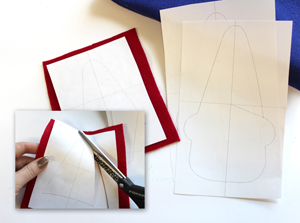
Lightly spray the back of each paper template with temporary spray adhesive and put it on the right side your chosen fabric. Spray a piece of cutaway stabilizer with templorary spray adhesive and smooth that on the wrong side of your fabric.
Cut out your fabric shapes along the dielines.
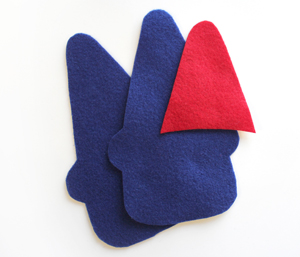
When you're done you should have several cut-out fabric shapes, like this -- front and back body pieces plus any applique details..
Hoop up a piece of your tearaway stabilizer nice and tight, and get your machine ready to sew...
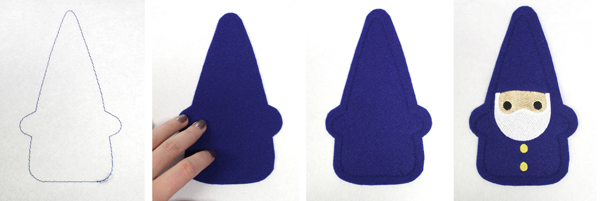
The first thing that sews is a dieline. Lightly spray the back of one of your body pieces with temporary spray adhesive, and place it so it completely covers the dieline. After that, a dieline will stitch to tack down your fabric, and then the inner details will start to stitch out.

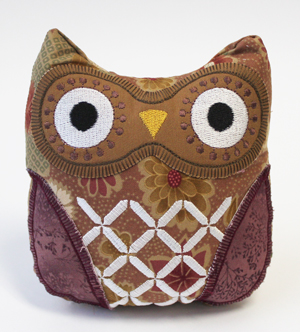
This is what it looks like for the Cozy Owl, which will also look similar for the Playful Penguin. The first thing that sews is a dieline. Lightly spray the back of one of your body pieces with temporary spray adhesive, and place it so it completely covers the dieline. After that, a dieline will stitch to tack down your fabric, and then the inner details will start to stitch out. After it stitches the wing dielines, lightly spray the back of your wing pieces with temporary spray adhesive and place the wing fabric so it completely covers the wing dielines.
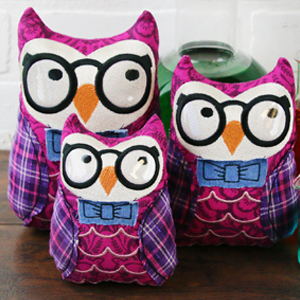
If you are stitching this bespectacled owl, you will add vinyl applique for the glasses as well. Click here to learn more about stitching with vinyl applique.

At one or more points during the stitching, you may see dielines and tackdowns on the thread list. These are where you'll add your applique details. In this case, a dieline stitches for the hat. Spray the back of your felt hat piece, and place it so it completely covers the dieline. Then a tackdown will stitch to hold the fabric in place. Once all the details and applique bits have stitched, lightly spray the edges of your other body piece with temporary spray adhesive, and place it on top of everything. The last thing that will stitch is a finishing seam to sew your plushie together, leaving the bottom edge open.
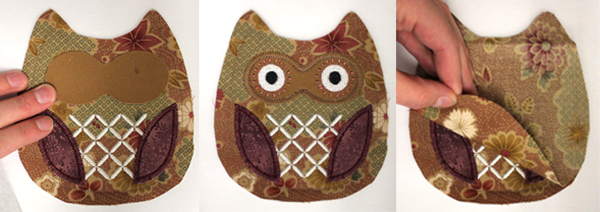
After the wings get tacked down your machine will stitch the eye dieline. Spray your eye fabric down with temporary spray adhesive, then place it over the eye dieline. The eye tackdown and details will then stitch out. The final step is to lay down your other body piece, right side in with the sides sprayed with temporary spray adhesive to keep it in place. The last thing that will stitch is a finishing seam to sew your plushie together, leaving the bottom edge open.
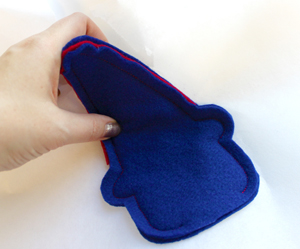
Once that final tackdown has sewn, un-hoop your little gnomie or owl and tear him free from the stabilizer.
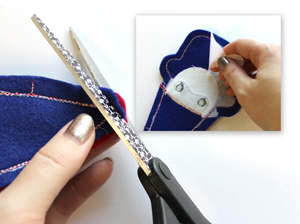
In order to make turning him right side out easier, remove as much of the remaining tearaway stabilizer as possible, and clip your corners and excess fabric edges so there’s less bulk when he’s right side out.
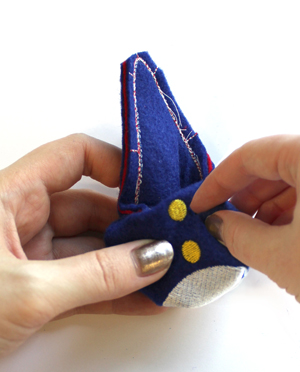
Turn your little gnomie right side out through the opening at the bottom. This is a somewhat uncomfortable endeavor for our little gnome, but he bears it with good spirits.
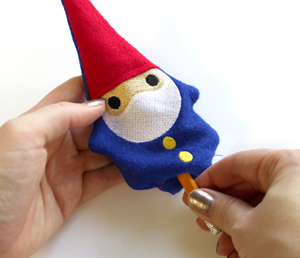
When he’s the right way 'round, use your finger or a long object like a pencil to push out the corners on his little arms and pointy hat.
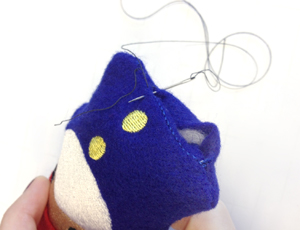
Then, fill him plump full of polyfill and stitch the opening closed with your needle and thread.
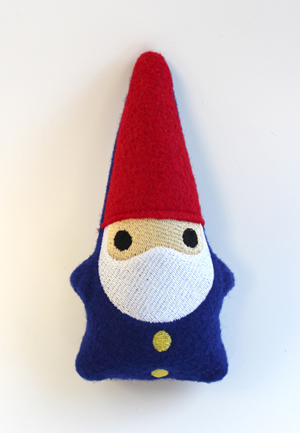
Your gnomie lives! He is plump and ready to live out the rest of his little gnome days.
When your cozy critters are plumped and stitched, you'll have new friends to acompany your gnome!
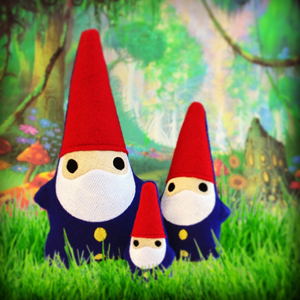
Make a gnome friend, a gnome family, or heck, a whole little gnome village! These little guys are a piece of cake to stitch and stuff. And they're so adorable!

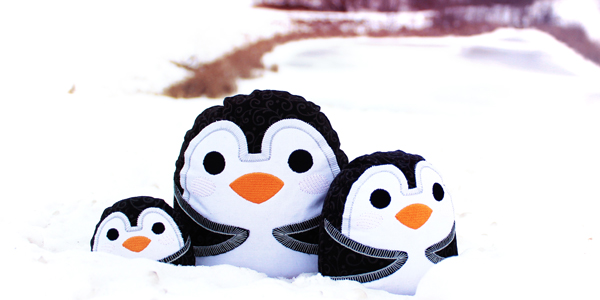
No matter what plushie you are stitching, it's bound to be adorable! Remember to play with fabric colors and patterns, and different thread colors to make them unique to you.


