Designs Used
When I hear “beanie” the first thing I usually think of is those little multicolored ones you see in cartoons with the little propellers on top. Well, “beanies” are something quite different now, and they’re fast becoming a fashion statement for both guys and gals.
The thing about hats is they always looked really difficult to make to me. They were all ... roundy, and fitted ... and brimmed. I really wanted to stick some swank embroidery designs on a beanie, but hooping them wasn’t really an option. The only way to embellish my beanie would be to make it myself. Eek!
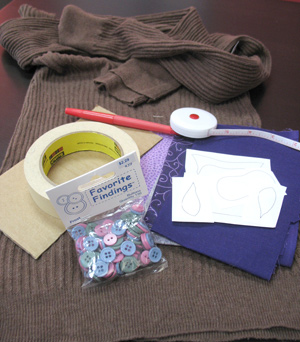
Well, once I stopped needlessly panicking and did a little research, I found out that making a swank beanie is really quite simple, and since you make it yourself, you can embellish it however you like. All you’ll need is an old sweater, measuring tape, and some cardboard and tape. If you want to embellish it with a fantastic button-eyed animal, you’ll need some fabric and buttons as well.
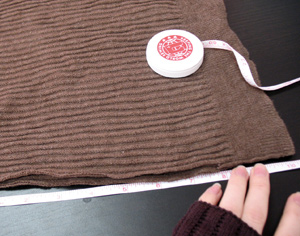
We’re going to use the bottom of the sweater because it usually has a nice finished edge for the hat. To figure out how much sweater you need, you’ll want to take a quick measurement around your head (let’s call that x), and from the crown down to where you want your hat to be (y).
These are just basic measurements, because depending on how stretchy your fabric is, you probably won’t need that much.
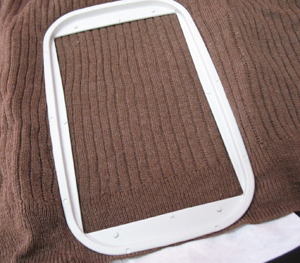
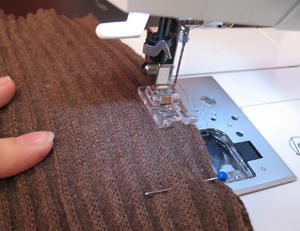
We’re going to open the sweater so it’s easier to hoop.
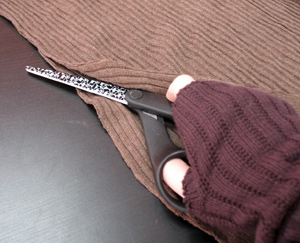
Using your measurement for y, add about two inches and cut up that far along the side of your sweater, then cut across at that height so you then have a rectangle of fabric.
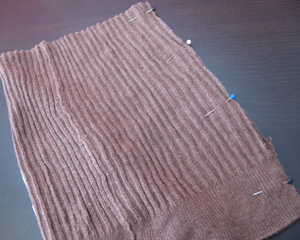
Now, to make sure your fabric is the right hat size, take the bottom end and wrap it around your head. You might want to do this when no one else is around since you’ll look a bit silly, but it’s necessary. You’ll probably find you can lose a few inches around your hat because it’s stretchy.
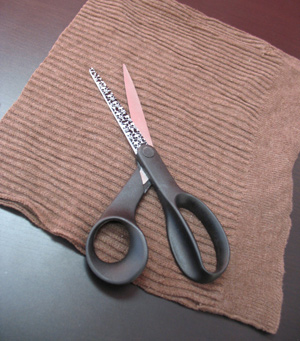
This is how your fabric should look now. Once you have it cut, open it up the long way and decide where you’re going to want to embellish it. The bottom cuff of the sweater will be the bottom of the hat, and the top inch or two won’t be visible, so keep your design somewhere in between there.
Hoop up your fabric with some stabilizer. If you’re using a normal embroidery design, you can stitch away. If you’re using our special button buddy designs, follow along with me and I’ll show you how to make them.
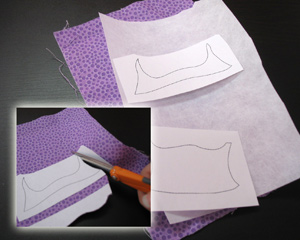
First, stitch or print all the dielines you’ll need. The owl is the most complicated, so I’ll show you how to do him. By “complicated” I mean like three steps instead of one, and they’re actually all pretty simple.
If you’re printing them, spray the templates with a bit of stabilizer and cut them out carefully. For the base of the owl, I added some stabilizer to the back of the fabric. For the other bits of him, I left them raw, with no backing. Just ... because.

Here are all the pretty purple owl bits, all nice and cut out. Each of these pieces will be sewn on in parts. I’ll show you the process...
First his feet will sew, and then the first two dielines, for his body. Carefully cover these up with your body fabric, making sure the dielines are completely covered. After these are tacked down, the dielines for the wings will stitch. Add your fabric carefully again and then a tackdown will stitch. Finally, the eye dieline will stitch, and after the fabric has been stitched down and his beak added, you’ll notice some funny little x’s will sew where his eyes should be. There’s also a cute little blanket stitch on the last step if you want to make him look extra handmade.
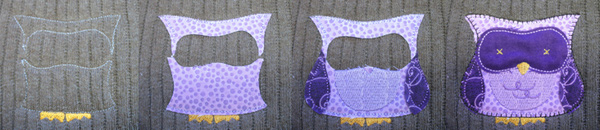

Yay! Now you have a somewhat dead looking owl. Let's resurrect your zombie owl into a cute little button one.
Using the x’s as guidelines, sew on some cute button eyes. Pick cute colors, funny shapes, or layer two buttons on top of each other to add extra character to your little animal.
Once your button-eyed animal is finished, fold your fabric in half again, this time right sides touching (so your little owl is hidden) and pin it together.
Sew a seam along the side so you’re back to having a nice little tube of stretchy fabric. Once this is sewn, you can “test” your hat by pulling it on your head, but do be advised again that you’ll be an honorary member of the silly hats brigade should anyone see you...
Once you’re happy with the size of your hat, we’ll finish off the top so it doesn’t look so wonky. Don’t turn it right side out yet, keep it inside out.
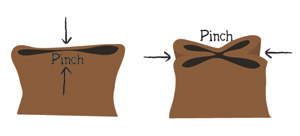
To close the top of your hat, pinch the two sides together in the middle, and then pinch the opposite two sides in again, so you have four little corners puckered out, like in the diagram. It’s a little less clear in the picture, but it’s there. Stitch through the pinched sides by hand, securing your little cross together.

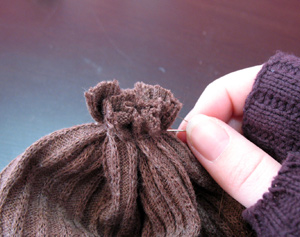
Continue pinching in the gaping pieces of fabric into the center of your hat, sewing them in to the center as you go. Soon you’ll have a nice little pinched bunch at the top of your hat. Sew through it many times so it’s nice and sturdy.
Turn it right side out, and now you have a cute little owl beanie! If you want a simple hat like this, you can be done at this point, but if you want to be super swank, you can add a brim to your beanie and earn extra style points.
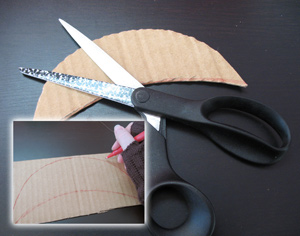
To make your brim, you’ll need a little bit of cardboard about 7.5 inches wide by 3.5 inches tall. Draw a curved beanie shape onto the cardboard. You can copy my shape, or trace the curve of a hat you have at home. The shape of the brim is up to you. You can hold it up to your head a bit to make sure it’s not too wide. You don’t need it to match the curve of your forehead perfectly; in fact, you want it a bit straighter than the curve of your head. It will fit your hat better.
Once you have a nice shape, you’ll want to reinforce it with some tape. Masking tape is good, duct tape is better. Wrap it around many times until it feels sturdy.

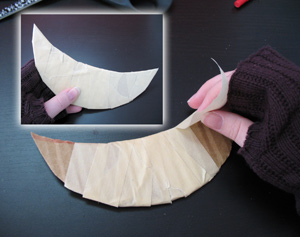
Using the leftover bits of your sweater, cut a piece of fabric that’s a bit wider than your brim and long enough to fold over it. Fold your beanie up inside of it, and pin the fabric together as close to the curve of the beanie as you can.
Now sew a curved seam as close as possible to the cardboard curve of your beanie. Use the edge of your sewing foot as a guide.
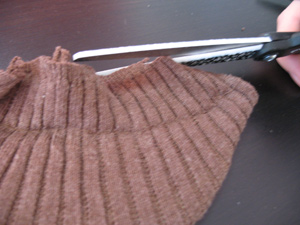
Trim away the excess fabric above the seam, leaving about one inch behind so we can sew it on to your hat.
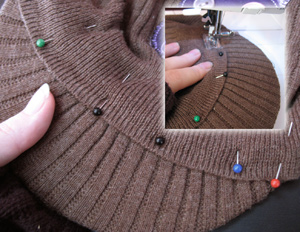
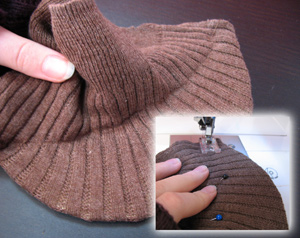
Place the edge of your hat so it’s slightly overlapping the top edge of your brim, and pin the excess fabric from the brim to the inside of the hat. Once again, sew a seam along the edge of the brim, all the way across until all the excess is stitched in place.
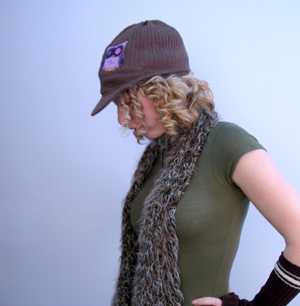
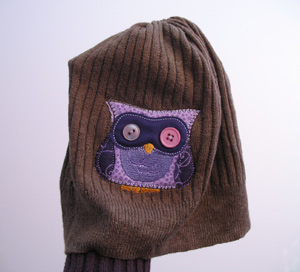
Now you have a swank brimmed beanie, complete with customized button owl. With this technique it’s super easy to make an embroidered customized hat, and they work for guys and gals alike. All you need are some old sweaters and a bit of cardboard!
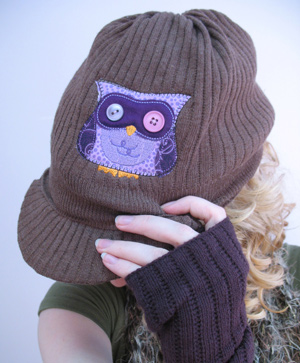
Now you also know how to make our cute little button-eyed buddies, perfect for adding that handmade look to things. In retrospect, I wish I’d moved my owl down a bit so he’d be sitting on the brim, but he’s pretty cute all on his own. Plus it’s so easy to make, I can make a whole army of bodacious button buddy beanies. Say that five times fast.
You can still say bodacious, right? The Ninja Turtles said it. It must be cool. And it is a pretty bodacious hat.


