For this tutorial, I was inspired by the many T-shirt dress ideas I kept seeing on Pinterest. I love projects that upcycle old clothes, and I also love to make stuff for my daughter, Olive. Her third birthday was coming up, so I thought I could make her a simple T-shirt dress, using the Creature Feature designs! I showed her the drawing for all of the creatures featured, and she requested the dinosaurs right away -- which is great, because how hard would it be to find a little girl's dinosaur dress otherwise? Making it yourself lets you make something just for your little one, whether it’s pink unicorns or green dinosaurs!
Supplies
To make your upcycled T-shirt dress, you'll need:
- Embroidery designs from the Creature Feature Design Pack (or other collage-friendly embroidery designs)
- T-shirt (long or short sleeve will do)
- Sheer mesh cutaway stabilizer (such as Sulky Soft 'n' Sheer or Floriani No Show Mesh)
- Temporary spray adhesive
- Air-erase pen
- Fabric for a circle shirt and sash (at least a yard) - I used quilters cotton. (Read through the skirt measuring/cutting section for details on calculating exactly how much fabric you'll need.)
- Scissors and pins
- Measuring tape
Optionally, you can of course add buttons, rick rack, tulle, or other embellishments. You may also want to print some paper templates of your embroidery designs to help with placement -- here's how!
Designs Used
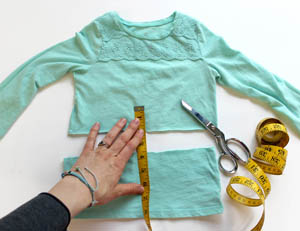
To begin, use an air-erase pen to mark on your T-shirt where you would like the waistline of the skirt to fall. Mark a line 1/2" below this to add seam allowance, then cut along this second line.
Now it's time to cut out the skirt fabric! First, you'll need to determine two things: the waist measurement, and the length of the skirt. Measure the waist of the person who will be wearing the dress, at the point where the T-shirt cut falls, and add a little bit extra for ease. (You want the dress to be comfy -- and the sash will cinch it in.) Then decide how much length you want between the waistline and the hem.
For Olive's dress, I used a waistline measurement of 21". From that waistline to the hem, I wanted the skirt to be 13" long.
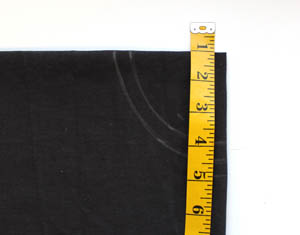
Take your fabric and fold it in half, and in half again, so you have your fabric folded in quarters.
So, I am going to make a circle skirt with a 21” waist circumference (C). Using this number, I determined the radius of the waistline/inner circle:
waist radius = C/2*3.14
waist radius = 21/6.28
waist radius = 3.34
Mark a quarter circle on the folded corner of your fabric, using this radius measurement. This circle will be your stitching line.
Then mark another quarter circle, 1/2" closer to the corner, for seam allowance. This circle will be your cutting line.
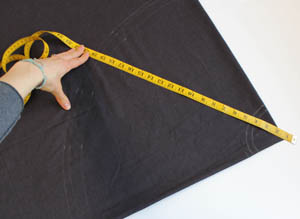
Now it's time to mark the hemline for the skirt. Take your desired skirt length (13", in my case) and add it to the waistline radius measurement.
waist radius + skirt length = hem radius
3.34" + 13" = 16.34"
Mark a quarter circle that distance away from the corner. This circle will be where the hem folds under.
Then mark another quarter circle, 1 1/2" further down from your hemline. This circle will be your cutting line.
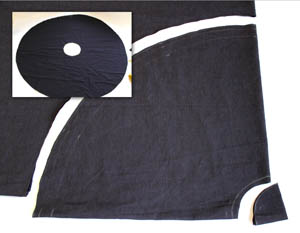
After you're sure of your measurements and markings, cut along your two cutting lines. When unfolded it should make a large circle of fabric with a hole in the middle.
Tip: Here's how to use the above measurements to figure out how much fabric you'll need! Take your hem radius, and add 1 1/2" for the hem and seam allowance, to get the total length of your folded skirt fabric. In my case:
16.34" + 1.5" = 18.34"
Your fabric for your circle skirt will need to be at least double this measurement in length and width (36.68" in this case) in order to cut out a circle skirt in one continuous piece.
That's just for the skirt -- remember, you'll want fabric for a matching sash too! For my dress this added 6" to the length; if your sash will be longer than the width of your fabric, you'll want to add 12" and piece together your sash from multiple lengths of fabric. My sash ended up about 38" long, so 36.68" + 6 = 42.68. A yard and a quarter of fabric was just right!
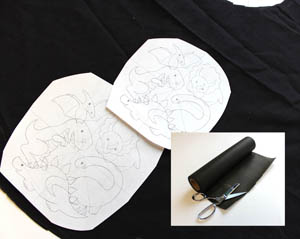
Next up is the embroidery. These designs were made to overlap easily and create a seamless pattern. Paper templates are great for helping you get them to line up properly to achieve this. If you want an in-depth tutorial on how to place overlapping embroidery like this, click here.
My goal was to create one “panel” of embroidery down a section of my dress, I used the 5.87" x 5.87" version of the Dinosaur Party design, but you can use the patterns and different sizes however you like! Across the hem as a border could be another cute example.
A note for this project: I found a great BLACK sheer mesh cutaway stabilizer that really made this project look great! Matching stabilizer to fabric is a great trick to hide it.
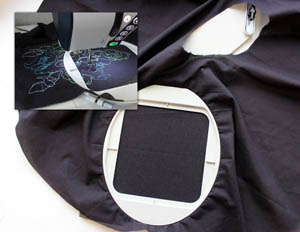
Spray a piece of sheer mesh cutaway stabilizer with temporary spray adhesive, and smooth it onto the back of your fabric. Hoop up your stabilized fabric for the first design, aligning your printed template crosshairs with the crosshairs of your embroidery hoop. Then pick your thread colors (try matching at least one color in the pattern to your chosen shirt) and start stitching! If you’re doing this project for a child, it can be extra fun to let them pick the colors at this point too.
When your first design is done stitching, use a template again to get a good overlap, and repeat the process.
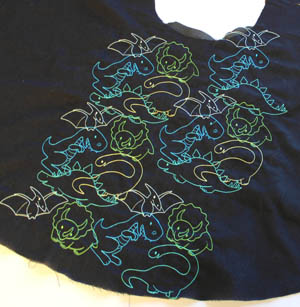
A couple hoopings on your machine, and you have a big, bold dinosaur pattern.
A note, some of these designs will be folded into seams and such, but that’s not bad! It will help the whole pattern look seamless on your finished skirt. So don’t worry too much about designs getting too close to an edge.
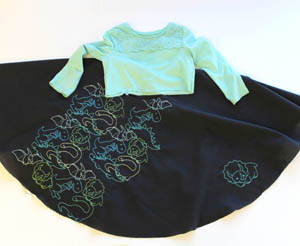
Once your embroidery is done, lay out your skirt and T-shirt, to decide where you want the embroidery to be in relation to everything once it’s sew together.
You’ll notice I also added a single dino around the side. You can do that using the single separations of each design (find them all in the design pack!).
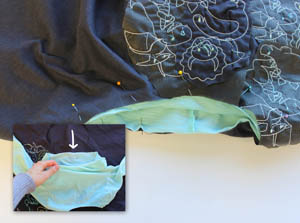
Once your skirt is lined up with your T-shirt in a way you like, you’re going to want to start to pin them together.
You’ll pin the two layers right sides together, so as you work around you’ll be working inside out. I started in the front, to make sure the embroidery lined up where I wanted it to, and slowly worked my way around the waistline.
When you’re done, you’ll have pins all the way around the opening, with your skirt inside out.
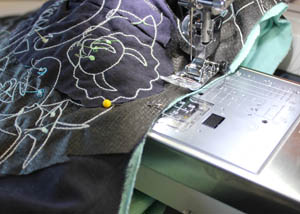
Sew a seam all the way around the edge, using a 1/2" seam allowance.
Take care as you go around! I had to rip out a section that folded in over itself and sew it again. Working with garments can be tricky, so be patient and work slow!
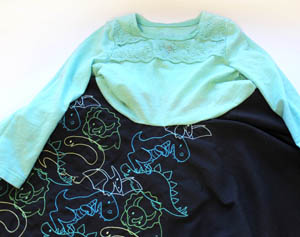
Turn your skirt right side out. The top tee and the bottom are now connected! You pretty much have a dress at this point, but we need one more little detail to make it look extra finished...
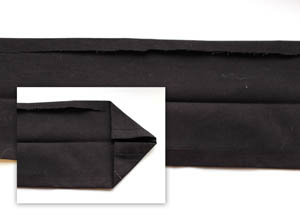
Add a sash! It’s the perfect place to add a matching border to your embroidery.
I used the 6.85" x 1.81" dinosaur border and started with a sash long enough to tie around my child’s waist, with enough extra to tie a bow in the back. Keep the fabric width at 6" for this size design. You’ll fold and iron 1/2" seam allowances on all edges, and then fold the sash in half, leaving 2" for our finished embroidery area.
To give the ends of your sash a finished look, tuck in the corners like so and iron them flat.
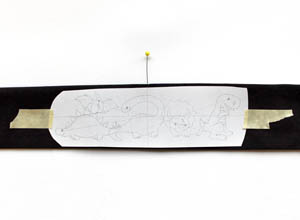
With your sash folded in half, find the very middle. This is where we’ll put the embroidery so it sits right in front. Use a paper template to get it lined up just right, and mark that spot with tape or a pin.
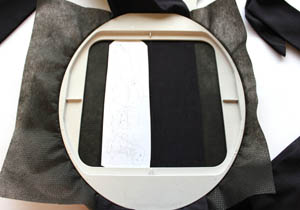
Open all your folds back up, so you have a maximum area to hoop. Spray a piece of sheer mesh cutaway stabilizer large enough to hoop with temporary spray adhesive, and smooth your fabric on top. Hoop up your fabric and stabilizer.
Stitch out your matching border on your sash, and then carefully trim away the excess stabilizer from the back.
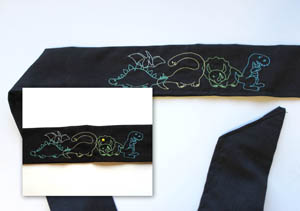
Once your stabilizer is trimmed, you can fold your sash back down to its 2" wide size along the seams you ironed before. Pin the layers in place, and sew a 1/4" seam around your whole sash.
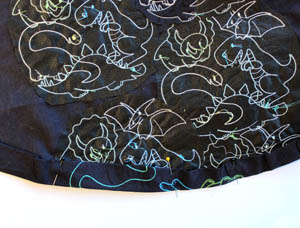
Finally, we need to add a hem to the skirt! Before you do this step, it may be a good idea to have your little one try it on so you can see how much hemming is needed.
When you’re ready, fold under 1/2" all along the edge of your skirt, and iron it flat. Then fold under another 1", and iron again.
As you iron your last hem line in place, add pins to keep everything in place for sewing.
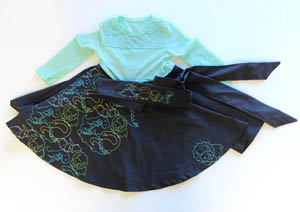
With everything pinned, sew a seam along the inner hem line.
Finally, to keep your sash from being lost (especially as mine is going to be worn by a 3-yeah-old) you may want to pin it in place at the front of your dress, covering the seam between the skirt and tee.
Sew a seam at the top and bottom, just across the front of the tee. This will keep the sash in place but leave the back open for tying.
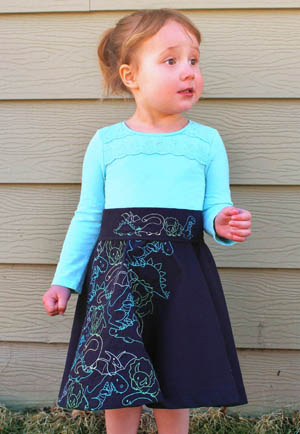
Your T-shirt dress is ready to be worn! Once it’s on, just tie up the sash in back with a neat little bow, and your little minion is ready to rock her new dino dress!
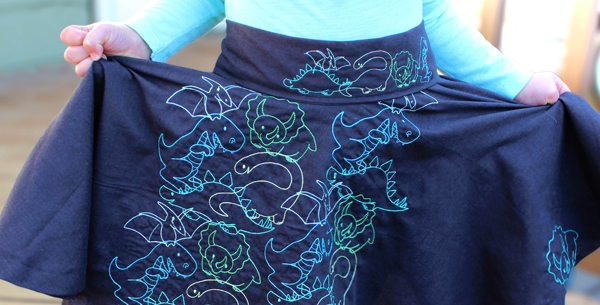
Custom embroidery, colors, and subject matter ensures that this dress is one-of-a-kind and perfectly suited to the little girl who’s wearing it. So if she’s more into robots than Barbie, or prefers unicorns over monsters, you can still make a cute dress that fits your child’s unique personality.
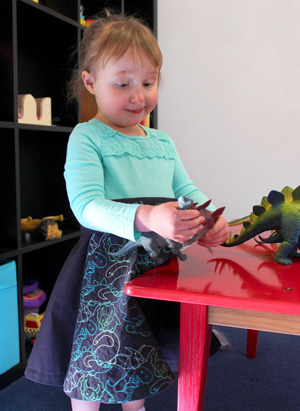
After all, girls love dinosaurs too (though good luck finding that in mainstream clothing options), and with a little crafty upcycling, you can make them an outfit they’ll love with the things on it they like the most.


