It's the start of a new year, and you know what that means... resolutions, new beginnings, and calendars! That's right, how do you ever expect to get all those new resolutions done if you don't even know what day it is? I have various calendars mostly on my computer organizing my life, but I swear when I'm at home and someone asks me what day it is or when the next holiday is, I can't for the life or me remember unless I have something digital nearby. Instead of getting one of those "hang in there" arbitrary kitty calendars, why not make one that's always on hand, always updateable, and totally custom?
We're going to put our calendar in the place we often seem to need to find one ... in the kitchen! A cute little calendar on a tea towel is perfect because it's always on "hand" (har ... I is so funny) and the kitchen always seems to be the place where I'm on the phone, looking for a pen and wondering what day it is.
Supplies
So, to make our little tea towel calendar, you'll need:
- A tea towel (who saw that one coming?)
- A cool all season design or whatever's awesome enough to look at for the next year
- Cutaway stabilizer (who was on a coffee break and missed the photo)
- Some fun fabric scraps
- Printable fabric paper (if you can't find this, I have a link on how to make your own, but you'll need extra materials)
- Scissors and pins
- Lots of Velcro
- These awesome downloadable calendar designs
- Glue, if your Velcro isn't self-adhesive
Designs Used
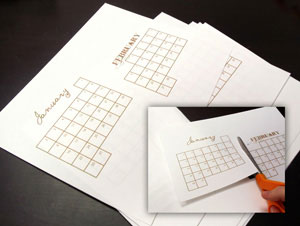
So, let's start with those neat calendar designs. You can download the 2011 calendar above, and it has all the months laid out for 2011. Each is set up to print two-per-page, so they fit nicely on a tea towel. If you're using printable fabric paper (like we've done before in this tutorial) just feed 6 sheets into your printer and print out the 6 PDF pages. If you'd like to try making your own printable fabric sheets, you can follow this tutorial that uses Bubble Jet solution for a similar effect. Make sure you cut your sheets to standard letter size.
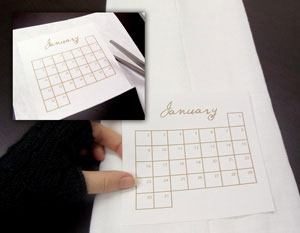
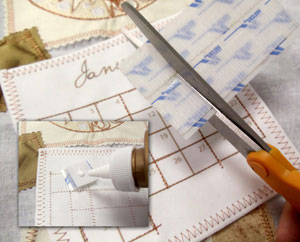
Once your calendars are printed, you can cut them to size, around 5 inches wide or so. Leave a little white space around each calendar for our decorative border.
If you feel your printed fabric is too flimsy to hang nicely on your tea towel, you can always back it with some light-weight stabilizer. Test the size, hang on your tea towel, and trim accordingly.
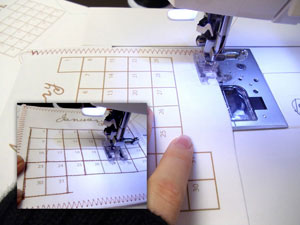
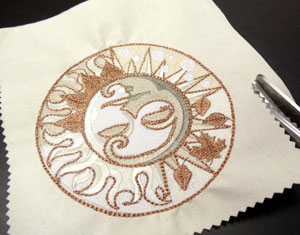
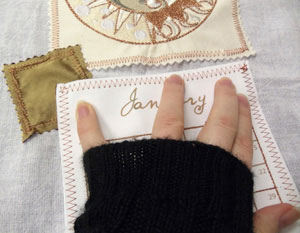
So, half the fun of having a fabric calendar is not only that can you write on it, but you can dress it up with stitches to match your soon-to-be crafty tea towel! I'm using a color palette of whites and metallic copper, so I thought I'd dress mine up with copper. First, I did a zig-zag border around the edge. This will keep the edges from deteriorating too much, plus it will help your calendar visually blend with all the stitched on "patches" we'll add later. After that, have fun! I stitched over the calendar lines here and there, adding some fun texture and visual interest. If you'd like, you can trace over the whole printed design with stitches. It will just make your calendar look all the cooler.
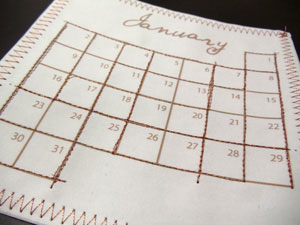
Here's one of my finished calendar designs. Funky border stitching and some calendar embellishments are all it needs to be good to go! You've got twelve of these to pretty up, you can play with them all now or embellish each one as the month comes up. Your choice!
Next, it's on to our main embroidery design. Now, if your tea towel is thick enough, you can stitch directly on it, but as I've chosen a heavy design, and most tea towels aren't really up to snuff for that sort of thing, I'm going to patch it on. If you've picked a light design, like a scribble, right on the towel should be fine, but if you haven't, just trust me, don't test your poor little towel.
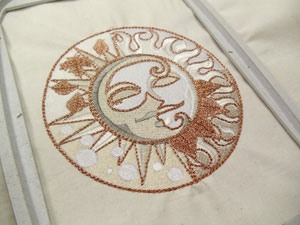
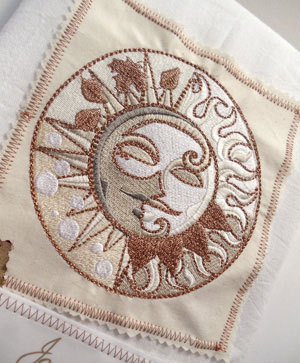
I hooped up a chosen piece of fabric with cutaway stabilizer (still keeping with my natural colors) and stitched out my celestial seasons!
Ignore the fact that I really should have hooped that design tighter. See? There is a reason rules exist sometimes. Bad Niamh. Bad. Always remember ... do what I say, not what I do.
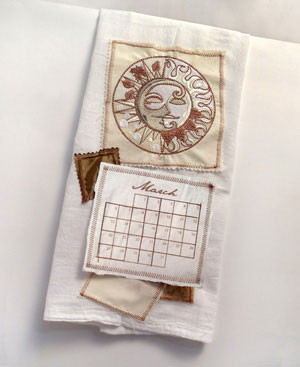
Once your design is stitched, (assuming you're patching it like I am) cut it to size so it's ready for your towel. If you'd like, cut up a couple other fabric scraps to complete the "patchy" look, and lay it all out on your towel.
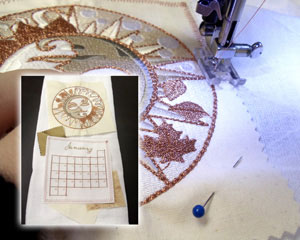
If you'd like, cut up a couple other fabric scraps to complete the "patchy" look, and lay it all out on your towel. Remember, the calendar part will be removable, so you can stitch some patches that go underneath, but always design around it. Once you're happy with your placement, begin stitching on your pieces.

I started with my main design then worked on the smaller patches. Do NOT patch on your calendar! That would defeat the point of making it changeable. Just keep in mind where it's going to be.
Now! Grab your Velcro. Add two pieces to the top corners of your calendar. I find the best way to get good lineup is to then stick the back pieces on top of these, remove the adhesive (or add some glue) and carefully place your calendar where you want it to go. Let the glue or adhesive dry, and now you can Velcro and un-Velcro your calendar at your leisure!
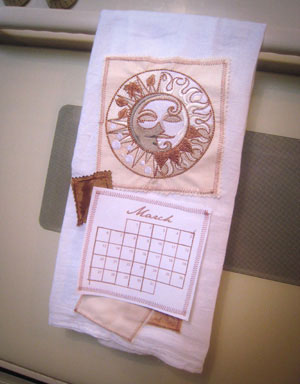
That's it! Your little tea towel calendar is ready to go. Stick on the first month of the year and start the new one out right.
Beautiful stitching will keep your kitchen stylish all year round, and you'll always have a calendar on hand when you need it, right in your kitchen! 3 Available Sizes:
Next month, swap out last month's calendar for the new one and continue your calendar in style. Plus, it's perfect for adding little notes, reminders, or birthdays on so you're reminded of those important days as you wander around the kitchen.
If you're feeling really ambitious (and have a lot of tea towels) you could always stitch one towel for each month, and put each calendar on permanently! Then you could change the colors and designs to suit the seasons. Start your crafty year off right with more stylish DIY calendar ideas! Blue Cricket Design pulls out the scrapbooking supplies and shows how to make a bling-encrusted interchangeable calendar. Lark & Lola crafts a calendar out of blocks. Content in a Cottage has a free download for a dodecahedron calendar. And Melissa Samuels has templates and a tutorial to create a pretty book calendar. Now's the time to make your own!


