Hey Threadsters, Karline here. Niamh is out saving the world this week, so I'm stepping in with a project of my own: the punky petticoat.
I have a confession to make: I'm a skirt girl. There's something about being uber-comfortable yet looking "dressed up" that's just pretty awesome.
I impulse-bought some stripy fabric and a ridiculous amount of trim the other day, and I instantly knew what I wanted to make: this tough-yet-tender gathered skirt that's half rock star and half casual Friday.
Supplies
For my skirt, I used:
- 3 yards fabric for outer skirt, pre-shrunk
- 1.5 yards coordinating cotton broadcloth for lining, pre-shrunk
- 5 yards wide trim for hem
- 4 yards narrower trim for seams
- Wide non-rolling elastic for waistband – enough to go around your waist, plus a few inches
- Sewing thread to match fabric and trim (these may or may not be the same)
- Candelabra embroidery design
I'd recommend doing the next few calculating steps before you go out and buy your supplies. If your skirt is lots bigger or smaller than mine, you might need more or less fabric. Make sure you have an air-erase pen, a tape measure, and a yardstick on hand, too.
Designs Used

More introductory notes:
I’ll be working with a 1/2 inch seam allowance and no seam finishes. Feel free to add them if that’s your bag.
Despite its simplicity, this tutorial has a lot of numbers. Pretty much all of them are flexible. If your numbers are a lot smaller or larger than mine, or you just want your skirt more or less poofy, you may want to tweak this whole process a bit. Feel free to experiment – it’s really hard to screw up a free-flowing skirt like this.
Time for some calculations. They’re easy, I promise.
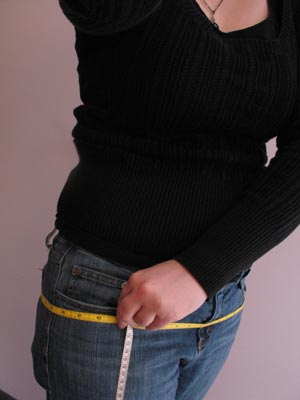
Measure around your booty at the widest part. (No cheating … you’ll be glad later when you end up with a flattering fit.) OK, now add 5 inches. This total is the circumference of your top tier (I’m calling it T1), plus seam allowance. Divide by 2 to figure out the width of the top tier pieces you need to cut out. Add 16 to the resulting measurement for tier 2, and double tier 2 for tier 3.
Want that in a formula? OK:
(Booty + 5) / 2 = T1 width
T1 width + 16 = T2 width
2 (T1 width) = T3 width
My booty measurement is 43 inches. (43 + 5) / 2 = 24. So I’m working with the following measurements:
T1 width = 24 in.
T2 width = 40 in.
T3 width = 80 in.
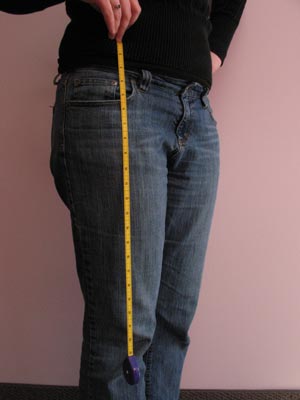
Now figure out how long you want your skirt to be when it’s finished. I like mine just below the knee, so 26 inches seemed like a good idea.
Subtract the waistband (2 in., in my case) and bottom trim (mine is 3”) from this total length – this leaves the length of the fabric part of your skirt. Add 3 inches for seam allowances. My calculations: 26 - 5 + 3 = 24.
Now divvy up the resulting height among the three tier pieces, however you choose. I thought I’d like the look of:
T1 height = 6 in.
T2 height = 8 in.
T3 height = 10 in.
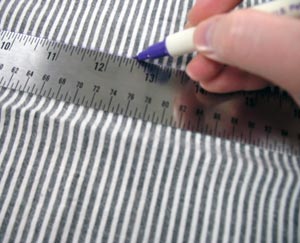
Now that you’ve figured out the dimensions of your tiers, mark them out using your air-erase pen. You'll need a front and back for each tier. I’m marking:
T1 = 6 in. high by 24 in. wide (2 pieces)
T2 = 8 in. high by 40 in. wide (2 pieces)
T3 = 10 in. high by 80 in. wide (2 pieces)
Waaaaaiit a minute … I don’t know about you, but my fabric isn’t 80 in. wide. Unless you’re making your skirt out of a bedsheet, yours probably isn’t either. In that case, create T3 by piecing together two 10-by-40-inch pieces. (Or whatever your measurements are.) OK. Problem solved.
You’ll also want to mark out your waistband pieces. Like everything else we’ve done so far, they’re just rectangles. Make them the same width as T1. To figure out the height, double the width of the elastic you’re going to use for the waistband, then add 1.5 inches. My elastic is 2” wide, so:
Waistband = 5.5 in. high by 24 in. wide (2 pcs)
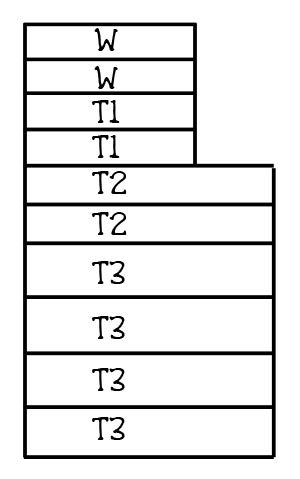
Here's a diagram of all the pieces you should have marked out when you're done.

Cut out your pieces, BUT leave the T3 pieces stuck together for now. It’ll be easier to embroider them that way.
Set aside your waistband pieces someplace safe for now. They’ll probably look a lot like your T1 pieces, so make sure you don’t get them mixed up.
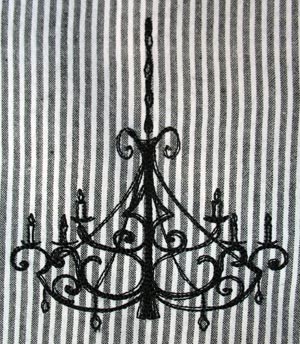
Before you start stitching the tiers together, embroider your design on one of the T3 pieces. I used this elegant, gothtastic Candelabra.
My embroidery is going to be on the left front side of my skirt. You don't have to get too picky with placement, since everything will get bunched up in ruffles anyway.
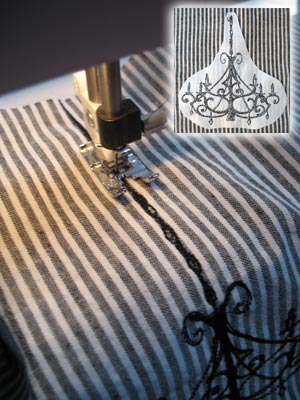
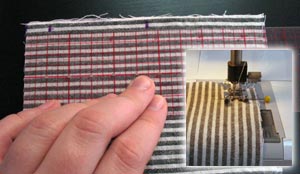
Once your embroidery is done, trim the stabilizer on the back, and cut apart your T3 pieces. Since I used a dangling chandelier, I loaded the same embroidery thread into my sewing machine and extended the “chain” to the top of the fabric piece.

Now it’s time to gather your fabric. Set your machine for the longest stitch length you’ve got. Take one of your tier pieces and stitch along the top edge at 1/2 in., then again at 1/4 in. Do this to each piece for T2 and T3.

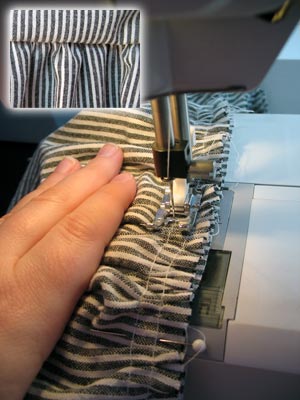
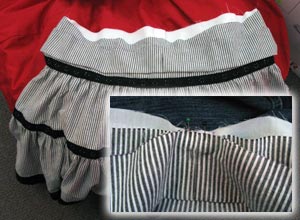
Once you’ve stitched two rows across the top of a piece, grab both bobbin threads and pull, massaging the fabric into pretty gathers. Work from both ends; it’ll be easier. When the gathered edge is the same width as the tier above it, you can call it done. Repeat until you’ve gathered four pieces of fabric – two for T2 and two for T3.
Pin the top of a T3 piece to the bottom of a T2 piece, right sides facing, and sew them together. Keep the gathered side on top so you can keep the seam allowance from getting unruly. I found it helpful to hold down the fabric with my hand to help keep the gathers even.
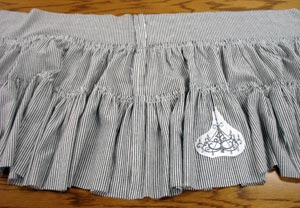
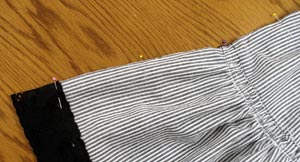
Pin the top of T2 to the bottom of T1 in the same manner and stitch. Voila, it’s the front of your skirt!
Repeat for the back.
Sew together one side of the skirt. We’ll leave the other side open for now.
Press open the side seam. I gently pressed the gathered seams too … just enough to get them to look nice without smashing them down too much.
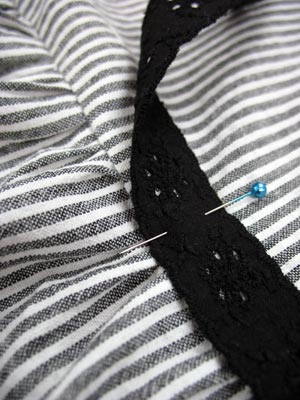
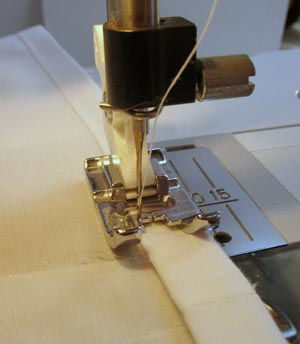
Add your trims to the seams of your skirt. Pin each where you want it, then topstitch in place.
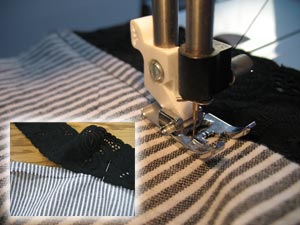
Fold under the hem of your skirt about 1/2 inch. Pin your bottom trim to the hem and topstitch in place.
Sew together the other side of the skirt, right sides together. Now the ends of your trim are all neatly tucked in. Press open the seam.

Now it’s time to make the lining for the skirt. You'll need four slightly trapezoidal pieces of fabric.
Take your T1 measurement, add 2 (for seam allowances), and divide by 4. This is the top width of your trapezoid. For each piece, make the bottom 2 inches wider than the top. Draw these out on your lining fabric with your marking pen and cut out the four lining pieces.
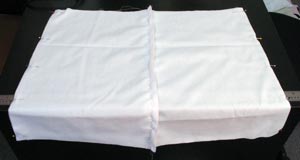
Sew all the lining pieces together at the sides, making sure the narrow parts of the trapezoids all point the same way, and the seam allowances are all on the outside. Press open seam allowances.
Fold over and press the hem of the lining (that's the slightly wider end) 1/4 inch, then 1/4 inch again. Stitch in place.
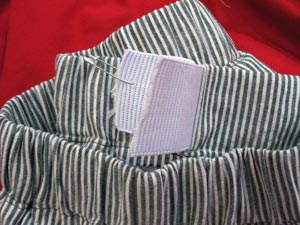
Get out those waistband pieces. Pin them together at the ends, right sides together. With your air-erase pen, mark the halfway point from the short end, then 1/2 inch from the end. Stitch together, leaving a gap between the marks. (This is where you'll feed in the elastic later.) Stitch the other end all the way across.
This will give you a circular piece with a gap in one of the seams.
Press waistband in half the long way, right sides out.
Slip the lining inside the outer skirt. Put the waistband on the outside of that, making sure the little gap is facing out. Pin everything together, making sure the edges of all the layers are even. Stitch.

Press all seam allowances toward the bottom of the skirt, then topstitch them in place along the outside of the skirt.
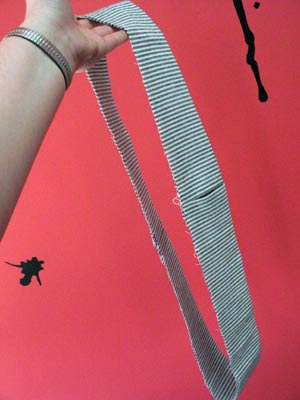
Attach a safety pin to your elastic, and use it to guide the elastic all the way through your casing. Once you have both ends sticking out (like in this picture), try on the skirt. Adjust the elastic so it feels comfortable, then safety-pin the elastic together to keep it there before you take the skirt back off.
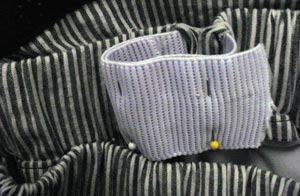
Pin your elastic as shown, then stitch back and forth a few times across the width to attach the ends together. Do this again about 1/2 inch away. Trim off any excess and let the elastic band slide all the way into the casing.
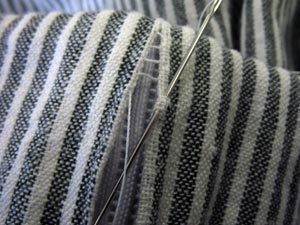
Hand-stitch the gap closed, picking up a few threads from each side alternately until it's all closed up.
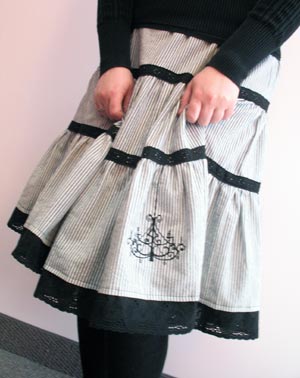
Aaaaaand you're done! These tiered, gathered skirts may be hot right now, but it's a pretty timeless look. Wear it to that basement show or strolling around the neighborhood ... it's up to you!
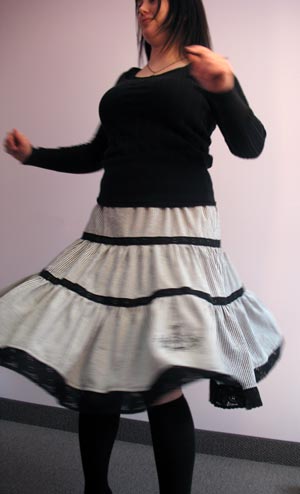
Don't forget to twirl around in your new skirt! With an impressive four-and-a-half-yard hem, it's perfect for creating that froofy-yet-fierce feeling.
P.S. This is pretty much my first full-blown tutorial. If you use it to make a skirt of your own, I'd love to see! Add pics to our flickr pool or email them to [email protected].


