A hoodie is one of those basic items that offers all kinds of possibilities for transformation. This week, we have a special guest tutorial from local Minneapolis designer Tim from Tim+Thom. Tim has been involved in everything from local fashion events to Project Runway. He's here to show a classy upcycle to transform a basic hoodie into a stylish leather-topped jacket. This project can work for both guys and girls alike!
Supplies
To do this upcycle, you will need:
- Your favorite designs from the Dark Creatures embroidery collection, or any other embroidery design(s) that will suit your jacket
- Printed pattern template (download the PDF here)
- An oversized hoodie
- Soft leather or pleather for shoulder accents (or any fabric of your choice)
- Medium weight cutaway stabilizer and temporary spray adhesive
- Extra fabric for your collar lining
- Seam ripper
- Scissors or rotary cutter
- Ruler
- Fabric chalk
- Tissue paper scraps (if you're stitching on real leather)
- An 80/12 leather needle for stitching on leather
A note, in order to transform the top of the jacket from a hood to a collar, we're going to lose a little length on your jacket. That's why an oversized hoodie is best!
Designs Used
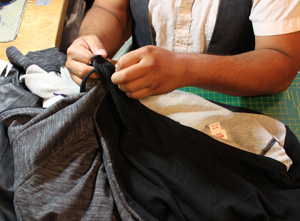
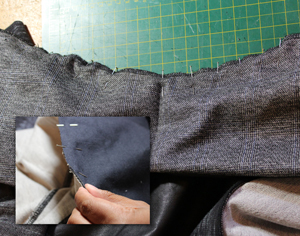
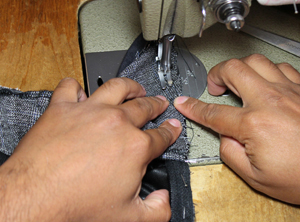
To begin, use your seam ripper (we do not recommend living dangerously like Tim and using a razor) to remove the hood from your jacket.

This is what your jacket should look like with the hood removed.

Continue your careful dismantling by removing the zipper next. We will re-use these pieces later, so hold onto them as you remove them.
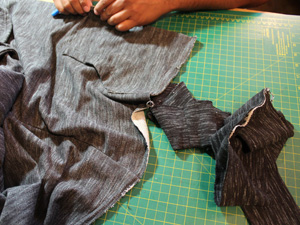
Once the zipper is off, remove the bottom edge of the jacket.
And lastly, the pockets!
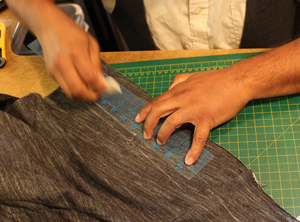
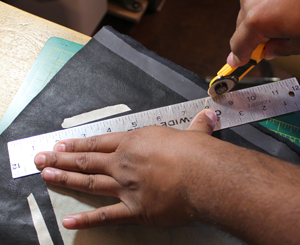
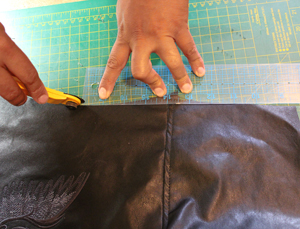
With everything off, it's time to start the modifications! Use your ruler and chalk to mark a straight line along the bottom of your jacket, 2.5 inches above the bottom edge.
This will make our jacket a little shorter, and allow the zipper to come up higher for a our stylish collar.
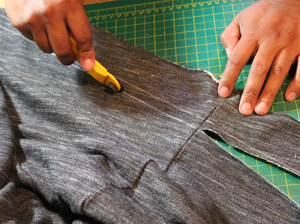
Use your scissors or a rotary cutter to remove the 2.5 inches of marked fabric from the bottom of your jacket.
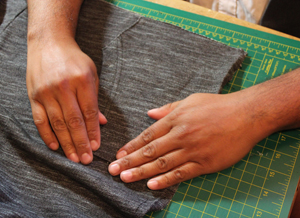
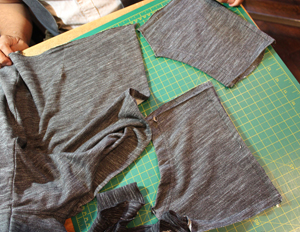
Now it's time to put some things back together!
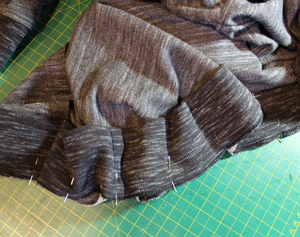
Place your pocket back on, lining up the bottom edge with the new edge that was just cut.
Carefully pin your pocket in place. We're going to sew a seam around the three edges we removed before.

With everything pinned and secure, sew your pocket back on.
Repeat with the second pocket.
Ta da! Pockets back in place. Easy.
Now it's time to put the bottom edge back on.
Pin it in place along the newly cut edge.

Once everything is pinned, sew a wide seam along the bottom edge.
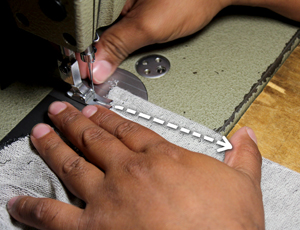
To finish the bottom, flip the edge back over, right side up. Fold the excess fabric underneath up towards the collar, and sew a 0.25 inch topstitch from the edge of the trim, as shown,
You are complete with the first phase of this fabulous transformation.

Now it's time to add your embroidery!
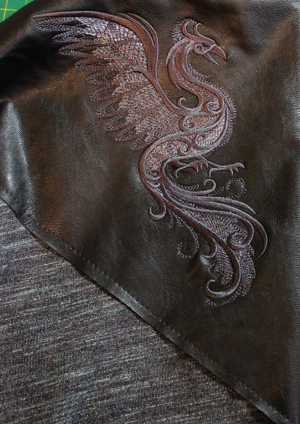
Stitch your design onto your leather or fabric. We recommend using a medium weight cutaway stabilizer, adhered to the back of the leather with temporary spray adhesive and stitched with a 80/12 leather needle with this design. If you're stitching on real leather, check out the additional tips in this tutorial for best results. Remember to keep a lot of extra space around your design to cut your PDF pattern templates.
For this project, Tim used a special kind of leather that has fabric bonded to the back -- which is why this embroidery design, with its satin stitch edges, worked. In general, for leather, we recommend using very light and open designs, with no satin stitch or stitch-filled areas. Pleather tends to be very resilient and can handle a much wider range of embroidery designs.
You're also going to want to stitch a mirror of your design, so they can sit on either side of your finished jacket.
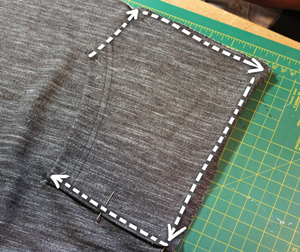
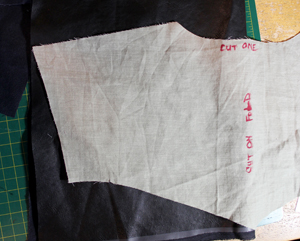
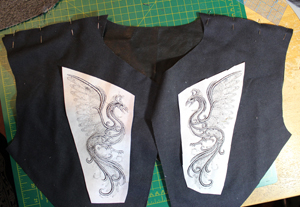
With your embroidery complete, place your printed pattern on top. Tim made this template out of thin fabric, but you can use the paper from your printed PDF. Download the PDF here if you haven't already.
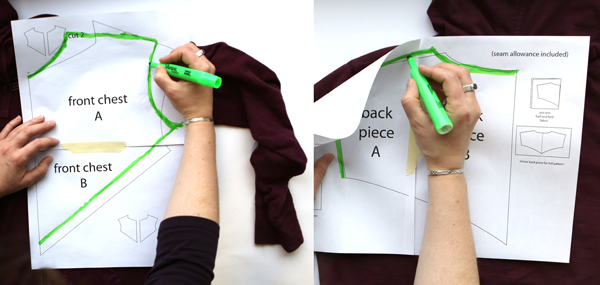
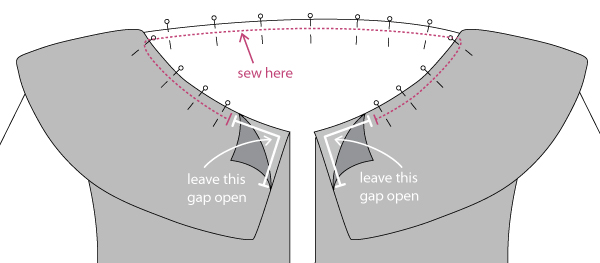
These pattern pieces are a starting point -- depending on the size and fit of your garment, you may need to sketch a slightly different shape for your pattern pieces. Print out your pattern, tape the pieces together, lay the pattern over your garment, and sketch your shape, following the general shape of the neckline, shoulder seam, and armhole. (Note: Tim's design extended the shoulder seam of the leather accent piece a little way past the armhole seam, to make a shoulder cap style.) Remember to leave seam allowance! When you re-sketch your front and back pieces, the shoulder seam lengths should match, and your collar should match up to your neckline.
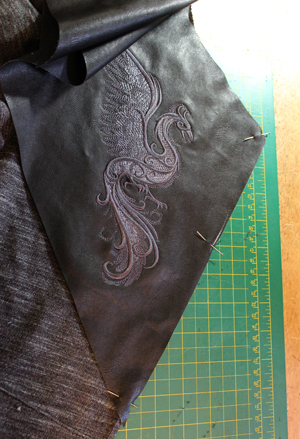
With your template in place, carefully hold down your fabric and template together and cut around your template shape from your fabric.
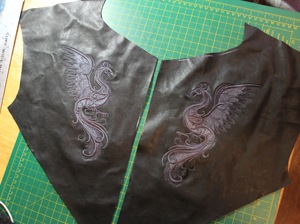
Flip your template over and do the same on your other embroidered piece. Take care to line up your two embroidery pieces so the fabric pieces end up mirrored exactly the same.
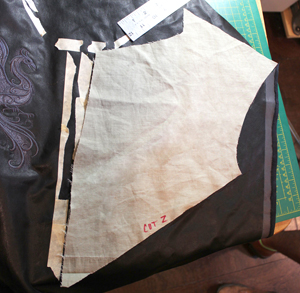
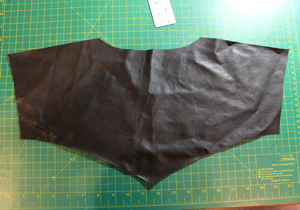
This is what your two embroidered pieces should look like once they're cut out.
Next, we're going to cut the back panel piece. To get an even cut, Tim recommends folding your fabric in half, and placing the half of the template over the fabric like so.
The back panel is also an excellent place to add embroidery!
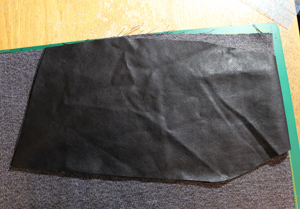
Cut out the folded shape to get a perfectly even back piece.
Batman!
Just kidding. Set this piece aside along with your two embroidered front panels.
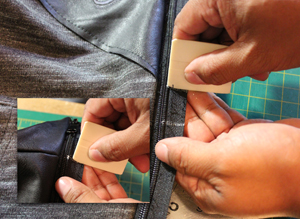
Finally, we're going to need to cut one more leather piece for your collar.
As before, fold your fabric and use your template folded over like so to get a perfectly even collar piece. Hold your template in place and carefully cut our your collar.
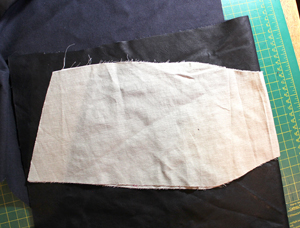
Using the same leather piece as the new template, place it on top of a folded piece of your collar lining fabric in the same shape.
Place the two pieces (your leather and your lining)right sides in together and pin along the top curved edge.
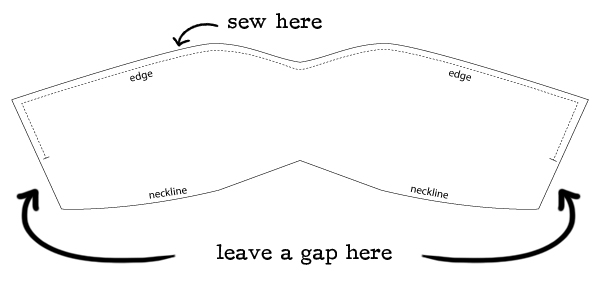
We're going to sew around the sides and top edge of our collar, but instead of sewing up the full side, start about 3 inches up from the bottom (as shown, where the gap is in the picture).
This gap is where we will attach the zipper later, so don't forget to leave it open on both sides!
Sew a seam around the top of the collar, leaving the gaps on both ends.
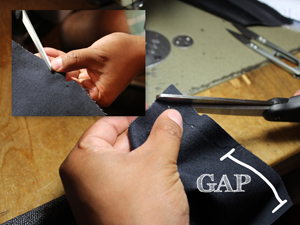
With the collar stitched, you'll get a smoother, flatter collar if you clip some of the edges.
Snip the corners on either side of the collar, above the gap, and clip a few notches along the curved edge.
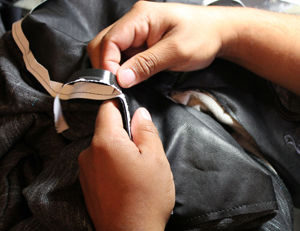
With your seam stitched and edges clipped, turn your collar right side out. Push out the corners of the collar so you get a nice, crisp point. (Using a capped pen can help with this).
Set the collar aside for now; we will come back to it later.
Now we'll put our top leather piece together.
Pin the top edges of your embroidered pieces to the top edge of the back panel, right sides facing in, like so.
Sew a seam along the top edge on either side of the shoulders.
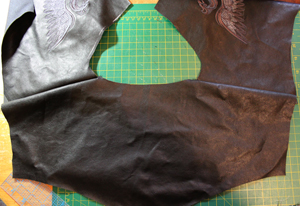
This is how the top piece should look stitched after this first step.
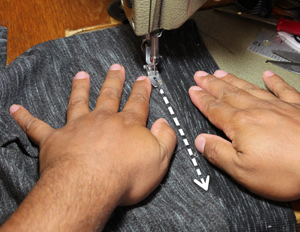
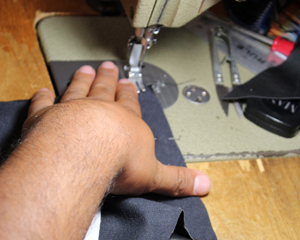
Note, as you sew on the leather, it's helpful to put small strips of tissue paper underneath your sewing machine foot so the leather doesn't stretch or bunch when it sticks to the metal foot. Using printer paper is fine too, but it may dull your needle.
To get your shoulder to lay flat, fold the edge down and stitch the shoulder seam 0.25 inches away from the seam.
Sew this top stitch along both shoulders.
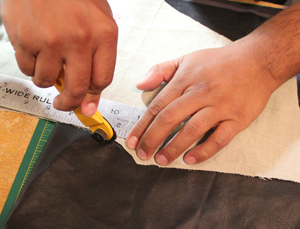
To get a clean, crisp edge along your shoulders, use a straight edge and your rotary cutter or scissors to trim off any excess along the should sides.
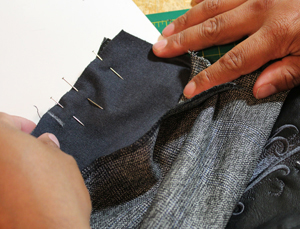
With your leather top piece ready, pin the embroidered piece along the edge of the jacket where the zipper was.
Do this on both sides.
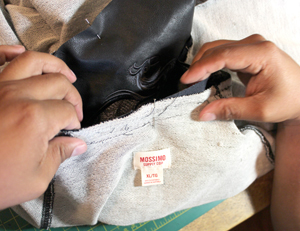
To make sure everything is even, you'll also want to find the center of your leather back panel and pin it to the center of your hoodie, right at the back of the collar where the tag is usually located. This will ensure nothing ends up wonky.

Start pinning from the center of your back outwards, and from the front of your collar inwards so you end up finishing right at each shoulder.
You may find that you have a little excess fabric right at your shoulders. That's OK -- we have a neat darting trick to take in the excess and keep everything fitted neatly.
Just pinch in the excess on either shoulder, and measure how wide the fold overlap is.
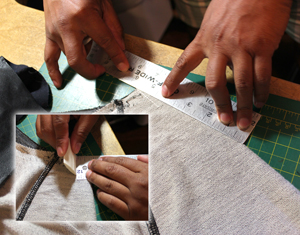
Unpin just a couple pins from the shoulder area, enough to get at it for sewing your darting. Use your ruler and chalk to mark the shoulder where the excess is, then mark down about 5 inches at an angle from your first point. We're going to stitch down this line to create a dart.
With the dart marked and pinned, sew a seam down from your fold back out to the outer edge of your shoulder, like so.
Mark exactly the same dart size on the other shoulder and repeat.
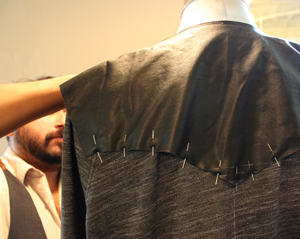
Now, with your shoulder fitted in, you can continue pinning your leather piece all the way around to the collar edge until everything is secured.
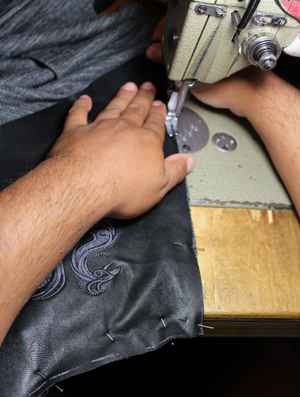
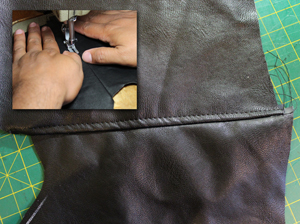
With the edges pinned and ready, we'll sew a seam starting from the bottom of the leather corner (below the embroidery) all the way around the collar, and down the other side of the bottom of the other corner.
Use your paper trick to keep the leather flat and secure.

When you're finished stitching, we can sew the bottom edge down. First, we'll want to make sure everything is lined up straight on the jacket. Find the middle of the jacket along the back, using your ruler and chalk and mark a line up the middle of the back.
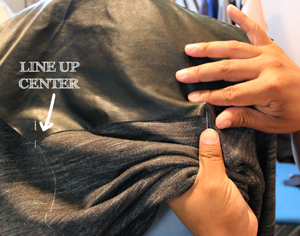
This line will help you keep everything centered. Locate the center of your leather and pin that to the center marking of your jacket.
This step is a lot easier if you can do it on a mannequin, because we're going to pin the bottom half of the leather in place as it would hang on a person. You can also borrow a friend. Friends are good like that.
Continue pinning all the way around, from the back to around the shoulders. More pins are always better, as we don't want anything to shift when we're sewing this final piece in place.
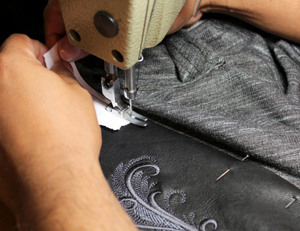
With everything ready, slowly and carefully stitch around the leather, using your paper trick to keep it laying flat and smooth.
Once all your stitching is done, you can tear off the paper strips.
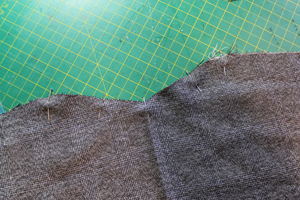
This is what your stitched edge should look like once the leather is in place, with the paper removed.
Now onto the collar!
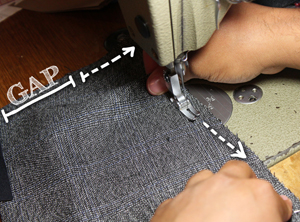
First, find the center of your collar and line it up with the center of your jacket, pin in place together. Continue pinning the collar along the edge of where the hood used to be, working outwards.
When you get to the edge of the jacket hood area, pin only the bottom layer all the way up to the edge. Leave a gap of about 3 inches so we can attach the zipper.
Here's what the collar assembly will look like when everything is all pinned together.

Stitch the collar in place all along the top edge. Leave a small gap at the end so you can pull this back through.
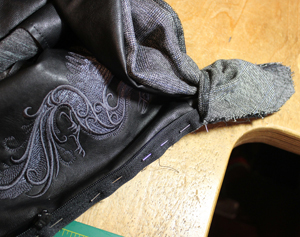
Separate the two halves of the zipper. To get your zipper to attach properly, pin one side of the unzipped zipper to one edge of your jacket. Starting from the bottom, pin up to the top along the edge.
When you get to the top, you'll need to do a little trick to get the collar to work out right. Using the small edge you left open, turn the collar inside out and pin the raw edge right side in together along the final top edge of the zipper.
Starting at the top with your collar pinned in that slightly awkward open position, sew a seam all the way down your zipper.
Don't stitch the other side of the zipper just yet!

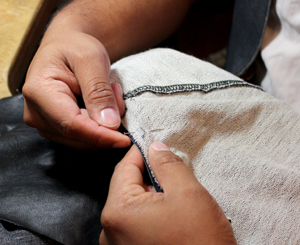
When your zipper is stitched in place and you turn the edges of the collar right side out, your zipper should look like this along your shiny new collar.
To get your placement even on both sides, zip the other half of your zipper back in place. Use your marking chalk to make a mark along a few key points... where the pocket ends, where the leather corner ends, and right up where the collar meets.
Keeping these lined up and straight will ensure your jacket looks neat and professionally stitched.
When you're done marking, unzip your zipper once more and pin in place on the opposite side of the jacket (using your markings to get exact placement), and stitch it up!

This marking technique should lead to a nice even zipper.

To finish the zipper edges, open your zipper up again, and sew a 0.24 inch topstitch on the other side.
Remember, when you get up to your leather section, you may want to use the paper slips under the needle again.
If you wish, you can also add a 0.25 inch top stitch all the way around the collar where it meets the jacket. Then press your collar flat.
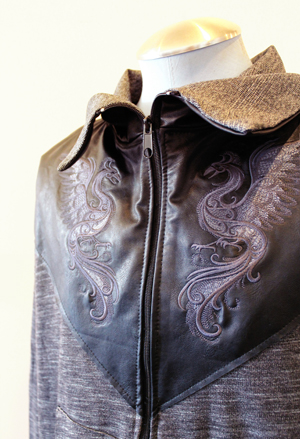
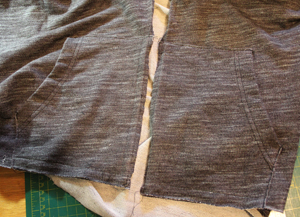
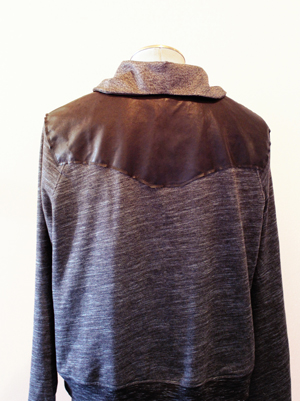
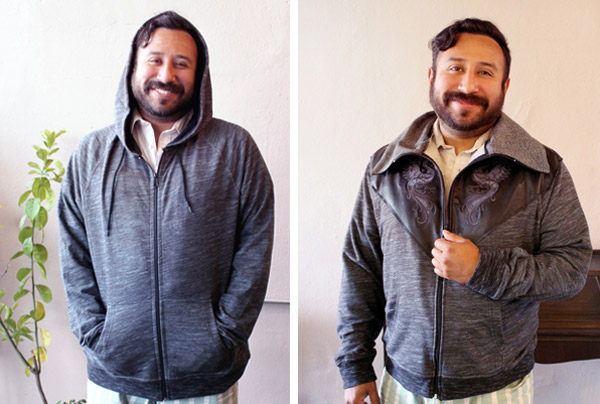
Your new jacket is finally ready! This simple hoodie got a chic new update with the leather and embroidery details, and the hood has now been transformed into a new wide collar.
The leather adds a luxe new accent to an otherwise simple jacket.

Your new jacket is ready to take you into autumn weather! Though this is a men's version, you can use the same upcycle style for both men and women's fashion. Just scale the pattern down for narrower shoulders.
The transformation is complete! Remember, everything old can be made new again with a little upcycling ingenuity.


