Cold weather can come fast here in Minnesota. One day you’re chillin’ in your T-shirt and it’s nice and warm outside, and before you know it, the temperatures have plummeted. I’m a stubborn Minnesotan, and I don’t quite feel ready to give up my tees, so what’s a way of rocking out your summer wear at least into the cooler months of fall? Well, all your T-shirts are really lacking are some longer sleeves and maybe a hood. Alrighty then... let’s make some sleeves and a hood! It’s fast and simple and we just need a plain ol’ long sleeved shirt.
Supplies
We could wear this long sleeve tee, but it’s not nearly as rock 'n’ roll as my tee, so I’m going to transform it. To make your shrug, you need:
- A long sleeve tee
- Some ribbon
- An awesome embroidery design
- Stabilizer (I used no-show mesh stabilizer because my shirt was thin and stretchy)
- A ruler
- Scissors
Designs Used
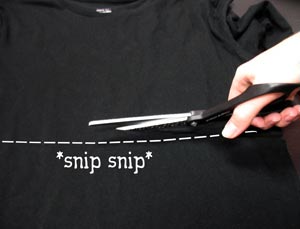
First, we’re going to snip our shirt into a crop top. Make sure you cut it long enough to wrap around your upper torso. Cut a little farther down the tee if you want more cover with your shrug. It can be a tiny crop top or a longer shrug, it’s up to you. Set the bottom piece aside; it will become our hood later.
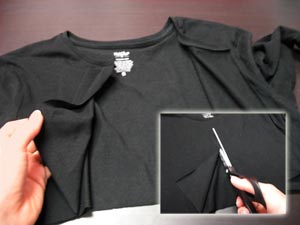
Take the top half of your shirt, and snip it up the middle to the collar. Now you have a small little crop shirt that can be easily embroidered!
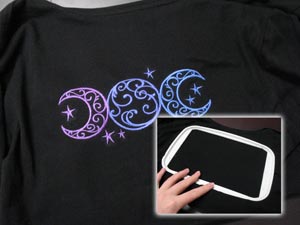
Spread your shirt open and flip it over to the back. This is a great place to add a little embroidery embellishment, and your new open shirt makes it a snap to hoop. Hoop your shirt up with a piece of cutaway or no-show mesh stabilizer, and stitch out your design. I chose our triple moon design, because I want my shrug to make me feel like a goddess. That and I thought it was pretty.
Now, if you want, you can use that extra piece of shirt to make a hood for your shrug!
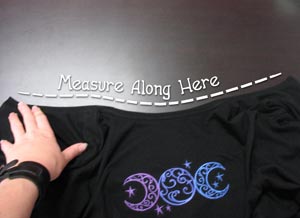
To make sure our hood fits our collar, measure the distance from one end of the collar to the other. This is how long your hood can be. Mine was about 21 inches across.
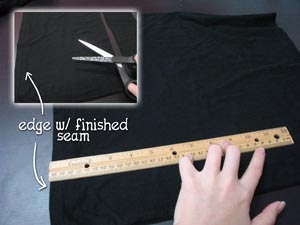
Grab the lower half of your shirt, and keep the bottom (finished) seam to your left. We’re going to use this finished seam as the open edge of our hood, because it’s already done for us.
From the finished seam, take your previous measurement and divide it in half (mine was about 10.5 inches) and measure that far back. We’re dividing it in half because the shirt is still folded over, so it’ll really be the full 21 inches. Add a little extra for your seam allowance. Once you’ve marked your tee, snip it to size.
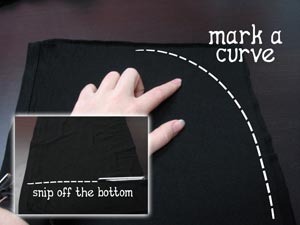
Next, snip off the bottom edge of your shirt (which originally would have been the side seam on your shirt). You can snip off as much or as little as you like, just make sure you leave enough height to fit your head. Once you’ve snipped that off, turn your shirt inside out, with the right sides together. Keep the edges of the finished seam on the left lined up.
From the top folded edge, mark a curved line that will be the back of your hood, and pin the two layers of your hood together.
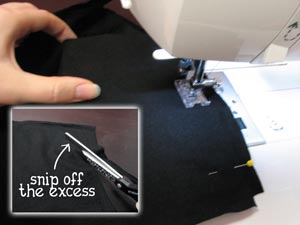
Sew along that marked curved line, and then snip off the excess fabric.

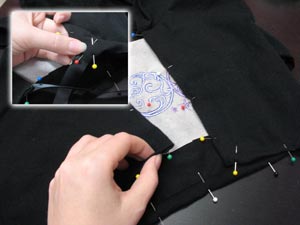
To attach the hood, find the middle of the hood (on the raw edge) and the middle of the back of the shirt collar, and pin them right sides together.
From there, pin the hood all along the edges of the collar. If you measured right, your hood should end right at the edge of the collar. Don’t worry if it’s a little off – as long as you center it from the back, it will look even at the front.
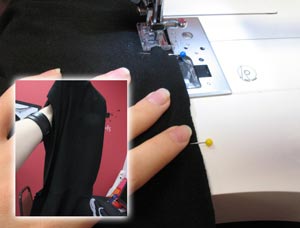
Sew a seam from one end of the collar to the other, attaching your fancy new hood.
See how fancy it looks?
Finally, we need to sew a seam around the remaining raw edges of the shrug. Fold all the edges in and pin in place all around the top.
At the bottom corners of the front of the shrug, cut two long pieces of ribbon and pin them under the edge. These will be used to tie your shrug in place and also look pretty cool wrapped around your torso. Make sure you cut enough ribbon for it to be wrapped around at least once.
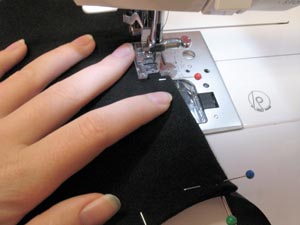
Sew a seam all the way around your shrug, taking extra care when you get to the ribbon, making sure it’s snug and sewn on straight.
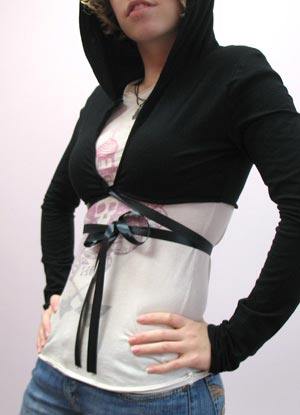
Your shrug is done! I can rock out my tee while staying warm and looking swank. A bit of ribbon and a simple long sleeve tee transforms into a new and stylish look for fall!
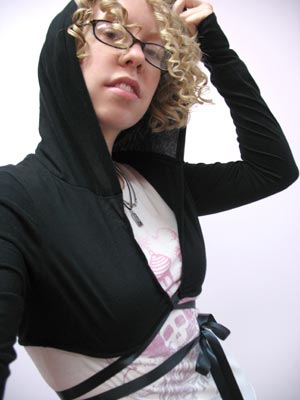
Long sleeves keep your arms toasty, and you even have a hood for those icky rainy days when you don’t want to mess up your hair.
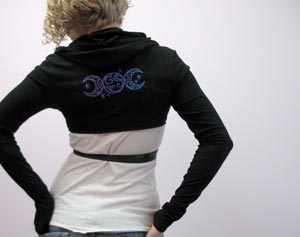
From the back, rock out the triple moon design and feel like a goddess. A upcycled shrug is fast and easy to make, and is super simple to add a little embroidery embellishment.
This is a great way to dress up tees, and to save some of those old long sleeve tees that just didn’t fit very well anymore but you loved too much to throw away. A few snips and seams and they’re totally transformed. Enjoy your new look for fall!


