Given that it’s currently right before Christmas as I write this, you might be feeling inclined to take a break from crafting. Holiday gifts and embroidered goodies have been consuming your life. But wait! This is something different. Think of it more as an early start to new year's beginnings. Taking something old, and making it new again! And this one can be all yours. I’m talking about this super simple upcycled sweater skirt...
Supplies
Yup, this one is easy peasy, especially if you have a sweater that fits. But I’m getting ahead of myself. To make your sweater skirt, you’ll need:
- A sweater (your size or larger, either will work)
- An awesome embroidery design, something maybe that can be repeated as a border (I used Clockwork Romance)
- Scissors and pins
- Elastic
- Safety pin
- Cutaway stabilizer
- Temporary spray adhesive
If you have a really thick or fuzzy knit, you may also want light water soluble stabilizer for topping to keep the stitches from sinking into the fabric, like we used in this tutorial.
Designs Used
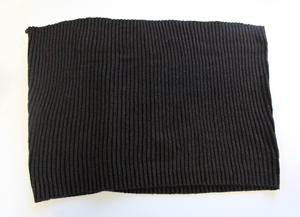
Start by cutting off the bottom half of your sweater, just below the arms. You might recognize this baby from our sweater spats tutorial. Yup, waste not! It already didn’t have sleeves, so I figured its life as a regular sweater was over.
Now, in this rough state, slip your “skirt” on. If it basically fits, lucky you! You get to skip this next step.
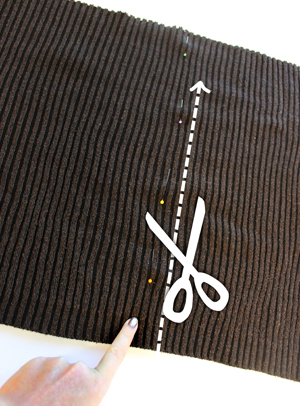
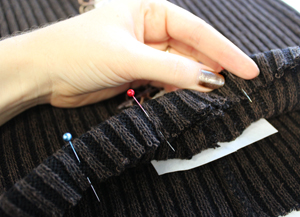
For anyone else who might have found a sweater lots bigger than your hips, you might have some trimming to do. With your skirt “on” pin the excess down one side. Carefully take it off, keeping the pins in place.
Once it’s off and flat again, trim the skirt down about an inch or so away from the pins. This sweater turned out to be so big I practically could have made a second skirt...
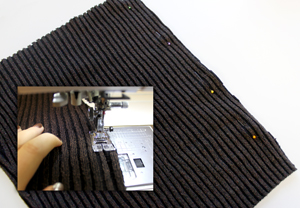
Never fear, this part is easy too. Once you have it trimmed, turn it inside out, with the right sides together, and pin it back together again.
Sew a seam down the side, about 1/2 inch away to make sure you catch all the stretchy sweater edges. Turn it right side out and you’re ready to move on.
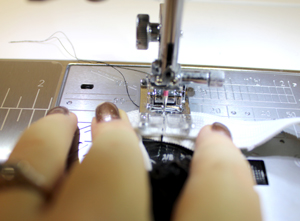
OK, all you lucky people who already had a skirt that fit, you can join us again. Now, embroidering on knit requires a few tricks. First, on a stretchy skirt like this, I would recommend adding embroidery to an area that’s NOT going to stretch as much as the rest of your skirt, i.e. the sides.
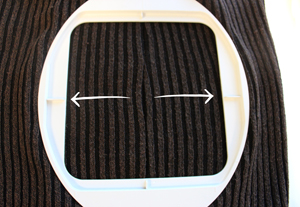
Next, in order to keep the fabric from looking distorted while wearing it, you’ll want to stretch it just a tiny bit when you hoop it. We’re already minimizing the stretch by embroidering on the sides, but it will still be a bit wider when you’re wearing it. Tug it gently but evenly, like shown, and hoop it up with cutaway stabilizer. If you’re using a thick or fuzzy knit, now is the time to add your light stabilizer topping as well.
Embroider away!
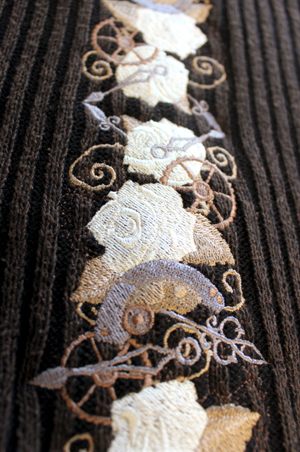
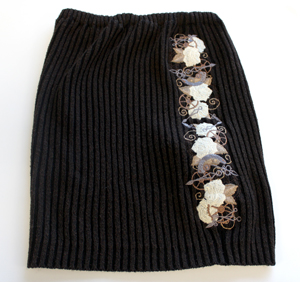
I chose our beautiful Clockwork Romance design and toned down the original hues, then repeated it down the skirt to make a kind of border. You don’t have to do it this way, but no matter what you choose, keep most of your embroidery stitches towards the side of the skirt. The more your stitches get towards the middle, the more you’ll notice distortion when you stretch and walk in it.
Once your embroidery is done and your stabilizer trimmed, we just need to add a quick band of elastic. Fold over your top raw edge inside the skirt. Make sure the fold allows enough room for your elastic to fit inside. Pin this fold all the way around the top of the skirt.
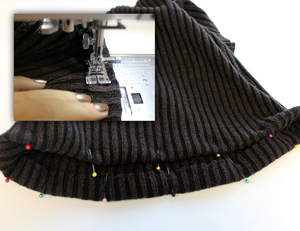
Once it’s pinned and ready, sew a seam all the way around your skirt. Make sure you keep your seam close enough to the raw edge to allow your elastic to fit.
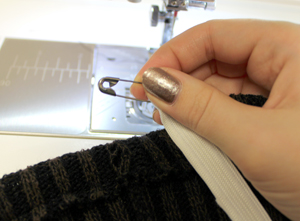
Once the fold is stitched, loop a safety pin through one side of your elastic. If you didn’t leave a hole in your skirt seam, cut a small one and feed the elastic through the top loop of the skirt.
Once you’ve found your way all the way around and back out again, cross the two edges of your elastic. Remember to cut the elastic so it’s just a little bit smaller than your waist, so it keeps the skirt nice and snug.
Place the overlapping elastic ends under your machine and sew a seam to secure them together. Then stretch your elastic out again and it will all go back inside your skirt top.
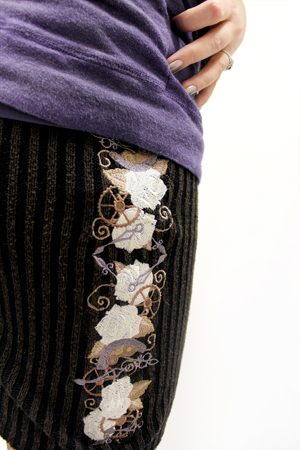
And in no time at all, done! A few snips and some embroidery and we’re there. It’s even easier if you already have a sweater that’s your size, but even if you don’t, tailoring it to fit is only a quick extra step.
Lovely embroidery down one seam of your skirt adds a classy touch and lets the embroidery sit on the knit without getting too stretched out.

Rock your new sweater skirt into the new year, and feel proud that you made something for yourself out of something you probably weren’t using anyway! It’s a fantastic spirit to welcome the new year, and a fun and easy project that has nothing to do with Christmas fuss and everything to do with effortless style and new beginnings.


