Designs Used

This week, in honor of our new mini designs, we’re doing a special two-for-the-price-of-one mini projects! These two quick projects show you a few of the many uses you can put your new bite-size embroidery to...
It also seemed the time to honor another long-held tradition of the holidays ... terrible or boring gifts, usually from your great-aunt Bertha that you get every year and never use. Things like Christmas sweaters, ties for dad, knickknacks and other random doodads. These things pop up over Christmas so many times you wonder if they’re just being recycled back into the system, not unlike fruitcake.
Well I have another idea. Instead of recycling them, and throwing them back into the mix for someone else to be unenthusiastic about, how about upcycling them into new handmade Christmas goodies?
The gift-in-question for this upcycling session is the classic fallback gift for dear old Dad ... a tie. Some ties are swank, others can become swank with the help of certain tutorials, but some are just beyond saving. If you’ve got a few crazy-patterned ties lying around that no one will ever wear, you might as well do something with them.
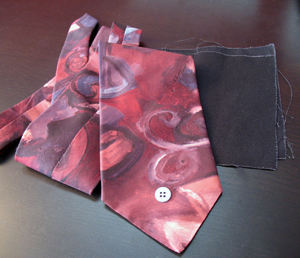
So first, grab Dad’s old tie, or ties. If you’re really, really lucky and find two ties of exactly the same size, grab them both. If not, you’ll need some fabric for lining. You’ll also need a button or snap closure, and your favorite mini design.
We’re going to upcycle this crazy-colored tie into a spiffy-looking and useful gift card holder. It also works really well as a swank business card holder. To make sure your tie will work for this project, you’ll want to grab the card in question to make sure the tie is wide enough to accommodate it. The tie should be about 1/2 inch wider than the card for about 8 inches from the point (I realize ties taper...). This pretty much means emo skinny ties are out.
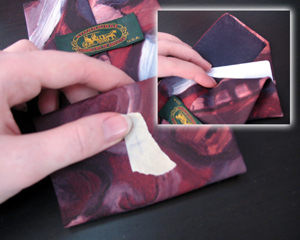
The best place for embroidery on this little holder is the back. To find your perfect placement, fold your card up inside the tie. Think of it like an envelope, with the tip of the tie the closing flap. Once you’ve wrapped it up, turn it over to the back and mark your embroidery spot with a bit of tape. Trim off some of the excess tie once you know how much you need, but leave at least a few spare inches.
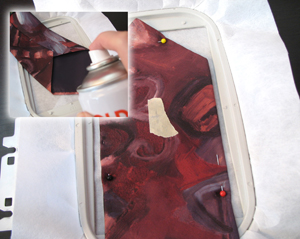
Now... how do we hoop a tie? Well, if you remember from the last tie project, you don’t! Just hoop up a piece of stabilizer on its own, then spray the back of the tie with fixative, and press it firmly in the hoop. For extra security, you can also pin the edges to the stabilizer, just make sure that none of the pins will get in the way of the embroidery. Also, make sure you orient the tie the right way in the hoop. You want the top of your design to be oriented to the tip of the tie.
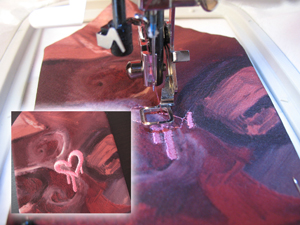
I’ve sewn on ties a few times now and they’ve always worked fine, but I discovered while experimenting with this project that some cheap printed ties, often with a complicated pattern, can sometimes look at little funny after embroidering.
With a cheap tie, when the embroidery machine sinks the thread into the fabric, the grain of the fabric will very slightly split. This happens all the time, but you never notice it, but with cheap silk it can create a small run that shows up as small white lines around your design. You may want to test a little bit of your design on the other end of the tie, just to see how it reacts.
On to the lining... if you’re fantastically lucky and have two ties the same size, you can just pin the other one, wrong sides touching, to your embroidered tie, and you have an instant lining.
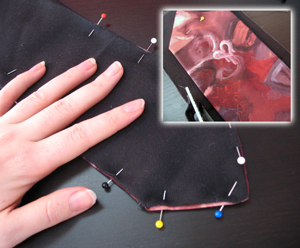
If you got your tie at a thrift store bin like I did, finding two that match is not so easy, so we’re going to make our own lining. Lay your tie on top of your lining fabric, and pin it in place. Then cut about 1/2” inch around it, snipping in at any turns or corners. Now take your lining and fold the raw edges under, and pin it on top of the inside of your tie. You can also go over it with an iron to keep the tucked edges flat.
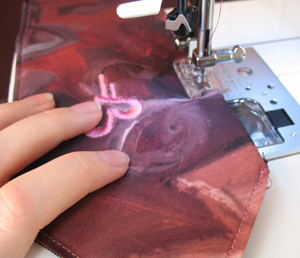
Sew a seam 1/4” inch around the tie, securing your fabric in place. For simplicity sake, I’d match your bobbin to your thread so you don’t need to worry about what side you’re sewing on. You don’t have to sew the trimmed end of the tie (the non pointed end) because we’re going to fold that under to make a clean edge for the holder.
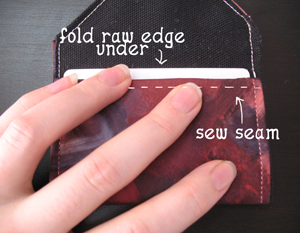
To finalize the size of the holder, take your card and fold it in the tie. Fold the non pointed end up to be the pocket for the card, snip it about 1/2” inch longer than it needs to be, and then fold the raw edge under.
Pin it in place and sew a seam across.
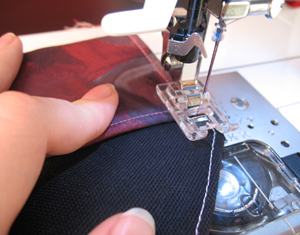
Fold the card up one more time to measure how far up the pocket should go, and pin them in place. Be sure to check the back of your holder, to make sure your embroidery design is still centered on the back.
Sew a seam down either side of the pocket, following the same seam line you made before. If you want to keep the stitches consistent all the way around the holder, keep sewing past the pocket, around the point, and down the other side of the pocket, so that everything has a double seam.
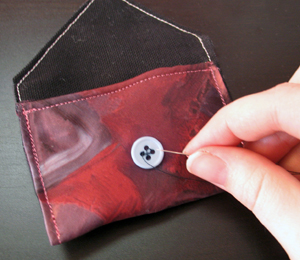
To finish your card holder, sew a closure of some sort. I sewed on a button. You can also use velcro, or snap closures, or even ribbon. It’s up to you.
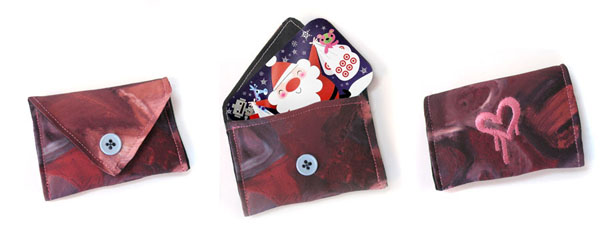
Your finished card holder! A cute colorful way to personalize the giving of a gift card. Choose a mini that fits their style, and colors they like. Or take one of dad’s most hated old ties and use it as a way to gift him a much better gift card... to buy better ties! Or electronics. Guy seem to like electronic things too.
If it’s not the holiday season, use it as a super crafty way to hold your business cards, and prove to your customers just what a crafty business entrepreneur you are. Want more ways to use your new minis? Have more unused Christmas gifts sitting in your closet? Then check out our other minis project here!


