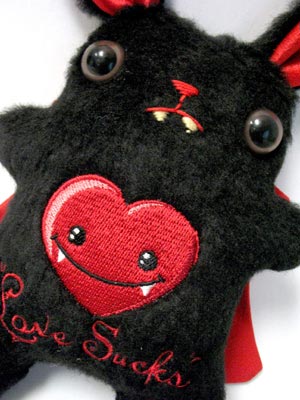
Craft Bunny will probably deny this vehemently, but beneath his violent, fuzzy exterior, I’m pretty sure he’s a Twilight fan. (Yes, that heart does say bite me. Isn’t he cute?) Or maybe all the baring and gnashing of teeth really isn’t an act, and actually he really hates lovey dovey stuff.
Luckily for me, I’ve got a project this week to suit either side. That’s right, for both valentine scrooges and vampire lovers alike, I’ve got the perfect gift! Follow along with me and we’ll make a totally awesome... wait for it...
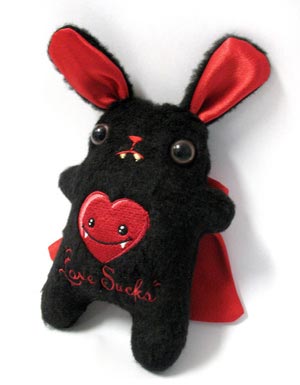
Anti-valentine vampire bunny! Isn’t it amazing how often I manage to incorporate fanged bunnies into my work? It’s a gift.
Supplies
So to make your totally awesome bunny plushie, you’ll need:
- fake fur or other fabric for the bunny
- satin for the cape and inner ears
- a toothy anti-Valentine’s Day embroidery design
- embroidery floss and needle
- cutaway stabilizer
- water-soluble stabilizer (if you’re using furry fabric for your bunny)
- toy eyes and back fasteners
- awesome printable templates
- polyfill stuffing
- scissors and pins
Designs Used
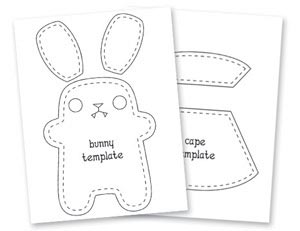
To make a bunny just like mine, I’ve included printable templates you can follow (see pattern PDF). The body shape is simple enough, and you can make it pretty much any animal you like just by changing up the ears. I’ve also included a cape template, because all vampires need capes. It’s a rule. That I just made up.

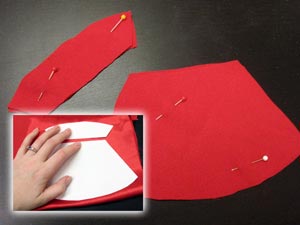
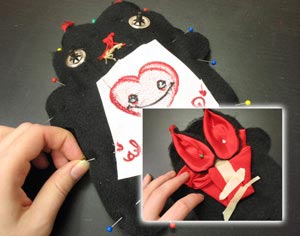
So let’s start with the embroidery. First fold your fabric in half, and place your template on top to make sure you have enough fabric for both the back and the front. Make sure there’s some fur left for the ears too.
Using the template as a guideline, mark where you want your embroidery to be. There’s a nice big blank spot on his tummy that’s a good spot. Mark that with some tape.
If you’re embroidering on furry fabric, it’s best to use some water-soluble stabilizer on top in order to keep the fuzz from messing up your stitches.
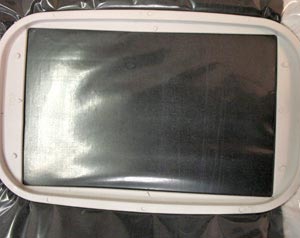
Hoop up your fur with cutaway stabilizer underneath, and water-soluble stabilizer on top if needed. I removed my tape mark from the fur but put it back on the top of the stabilizer after I had it hooped up. I, of course, forgot to take a picture of that particular part...
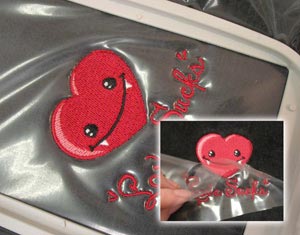
Set your machine to stitching, and in no time at all, you have an adorable and angsty heart to adorn your bunny’s tummy.
Once your design is done stitching, tear away that top layer of stabilizer to reveal your clean stitches and fur. You may need to use a small scissors or tweezers to get all the little pieces off.
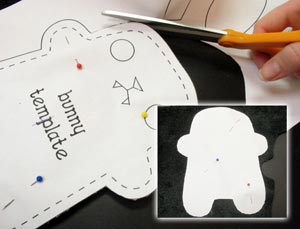
Place your bunny template back on top of your fabric, centering the stitched design inside his tummy, and pin the template in place.
Grab your scissors and cut out one side of your bunny. When you’re done, flip the template over and pin it on to another piece of fur, and repeat.

When you’re done you should have two bunny pieces, the front with embroidery and the back without.
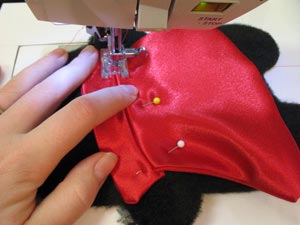
We don’t want to forget our little bloodsucker’s cape! Use your template to cut out your cape pieces out of some nice shiny satin (little-known fact: vampires love shiny things), and pin them right sides together, ready for sewing.
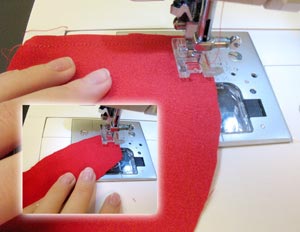
Sew a seam around three sides of each piece, leaving the top of the cape and the bottom of the collar open for turning. Turn them right side out again. It’s probably a good idea right now to press them flat with an iron, so his cape is nice and crisp.
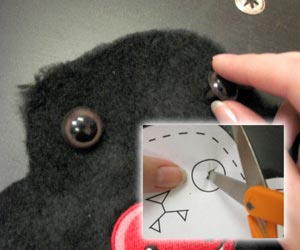
Back to our bunny! He needs some eyeballs! Vampires can’t hypnotize people without eyeballs.
As I said before, you can make your bunny any way you like, and place his eyeballs wherever, but if you want to follow the template, place it back on top of the front bunny piece, and use a scissors to poke a hole through the middle.
Take your little eyeball pieces and fit them into the holes.
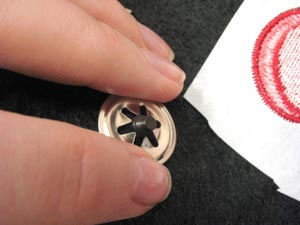
Slip the backing on your bunny’s eyes. The teeth of the back should be pointing up, away from the bunny. Once you get these things on, they don’t come off very easily, so be sure you like ‘em. These kinds of eyes are much safer for little ones than sewing on button eyes, but those are an option too.
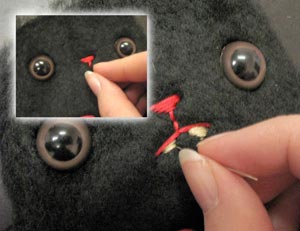
On to his little face! Grab your embroidery floss and needle and set to work. I only had tan, not white floss, so bunny looks a bit like he might benefit from a trip to the dentist.
For those of you who usually only dwell in the machine embroidery world, you can check this tutorial on basic hand embroidery stitches. This little bunny face is very simple to stitch.

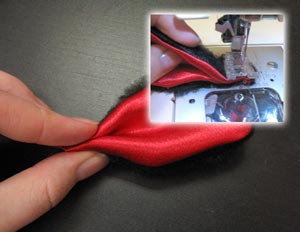
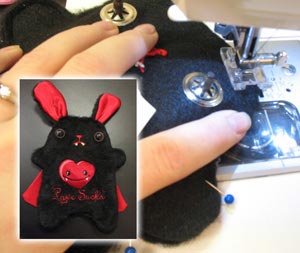
It’s time to give bunny his cape. Grab your back bunny piece, and pin your cape pieces in place. If you want, finish the raw edges off first with a seam, but overall they’ll be hidden under the cape. Place collar piece up by his “neck” (I know he doesn’t have one, just guess) and then pin the cape piece on top, wrong side up, with the edges lined up, like shown.
Sew a seam across the collar and cape. When you’re done, fold the cape back down.
With the cape folded back down like it should be, sew another seam across the top to hide the raw edges and keep the cape in place. Your cape is done! Place this back piece aside for now.
Only one more step before we sew the little fang together... his ears!
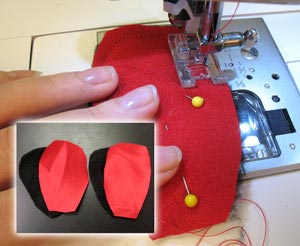
Use the template to cut out two pieces for each ear, one out of furry fabric and one satin for the inside of his ear. Pin the pieces right sides together and sew a seam around the edge, leaving the bottom open to turn them.
Turn your ears right side out again (you don’t get asked to do that every day).
To give the ears some fun dimension, pinch the two sides together at the bottom of the ear, and sew a seam across them so they’re folded a bit like a real bunny ear.
Now it’s finally time to sew everything together. Take your back bunny piece, and fold in the edges of his cape, taping it in place so it doesn’t get in the way of the seam.
Take his two little ears and place them pointing in, with the satiny sides facing up, like shown. Make sure the ends of them go over the edge a bit so the seam catches them. Pin them in place.
Finally, place your front bunny piece on top, right side in, and pin the two layers together.
Sew a seam around your bunny, leaving a small gap between his feet to turn him out again.
Carefully tug your bunny right side out and release his ears and cape. The little bunny amused me so much I actually giggled when I saw him right side out. He looks like he’s trying so hard to hypnotize me, despite the fact that he’s still as flat as a pancake.
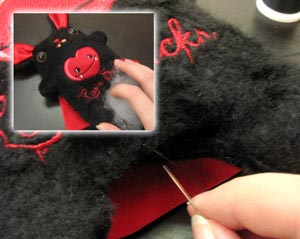
Plump up your bunny! Grab your stuffing, and begin to fill your plushie with little clumps of stuffing, being sure to fill the little corners like his hands and feet and then his middle. Once he’s nice and full, use a needle and matching thread to close the gap.
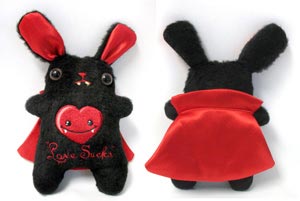
Look at that little fearsome fanged vampire! Both reveling in the awesomeness of the fanged persuasion, and making fun of everyone’s favorite hallmark holiday, your new little vampire bunny is perfect for your sweetheart or your disgruntled single pal.
Once you know how easily plushies are made, it’s a bit dangerous actually. Those beady little eyes and awesome embroidered tummy just beckon me to make him a pal.
His little cape and fangs will delight vampire fans of all sorts (Edward vs. Jacob people can fight amongst themselves, I’m not touching that...) and his snarky tummy will bring some laughter to those who don’t particularly fancy Cupid’s day.
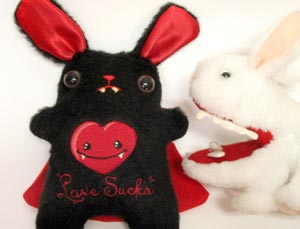
Craft Bunny was certainly thrilled with his new friend. He won’t tell me if it’s because he loves vampires or hates Valentine’s Day, but hey, as long as he’s happy, right?
Enjoy your new fanged friend and have fun with your new plushie-making skills!


