Supplies
All you need to make your new wine holder is your favorite fun embroidery design, and some nice thick felt. You’ll need the felt to be at least 16 inches tall when folded, and a little wider than 7 inches, so we’re not talking those little craft felt squares.
Designs Used

Wine.
It’s everything from a classy way to relax after a long week, to a great gift for your favorite hostess. That, however, is sort of the problem. Wine is such a common gift for someone, that unless you dish out serious cash for a classy bottle of it, it seems a bit... expected. If you’re like me and you don’t have a lot of money to dish on wine, but want to make a statement at your next wine tasting party (even if it’s only a half an hour away and you haven’t planned for it... eek!) I’ve got a solution for you. You can create a quick, classy and contemporary wine holder that you can gift along with your wine and leave with your hostess impressed with your classy craftiness.
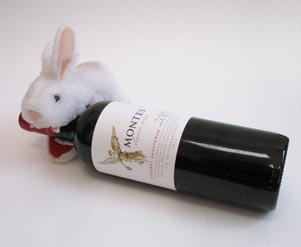
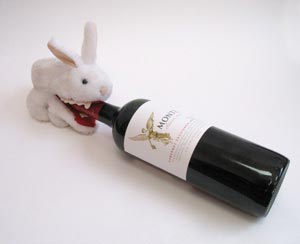
You’ll also, of course, need a bottle of wine. Craft Bunny declared himself a connoisseur and went and got me a bottle of wine. (What did he use for ID, I wonder? Fangs?)
Since he doesn’t appear to know how to drink or open it, I’m not sure of his taste, but hey, wine is wine, right? Having your bottle around will help you with testing your measurements.
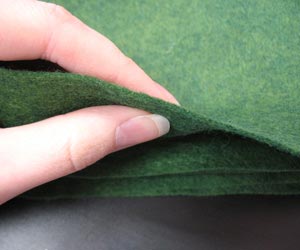
For the felt, the thicker the better, since we’re not doing much reinforcement of the fabric. Felt is great because it’s sturdy, simple, and doesn’t fray, but be warned, if you start getting super thick felt, it does start to get a bit expensive, and that kind defeats the point of saving money.
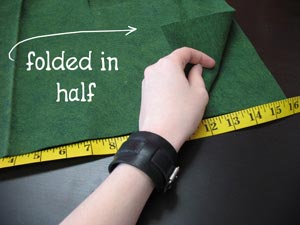
Take your felt and fold it in half, and cut it so the folded piece is 16 inches tall.
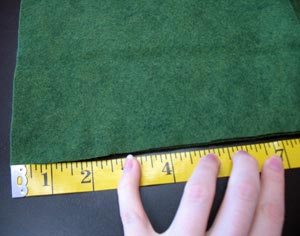
Now measure out the width, about 7 inches wide. Just mark this measurement for now, because it’s much easier to embroider your design when there’s more fabric to hoop.
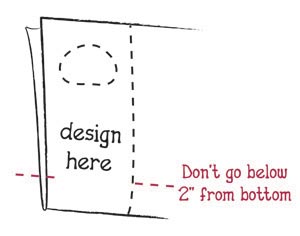
Placement of your design is important, but you won’t know where to place it unless you know a few things about how we’re going to make this holder.
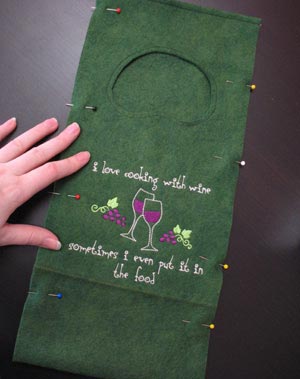
From the folded side of your fabric, mark with pins about two inches up. This part of your holder will remain open, and will fold flat when the holder is being used, so we don’t want our design there. Near the top, where it’s open, there will be an open space for our handle, so place your design somewhere between these two spaces.

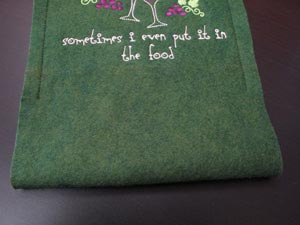
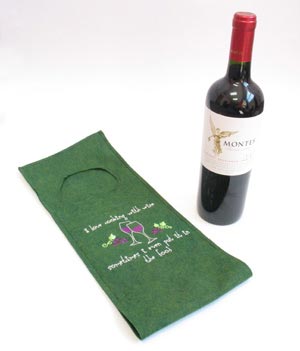
Hoop up your felt with some cutaway stabilizer, and stitch it out. I picked our fun wine design, since really, how perfect is it for this?
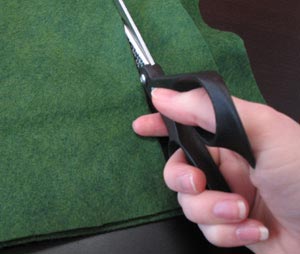
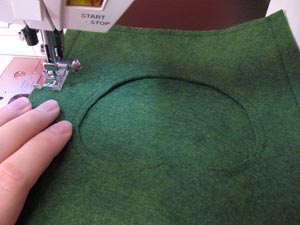
Once your design has stitched out, unhoop it, and cut off the excess stabilizer. Now it’s time to trim it. Snip up the 7 inch mark you made before, so you now have a folded piece of fabric that’s 16 inches high and 7 inches wide.
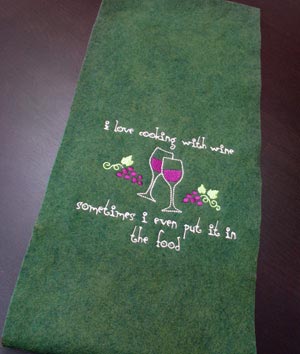
This is what your holder should look like now. A long strip of felt with some embroidery on one side. Really, it’s not much more complicated than that... just a few quick steps left.
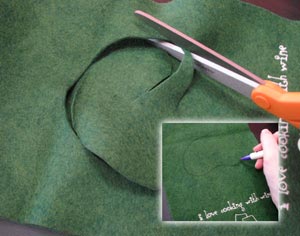
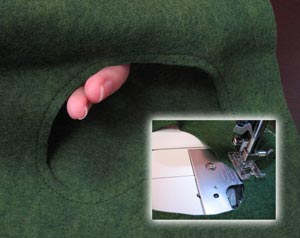
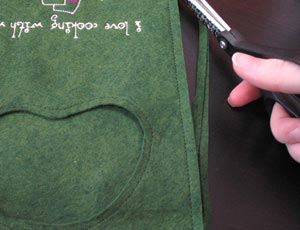
Now it’s time to cut our handle out. Cut out a fun shape that will allow you to grip it as a handle. If you like, you can also make it large enough for a bottle of wine to slip through. There are two ways of making this holder, one with the opening at the top, the other with the handle as the opening. It depends on how big you want your handle to be. I’ll explain as we go along...
If you want your wine holder to have an open top, fold the top edges inwards about 1/4 inch and sew a seam so they have a finished edge. I’d recommend matching your bobbin to your top thread so everything looks nice inside and out. If you’re just going to use the handle hole as the opening for the wine, you can skip this step, as you would simply sew the top shut.
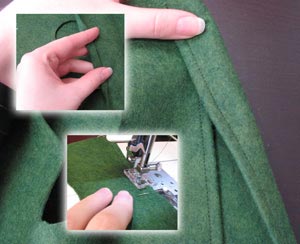
Even though we’re mostly leaving the raw edge of the felt, it’s nice to give it a bit of a “finish” and a little extra structure, so I went around my pocket with a 1/4” seam, using the side of the foot to help guide me around the tricky shape.
This will help make the handle look nicer and give it a bit more strength.
Now it’s time to stitch it together. Pin the two sides together. If the sides don’t line up perfectly, (if you were a bit lazy when you were cutting it, or using scraps like me) don’t worry, because we’re going to trim the sides after we’ve sewn it so we have a perfectly even edge.
If you have an open top, your holder will look like mine. If you’re keeping yours closed, then your top will be unfinished and you’ll need to stitch that part shut too.
Now here’s an important step. Mark your last two pins near the folded edge about two inches up. This is an important mark for you, because you’re going to leave the last two inches open, so you don’t want to stitch past those pins.
Stitch a 1/2” inch seam down both sides of your holder, (leaving the two inch gap at the bottom on either side!) and across the top too if you left it unfinished and want to stitch it shut.
This is the gap you should leave at the bottom. Be sure to back stitch at the end so it’s plenty sturdy. We leave this gap open so the bottle can sit inside comfortably, but it can lay flat and travel easily when it’s not in use.
Now to make everything nice and flush and even, trim away about 1/4” inch down both sides, so all your seams are equal, and everything has a clean cut edge.
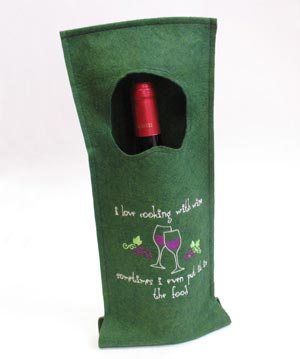
You holder is done! Wasn’t that simple? Slip your wine through the top, or through the hole for the handle, and you’ve got yourself a simple, slick carrying case.
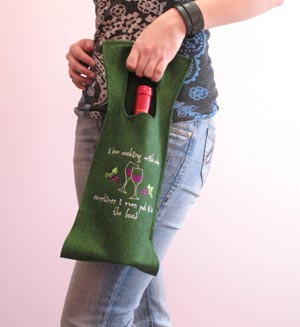
Truck your wine around in simple style, with a customized holder that took you no time at all!
Even better, when your wine holder’s not in use, it folds down perfectly flat, making it incredibly easy to take with you anywhere you need to transport wine. It’s fast to make, simple to use, easy to transport, and looks stylin’. What more can you ask for?
Well, perhaps a full bottle of wine to go with it...


